
by John | Jul 12, 2018 | Audio PROfiles, Instructor Training, KEEPING IT FUN, Leading Group Rides, Master Instructor Blog, Training With Power
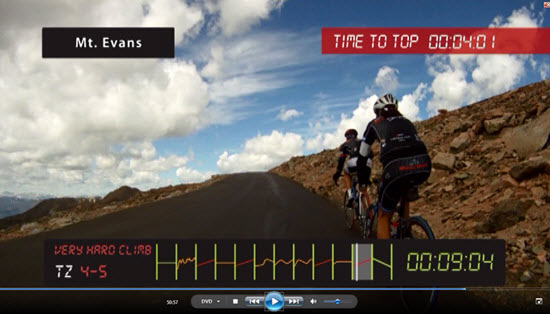
Screenshot of the Big Finish from Tour Of The West – heading into & above the clouds .
With the weather starting to break here in the frozen north, today [Sunday] is my last scheduled Performance class for the season. To celebrate our (hopeful) return to riding outdoors, I thought it would be fun to ride along with this new Indoor Cycling DVD from Epic Planet – Tour of The West.
This 60/45 minute video is a compilation of five minute long segments, from past titles, that includes various terrains. This should make for an excellent interval class, with lots of climbing, intermixed with plenty of fast flats.
I'll be coaching my riders to be working, as usual; Below/@/Above the PTP we'll discover during the first climb – segment #3 Mt Lemmon Climb. Alternately, you could easily coach this as an Interval set Below/@/Above Threshold Heart Rate, if you don't have power.
You might need some remote control for this
My preference is to ride along with the class, facing the screens, whenever I'm teaching to video. That way a can comment on what they're seeing + easily view the countdown timer. You'll need to have control of either your music… or the video, to pull this off professionally. With the of the video segments being exactly 5 minutes long, you'll want to change songs with the video. My playlist below is comprised of ~5:00 min songs (not exact), so you'll want to skip ahead a few times to keep the music and video in sync. Now if you've got a really long cord for your iPhone you're set. If not, my solution is to use an inexpensive Bluetooth receiver. You can learn more about using these simple devices here & here.
Tour of The West Class Profile
[wlm_private ‘PRO-Platinum|PRO-Monthly|PRO-Gratis|PRO-Seasonal|Platinum-trial|Monthly-trial|PRO-Military|30-Days-of-PRO|90 Day PRO|Stages-Instructor|Schwinn-Instructor|Instructor-Bonus|28 Day Challenge']
Featuring Epic Planet Video [ Title ] – the segments shown in Red are skipped if you select the 45 minute play option. My preference for a 45 min class, is to use the 60 min version and forward past #s 8 – 9 & 10. The first four segments conform better to my class format. You can obviously skip any three segments you choose, or if you're feeling devilish, repeat #5 [Beartooth Pass] to create a 10 minute threshold effort 🙂 Just make sure you have the video remote handy.
#1 [Wine Country] – Warm up > Let's get this class started! I take everyone through very purposeful series of intensity increases. The track Eireann is ~ 95RPM. Your objective to begin to feel warm and your effort should have you noticing that early change in breathing that signifies crossing over VT1 (Aerobic Threshold)
#2 [Saguaro East] – Openers > Repeated hard efforts, with the last one reaching Threshold. We slow the pedals to ~ 64 RPM to match the track Daybreak and I have everyone add load until they sense they need to stand > which we do. There's a nice build of intensity in the music that really hits at 1:00 where we accelerate to as fast as possible and hold for 30 seconds. I have my participants “walk”, with very slow cadence, during the recoveries. Follow the changes that you hear for around 30 secs on/off. Pay attention to the time on the countdown timer. I'll have everyone really push for the final minute. This should have everyone breathless (or close) so we get that first, painful trip to threshold out of the way.
#3 [Mt. Lemmon] – Four Minute “Best Effort” > I love these and my classes tell me they enjoy them as well = I include them on every ride I do, regardless if I have power meters or not. Use the first minute as an easy spin and to describe the effort to follow. If your power bikes have a stage timer, I encourage you to use it to time and record the maximum amount to work everyone can do during the last four minutes of the climb.
#4 [Monument Valley] – Establish “Base” Watts/Effort > I'll tell my class: On a group ride, you often don't get the chance to fully recover after a long climb. You have to keep up so you're not dropped, so you take whatever recovery you can grab. This often means you need to recover, while you continue to work, abet at a lower effort level.
Now that we're warm and aerobic, we'll use this fast flat (Call me the Breeze) @ 100RPM to establish the wattage or RPE, that has us early into Zone 3 – just above the transition in your breathing. I like to describe this as “above chatty”… and it is. VT1 is where your class begins to shut up and ride, because their need for O2 has them losing interest in talking with their neighbor.
NOTE: from here on we're limiting recoveries to no lower than “Base” Watts/Effort (HRs above Zone 2 / VT1) Your riders can recover there > it just takes awhile longer. This is a great opportunity to train out that need to; WORK – FULLY RECOVER. You never get that chance in the real world, why would you include it in your classes?
#5 [Beartooth Pass] – Five Minute “Performance Climb” > Between your “Base” and “Best Effort” is an intensity where you can perform for a long period of time. I make this time “self directed” by simply telling them; you've got a 5 minute climb somewhere between your base and best effort. You decide if you want to lead at the front… or struggle along at the rear.
Next you enter a series of rollers and short, steep climbs
#6 [San Diego] – Watch and ride these rollers. This segment includes a steep, 45 sec all out effort to keep up.
#7 [Mt. Baldy] – More rollers that have you powering your way over a 1:29 min and 1:50 climb
#8 [San Diego] – Hits with a sharp climb right at the start. Plenty of fast downhill action to stretch everyones legs.
#9 [Aspen] – 5 minute climb > back to a performance climb here. The rider's in this video don't appear to be working very hard = we just need to sustain the effort to keep with them. You're saving energy so you can beat everyone to the top of Mt Evans.
#10 [Sedona] – Begins with a gentle climb that flattens out to a nice fast flat were everyone should quickly find and maintain their Base Watts.
#11 [Mt. Evans] – BIG FINISH! > here's where everyone can demonstrate their physical endurance. THE RACE ISN'T WON AT THE BEGINNING… YOU NEED TO CRUSH THEM AT THE TOP! Here I'm asking for an effort above their 4 min “Best Effort”, for the complete 5 minutes. I don't care how they do it, I just want an average Watts / above Threshold HR for the total time. Get after it!
#12 [Wine Country] – Cool down and recovery
Here's the full playlist
Let me know how this worked for you. [/wlm_private]
by Joey Stabile | Jun 28, 2018 | Best Practices, Class Work-Sets, Creativity Indoor Classes, Instructor Training, KEEPING IT FUN, Master Instructor Blog, Training With Power
Welcome to the The Weekly Ride by Cycling Fusion
No more hunting for new music or counting out cues to develop your ride profile. Here is your ready to ride profile for a fully choreographed ride, that can be displayed from your phone, or printed out onto cue cards for your class. This ride is timed out, down to the second, to make your life as easy as possible!
(more…)
by Joey Stabile | Jun 21, 2018 | Best Practices, Class Work-Sets, Creativity Indoor Classes, Instructor Training, KEEPING IT FUN, Master Instructor Blog, Training With Power
Welcome to the The Weekly Ride by Cycling Fusion
No more hunting for new music or counting out cues to develop your ride profile. Here is your ready to ride profile for a fully choreographed ride, that can be displayed from your phone, or printed out onto cue cards for your class. This ride is timed out, down to the second, to make your life as easy as possible!
(more…)

by John | Jun 9, 2018 | Correcting Form, Instructor Training, Master Instructor Blog
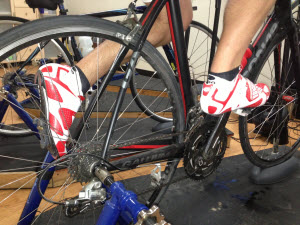
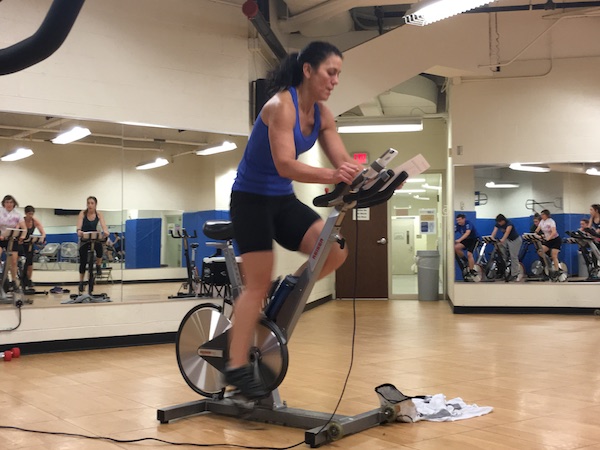
During a class I attending yesterday, the Instructor had everyone doing one-legged pedaling drills… one legged as in pedaling with one foot un-clipped and held out to the side or rested on the frame.
That's wrong/contraindicated… isn't it?
My initial reaction was to do what I normally do in this situation, I would just ignore his cue. Unfortunately I was setup in the dead center of the room and I quickly saw that I would be the one rider (of about thirty) NOT riding with just one leg. So I popped my left foot out and joined everyone else.
OK, so what's wrong with this? Was my first thought, as I began focusing on smoothing out my pedal stroke. This feels like what I remember from riding my old Schwinn Paramount road bike, on a trainer, back in the 90's
Looking around the room, I didn't see anyone riding with any difficulty or appear to be off balance or unsafe. All I saw were cyclists doing exactly what they're supposed to be doing during one-legged drills; trying to make up for the missing leg's influence at the “dead spots” in the pedal rotation – which is the purpose of the exercise. This wasn't a class of cyclists, but rather the typical diverse group of club athletes we all see each week.
So why is one-legged cycling viewed as contraindicated in our classes?
I did a few Google searches for “one-legged indoor cycling class” and found a number of articles, from knowledgeable people, recommending against removing (un-clipping) one foot while pedaling here, here, and here. That last link is from pdf from Spinning called Keep if Safe and includes this:
PEDAl STROKE
Do not pedal backwards or with one foot out of the toe cage or cleat. Pedaling with one leg is an advanced drill that elite cyclists practice on trainers–not fixed-gear bikes like the Spinner bike. On a Spinner bike, these drills have absolutely no benefit, since muscles work the same and burn equal numbers of calories pedaling forward and backward.
While I completely agree that pedaling backwards is dumb/goofy, pedaling with one leg is a very commonly recommended technique, for cyclists of any level.
Another Google search returns dozens of articles and videos advocating for this exercise. None of them issue any caution that this is an exercise reserved for a professional, on the contrary. It's the new cyclist who needs to learn to pedal properly and efficiently.
Here's none other than Joe Friel describing his recommended pedaling drills:
Let’s get rid of the energy wasters in this Base period. Drills will help you to pedal better. Following are the common ones I use with the athletes I coach. They may be mixed together in a single workout or each may be done by itself as a workout.
* Isolated leg training (ILT) drill. This is the quintessential pedaling drill, the one you should do a lot in the early weeks of Base. It’s done on an indoor trainer. Unclip one foot and rest it on a chair next to the bike so you are left to pedal with only one leg. With the bike in a low (easy) gear turn the crank at a comfortable cadence. The first thing you’ll notice is that getting through the top of the stroke, the 12-o’clock position, is difficult. Focus on smoothing this top transition. At first you may only last a few seconds before the hip flexors fatigue. When that happens switch to the other leg. When it fatigues clip both feet in and pedal for a few minutes applying what you have learned in the single-leg pedaling. Repeat the drill several times throughout the workout.
While I'm the first to raise my hand and say; “just because Joe Friel says something, it doesn't automatically mean that it's applicable to our classes“, I'm using him as an example of the clear conflict between what's recommended for indoor cycling vs. outdoor cyclists. Mr. Friel says this is the quintessential peddling drill (representing the most perfect or typical example of a quality) and yet others are saying this will hurt your participants – or is completely useless.
So where's the concern coming from?
Clearly there's a fundamental difference between a bicycle on a trainer and an Indoor Cycle. The bicycle has a freewheel that prevents the monument of the drive-train from pedaling you = you have control to easily stop the rotation. Indoor Cycles (with the exception of the CycleOPs) are fixed gear. The perceived (rightly) danger comes from the heavy, weighted flywheel spinning out of control and potentially carrying the loose pedal into the free leg of the rider.
So why didn't that appear to be a problem yesterday?
We were riding indoor cycles with magnetic resistance. I perceive this has two design differences that mitigate the safety issues that exist, as compared to Indoor Cycles that use friction resistance. If you've had the chance to ride (or your club has updated to) the Schwinn AC, Keiser M3 or Freemotion S11 you'll probably recognise the following;
- My perception (and I've ridden everything) is that magnetic cycles have less rotational flywheel inertia than friction. By design, the weighting of the flywheel of friction cycles is around the perimeter, which creates a greater amount of inertia = harder to control or stop. Magnetic cycles have either a smaller flywheel (M3) or in the case of the AC and S11, the outer diameter is aluminum. In all three there's a feeling of less of the flywheel's influence / control of your pedals.
- The amount of resistance created by the magnets increases with RPM = you don't see run-away pedals, even starting with a very low level of resistance.
Is this right for your class?
If you're teaching on a magnetic cycle, you'll have to decide for yourself if you want to add Single/Isolated leg training drills into your class. I wouldn't consider this if you are on friction resistance cycle.
Start by experimenting alone by yourself. Spend some time practicing with one foot detached. How does if feel to you? Could you safely introduce this into your class? Maybe as part of the warmup? How would you cue this?
I'm going to begin on Thursday. My initial thoughts are to offer it, with a modification to stay clipped in of course. I'll find a fun track around 70ish RPM, have everyone dial on a nice flat road feel – just below their base wattage and let everyone experience what it feels like.
I'll let you know the classes reaction 🙂
NOTE: If you're teaching on the FreeMotion S11.9 cycles, the power readings will be disrupted with either foot un-clipped. You'll want to explain to your class that the power is measured off the left crank. Removing the left foot and using just your right, results in near zero wattage displayed. Peddling with just the left foot appears to confuse the computer and I was seeing what looked like double the wattage. Both the Schwinn AC and Keiser M3 will display correctly.
by Joey Stabile | May 24, 2018 | Best Practices, Class Work-Sets, Creativity Indoor Classes, Instructor Training, KEEPING IT FUN, Master Instructor Blog, Training With Power
Welcome to the The Weekly Ride by Cycling Fusion
No more hunting for new music or counting out cues to develop your ride profile. Here is your ready to ride profile for a fully choreographed ride, that can be displayed from your phone, or printed out onto cue cards for your class. This ride is timed out, down to the second, to make your life as easy as possible!
(more…)
by Joey Stabile | May 17, 2018 | Best Practices, Class Work-Sets, Creativity Indoor Classes, Instructor Training, KEEPING IT FUN, Master Instructor Blog, Training With Power
Welcome to the The Weekly Ride by Cycling Fusion
No more hunting for new music or counting out cues to develop your ride profile. Here is your ready to ride profile for a fully choreographed ride, that can be displayed from your phone, or printed out onto cue cards for your class. This ride is timed out, down to the second, to make your life as easy as possible!
(more…)