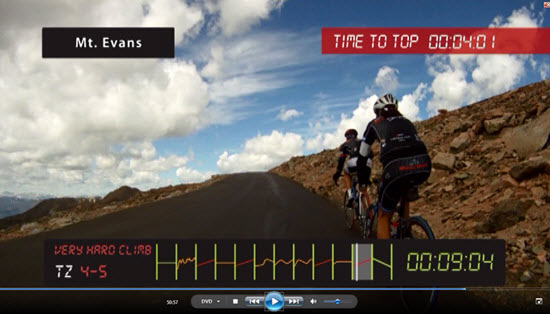
Screenshot of the Big Finish from Tour Of The West – heading into & above the clouds .
With the weather starting to break here in the frozen north, today [Sunday] is my last scheduled Performance class for the season. To celebrate our (hopeful) return to riding outdoors, I thought it would be fun to ride along with this new Indoor Cycling DVD from Epic Planet – Tour of The West.
This 60/45 minute video is a compilation of five minute long segments, from past titles, that includes various terrains. This should make for an excellent interval class, with lots of climbing, intermixed with plenty of fast flats.
I'll be coaching my riders to be working, as usual; Below/@/Above the PTP we'll discover during the first climb – segment #3 Mt Lemmon Climb. Alternately, you could easily coach this as an Interval set Below/@/Above Threshold Heart Rate, if you don't have power.
You might need some remote control for this
My preference is to ride along with the class, facing the screens, whenever I'm teaching to video. That way a can comment on what they're seeing + easily view the countdown timer. You'll need to have control of either your music… or the video, to pull this off professionally. With the of the video segments being exactly 5 minutes long, you'll want to change songs with the video. My playlist below is comprised of ~5:00 min songs (not exact), so you'll want to skip ahead a few times to keep the music and video in sync. Now if you've got a really long cord for your iPhone you're set. If not, my solution is to use an inexpensive Bluetooth receiver. You can learn more about using these simple devices here & here.
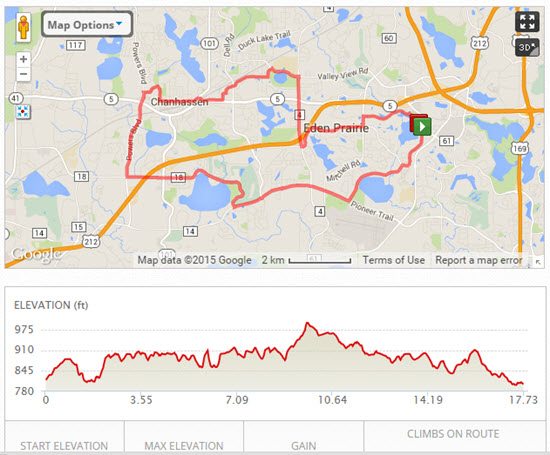
Tour of The West Class Profile
[wlm_private ‘PRO-Platinum|PRO-Monthly|PRO-Gratis|PRO-Seasonal|Platinum-trial|Monthly-trial|PRO-Military|30-Days-of-PRO|90 Day PRO|Stages-Instructor|Schwinn-Instructor|Instructor-Bonus|28 Day Challenge']
Featuring Epic Planet Video [ Title ] – the segments shown in Red are skipped if you select the 45 minute play option. My preference for a 45 min class, is to use the 60 min version and forward past #s 8 – 9 & 10. The first four segments conform better to my class format. You can obviously skip any three segments you choose, or if you're feeling devilish, repeat #5 [Beartooth Pass] to create a 10 minute threshold effort 🙂 Just make sure you have the video remote handy.
#1 [Wine Country] – Warm up > Let's get this class started! I take everyone through very purposeful series of intensity increases. The track Eireann is ~ 95RPM. Your objective to begin to feel warm and your effort should have you noticing that early change in breathing that signifies crossing over VT1 (Aerobic Threshold)
#2 [Saguaro East] – Openers > Repeated hard efforts, with the last one reaching Threshold. We slow the pedals to ~ 64 RPM to match the track Daybreak and I have everyone add load until they sense they need to stand > which we do. There's a nice build of intensity in the music that really hits at 1:00 where we accelerate to as fast as possible and hold for 30 seconds. I have my participants “walk”, with very slow cadence, during the recoveries. Follow the changes that you hear for around 30 secs on/off. Pay attention to the time on the countdown timer. I'll have everyone really push for the final minute. This should have everyone breathless (or close) so we get that first, painful trip to threshold out of the way.
#3 [Mt. Lemmon] – Four Minute “Best Effort” > I love these and my classes tell me they enjoy them as well = I include them on every ride I do, regardless if I have power meters or not. Use the first minute as an easy spin and to describe the effort to follow. If your power bikes have a stage timer, I encourage you to use it to time and record the maximum amount to work everyone can do during the last four minutes of the climb.
#4 [Monument Valley] – Establish “Base” Watts/Effort > I'll tell my class: On a group ride, you often don't get the chance to fully recover after a long climb. You have to keep up so you're not dropped, so you take whatever recovery you can grab. This often means you need to recover, while you continue to work, abet at a lower effort level.
Now that we're warm and aerobic, we'll use this fast flat (Call me the Breeze) @ 100RPM to establish the wattage or RPE, that has us early into Zone 3 – just above the transition in your breathing. I like to describe this as “above chatty”… and it is. VT1 is where your class begins to shut up and ride, because their need for O2 has them losing interest in talking with their neighbor.
NOTE: from here on we're limiting recoveries to no lower than “Base” Watts/Effort (HRs above Zone 2 / VT1) Your riders can recover there > it just takes awhile longer. This is a great opportunity to train out that need to; WORK – FULLY RECOVER. You never get that chance in the real world, why would you include it in your classes?
#5 [Beartooth Pass] – Five Minute “Performance Climb” > Between your “Base” and “Best Effort” is an intensity where you can perform for a long period of time. I make this time “self directed” by simply telling them; you've got a 5 minute climb somewhere between your base and best effort. You decide if you want to lead at the front… or struggle along at the rear.
Next you enter a series of rollers and short, steep climbs
#6 [San Diego] – Watch and ride these rollers. This segment includes a steep, 45 sec all out effort to keep up.
#7 [Mt. Baldy] – More rollers that have you powering your way over a 1:29 min and 1:50 climb
#8 [San Diego] – Hits with a sharp climb right at the start. Plenty of fast downhill action to stretch everyones legs.
#9 [Aspen] – 5 minute climb > back to a performance climb here. The rider's in this video don't appear to be working very hard = we just need to sustain the effort to keep with them. You're saving energy so you can beat everyone to the top of Mt Evans.
#10 [Sedona] – Begins with a gentle climb that flattens out to a nice fast flat were everyone should quickly find and maintain their Base Watts.
#11 [Mt. Evans] – BIG FINISH! > here's where everyone can demonstrate their physical endurance. THE RACE ISN'T WON AT THE BEGINNING… YOU NEED TO CRUSH THEM AT THE TOP! Here I'm asking for an effort above their 4 min “Best Effort”, for the complete 5 minutes. I don't care how they do it, I just want an average Watts / above Threshold HR for the total time. Get after it!
#12 [Wine Country] – Cool down and recovery
Here's the full playlist
Let me know how this worked for you. [/wlm_private]
In advance of recording her new Audio Profile Beat Down, Instructor Krista Leopold and I discussed her need to take a break from teaching. With a demanding tech job, along with being an active soccer mom, Krista explains why she decided to step away from regularly scheduled Spinning® classes in this episode of the Podcast.
This ties in with my moving to Florida and having to give up my classes at Life Time Fitness. So for the first time in 17 years I don't have a scheduled class next week 🙁 Not sure how I'm going to feel, once this sinks in…
For those of you who are still teaching, we've published Krista's profile Beat Down for our ICI/PRO members. It's going to include a special treat – a fully mixed MP3 of the complete class playlist!
This Indoor Cycling training video will help you learn the Elements of Style
Did anyone teach you how to pedal correctly?
I was lucky to have a mentor when I first started riding outdoors. My friend Eddy not only gently coached me on the finer points of cycling style as we rode together, he demonstrated an impeccable pedaling form. He was so smooth and powerful, that I desperately wanted to emulate how Eddy looked on his bicycle. So over hundreds of miles I watched and listened. Now I'll get an occasional comment about how smooth I am on a bike. I owe it all to Eddy!
So how do you learn if you don't have a friend or mentor with the experience and patience needed? Might I suggest this 40 minute video from the folks at Sufferfest: The Elements of Style – Efficiency and Awareness
https://vimeo.com/thesufferfest/elementsofstyle
I have an interview planned with David McQuillen the creator/producer of these excellent quality HD training videos tomorrow. So for show prep, I checked out what was new and downloaded The Elements of Style. NOTE: Sufferfest videos are only digital downloads > they don't offer DVDS.
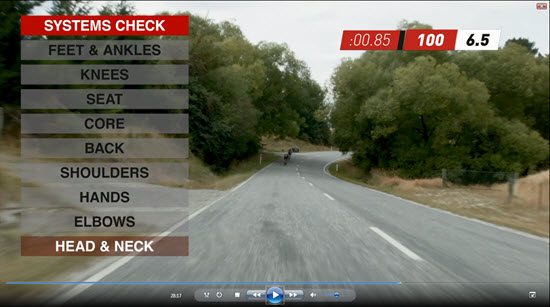
Includes a nice “Systems Check” for proper riding position.
Learn to ride with style
I rode along and completed all of the drills included in this video today – fantastic. The recommendations are solid – although they just might conflict with what you've been told by others.
New Instructors should consider using this training to fine tune how they ride an Indoor Cycle. Maybe setting up with a mirror so you can see yourself from the side.
I know, as part of your training you were told a bunch of things about proper pedal technique and position… but have you ever practiced improving how you ride? More importantly, how do you look – when you're up there on the Instructor bike? Are you demonstrating a cycling style that your participants will want to copy?
Can you ride? Really ride? Can you Suffer with style? Make profound Suffering look effortless?
Although it has very little Suffering in it, Elements of Style may just be our most important video ever. Developed together with the expert team at CyclingTips and shot on location in Wanaka, New Zealand, this 39 minute video provides the very foundation upon which all your Suffering must rest.
Over the course of six specific drills, you’ll learn and practice:
An exclusive 9-point ‘Systems Check’ you can use on any ride to get into your optimal position.
A 4-step process for standing up on a climb and generating more power.
How to engage your core, including your glutes, for more stability and power.
The components of a smooth pedal stroke and how to bring them together at both low and high cadences.
How to stay relaxed and efficient under pressure.
Narrated by one of the best cycling commentators in the world, Eurosport’s Carlton Kirby, you’ll get clear instructions about exactly what to do, when and why. We guarantee it will change the way you think about your riding style after doing it JUST ONCE. Do it five times and you’ll automatically adjust your position while out on rides. Do it 10 times and Sufferlandrian angels will burst into tears at the sheer epic beauty of you kicking the crap out of your competition all the while making it look effortless.
*** Download includes a FREE PDF from CyclingTips with further style tips. Look in the .zip folder after download. ***
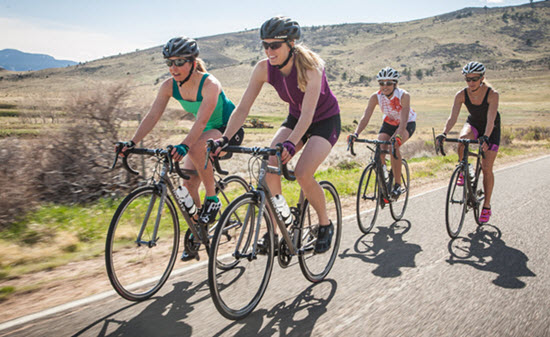
We were waiting for a long traffic light to change yesterday, when one of our group asked me a question; why do you unclip your left foot? I always unclip my right… personal preference, or is one way better/more correct?
The women who asked this question is a relatively new rider. This is her second year road riding with our outdoor group. Like many who've become passionate cyclists, she has become a student of all the little details involved in cycling. So she's often curious, questioning us about things we do on the road. I remember her asking last year why I would always stop in the center of the righthand lane, rather than staying on the shoulder. She quickly understood when I explained that by claiming the lane, it would hopefully prevent a car from squeezing us into the right hand curb, as we cross the intersection 🙂
Seeing that there are a bunch of Instructors riding outdoors, I thought I would share this with you. For your benefit, and possibly some new rider you have the opportunity to mentor someday.
My view is that unclipping should always be done with your left foot, regardless of which footed you are, because it's safer.
Regular or Goofy Foot?
Lead foot choice on board sports like; Slalom Water Skiing, Wakeboarding, Skateboarding and Snowboarding are designated as;
Left foot forward = Regular Footed
Right foot forward = Goofy Footed
I have no idea when I first heard the term Goofy Foot, but I do know it was waterskiing. I always had my right (Goofy) foot in the forward binding of the ski. I just felt more natural for me, even though all my friends did the opposite. With these sports it's a matter of personal preference.
Why does it matter which foot on a bicycle?
Here are a few reasons I feel it's safer unclipping your left foot during a controlled stop. NOTE: road cyclists should be comfortable unclipping either foot in case of emergency.
#1 That front chain ring is really sharp!
Like a stationary saw blade… ready to slice open your calf!
I didn't want to post the actual picture, but this link shows what can happen when your foot slips off the pedal when you aren't successful clipping in and you're in your small chainring. Ride long enough with slippery road pedals and there'll be a time when you put pressure on an unclipped pedal. Your body weight quickly carries your sliding foot across, and then off, the front of the pedal. Do it with your left foot and you'll just be embarrassed. With your right and there's a chance you'll need stitches from your right calf scraping across those sharp teeth and a tetanus shot – those teeth are not only like little razor blades, they're also really dirty.
This actually happened to my buddy Randy Erwin a few years ago. He had been following Amy and me on our tandem. Amy looked back and saw him stopped, hunched over his bike. Once we rode back we saw all the blood – he did too and nearly passed out from it.
#2 Your right leg is probably stronger
Watch a child or new rider leave from a stop and you'll normally see them repeatedly pushing/pawing off with the unclipped foot – often with the clipped-in pedal in it's lowest position.
Experienced riders start with the clipped in pedal positioned around 2 o'clock. This allows you to power away by driving the clipped foot down, using a normal pedaling motion. The unclipped foot can help push off a little, but it's mainly for balance. This first pedal stroke needs to be powerful – so use your strongest leg! With 90%+ people being righthand dominate, your right leg is typically stronger.
You might need to complete multiple rotations with just one leg, before pausing long enough to get the second foot secured. Another reason you need as much strength as possible.
NOTE: for you “lefties” I still feel the potential danger listed in #1 should have you unclipping your left foot.
#3 Keep your down foot on the high side
This might not apply where you live – and it will be contraindicated (a new use for that term) for our friends in the UK, Oz and other British territories. Roads are often constructed with a “crown” = the center of the road is higher than the shoulders. They do this to speed rainwater runoff and it will naturally cause an initiative/sleeping driver to steer away from oncoming traffic. So for us who drive on the right/correct side, your left foot will be on the “high side” = you may have better balance than reaching down to the low side.
NOTE: for you who drive on the left/wrong side, I still feel the potential danger listed in #1 should have you unclipping your left foot.
#4 Don't get confused
Err… not sure?
After leading group rides for 20 years, it's not uncommon to see a rider who appears confused at a stop – they aren't sure which foot to unclip. As you know, confusion can lead to indecision and indecision on a stopped bicycle frequently leads to someone tipping over. Embarrassing and often painful 🙁 Not to mention any names, but I have a guy… Lee, in the “C” group I lead (my community service) with this problem. More than once a ride I'm seeing him jump out of both pedals and then slide on both feet until he stops!
Decide what you're going to do in advance. Make a conscience decision; “I'm going to go Goofy and unclip my left foot!” as you roll to the stop with your right foot at the bottom.
Fun 17.75 mile C ride = my chance to develop more new outdoor riders!
I don't know if this is true where you live, but we are enjoying a fantastic spring here in Minnesota. Yesterday was 70 and sunny. I did a little multitasking = hammered for two hours, while pre-riding the two “C” loops I've created for our Life Time Fitness Cycling Club.
To create a new route for a group ride >
Decide on an appropriate distance and then map the route on mapmyride.com. It's super easy to use; create a free account, click Create a New Route, center the map on your starting location, then just click along the path you want to follow. You're shown the cumulative mileage as you go and there are edit tools (I use the undo a lot) so you can make changes until you've configured your ride. Then give your new ride a name and then Save Route. You will find a link to your new route that can be easily shared via email, or if you paste it into Facebook it will display the map.
Then take a test ride (the fun part) to check for any construction work or other concerns. Oh, and to learn the route yourself if you'll be the leader.
I feel it's important to give new riders a chance to lead. There are situations when I might be the only lead on the ride. Assigning a new leader is helpful so I can fall back and check on others and assist those needing help. I've learned not to ask; “can you be the new leader?” New riders almost always say NO! Instead I casually tell them; “you're the leader now… keep a steady speed and I'll be back shortly”. Before disappearing to the rear, I will also tell the new leader what's coming up; the next turn, any concerns, safety hazards, etc.
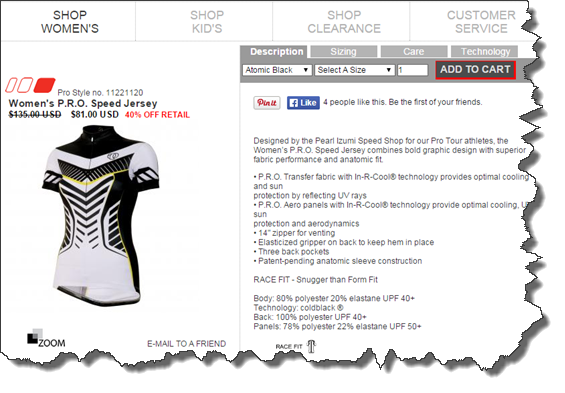
As a reminder to our ICI/PRO Platinum – annual members: you are entitled to a 40% discount on everything Pearl iZumi sells at their factory website. If you're a relatively new Platinum member it takes a while before your account is active at http://shop.pearlizumi.com/icipro/ – new members are added to their system manually = it takes a while.
If you need something right away, or have trouble accessing the ICI/PRO discount store, please contact us and we'll fix it for you ASAP.
Monthly members can upgrade or new members can join here > PRO/Platinum $97.95 = Two Months free!
Welcome to the Pearl Izumi/ICI PRO Program!You are qualified for a 40% off retail purchase rate for up to $1,000 of gear per season at shop.pearlizumi.com .
Please remember some of the basic rules of the program. This program is for your personal use only – please don't discuss your special privileges with anyone who's not part of the program; it's designed to make you more familiar with our products so you can show them off to your clients.
Of course, the whole process isn't complete unless your clients can purchase our products for themselves at a retail location – please take a few minutes to familiarize yourself with the stocking Pearl Izumi dealers in your area so you can send some customers their way – you might even land a few clients through these new relationships (you can use the dealer locator function on the site if you're not sure which dealers are nearby).
Dealer orders take precedence over any of our discount programs; your order will generally ship within 4 business days (even orders for PI employees have to wait), and you'll receive an automated email with your UPS tracking number once your order is en route.
ICI/PRO Annual/Platinum members can log in and review Pearl's entire 2015 line here. Please contact me if you have any issues accessing the programs website.
*I've lost track… I think this is year six of our exclusive access to the Pearl iZumi PRO Purchase program. Thanks Pearl for your continued support of our Instructors 🙂