It’s dinnertime, and I’m flying home to San Francisco from a Houston business trip. The flight attendant is bringing around the service cart and I’m about to order … milk. I never drink milk, so why now?
Let’s go back to how the day started. Fortunately, I had ordered eggs and oatmeal from room service. (This was a number of years ago, before we all became gluten-phobic.) Breakfast showed up at 7:00; so far so good.
I was in Houston in January for a meeting called by Sherry. The meeting started at 10:00 a.m. and was scheduled to last till 1:00. My return flight was at 2:30 p.m.
Sherry had promised us food. I should have been suspicious, because Sherry and I once had dinner at an airport, and hers was a plate of white-flour pasta and a plate of white rice. The only foods at the meeting were donuts, Danish pastries, M&Ms, Halloween-size candy bars, soft drinks and coffee. No refreshments for me, thank you.
At 1:00, a few of us got into Sherry’s car so she could drive us to the airport. Six hours without food had left me hungry, and I planned to get food at the airport. Unfortunately, unexpected traffic due to an event in town slowed us to a crawl. It was not going to be possible to get food before my flight. Maybe a pack of raw almonds? Almost every airport newsstand sells those.
Well, time was so short I had to run to the gate. When I finally stepped on the plane, they closed the door literally the instant I was on board. And then.
The flight couldn’t take off for an hour due to some problem or other. (Believe me, I had stopped caring.) Even when we were cleared to go, we couldn’t take off because the plane now had to be de-iced. We sat on the tarmac for 2 more hours.
So our 2:30 flight departed at 5:30. There was no meal service — it was an afternoon flight. A 2½-hour flight. After a 7:00 a.m. breakfast and nothing else, all I could think about was food.
Finally, the beverage cart appeared. I had already decided what to order. You might think I’d grab whatever I could get, but as I watched people consume Pepsi, ginger ale and apple juice, I knew that spelled nothing but trouble for a carb-sensitive like me.
The answer lay in finding food.
Food on a beverage cart. Are you thinking peanuts? So was I. But they had pretzels. White flour would have been worse than nothing. So my plan — at this point, was it Plan B or Plan C? Maybe D; it was a long day — was milk. Milk isn’t a beverage; it’s food. Usually, I don’t drink it, but this wasn’t usual.
Got milk? They had it — 2%, the only kind they serve on airlines. I had done the calculations (plenty of time to do arithmetic on the tarmac), and 2% was actually the perfect answer. It came as close to a 40-30-30 meal as I could get on the fly, although it was light on protein and a bit heavy on fat. Even though I don’t go around pushing 40-30-30 meals (remember The Zone?) on my clients, I do know that the effect of those percentages is stabilizing.
The key word is Stabilizing, and that’s the take-away here. In this case, stability refers to both blood sugar (glucose) and brain chem. In a semi-emergency like this, it’s tempting to use the situation as an excuse to grab anything edible, even things we should avoid.
But milk was a wiser choice, and in 20 minutes I felt a lot better.
Lately, I’ve been finding it necessary to go with Plan B often — so the best idea is always to have one. When it comes to food, a solid Plan B is absolutely vital. Carry envelopes of protein powder or packs of raw nuts with you, rather than fruit. Think stability. After all, we’re talking about your brain first, as well as the rest of you.
In Jennifer Lintz's last post; Use YOUR Workout as Inspiration for your Next Class , Jennifer talked about using your personal workouts and build a class around them. Makes sense to me… because I've experienced something, I can more accurately describe the feelings, intensity, frustration, etc…
I follow communication expert Alexa Fischer (she was featured on Podcast #296) and she's frequently sending out short videos that seem to always get me thinking. This week's email was on using thought bubbles vs. a script, when presenting:
When you are giving a speech or filming a video, I can appreciate the desire to communicate exactly what you want to say through a carefully crafted script. But let me ask you… Do you prefer watching a person reading a script or sharing their thoughts from their heart?
I used this technique in my class yesterday. Here are the thought bubbles I used to bring last Saturday's century ride inside:
Tour de Tonka – that's what the ride is named. I asked if anyone else participated (there were 6,000+ riders) or, if they were driving, were they forced to sit and wait while the mass of riders rode past. I told this personal story during the warm up:
Two years ago I offered to sub a Saturday 8:00 AM class on the day of this event. I wasn't running late, but let's just say I hadn't left myself much extra time. The last stoplight I hit is the corner where the club is located. It's also an intersection where the Tour de Tonka riders cross. So at about 7:50 I'm first in line at the stoplight, waiting while the cop is waiving hundreds of riders through. Light turns green, cop's still waving. I can see the club from where I'm sitting – cop's still waving. At around 7:55 I'm panicking – there appears to be no end of riders and the cop seems content to keep us waiting at the light, as he waves the cyclists through. So out of desperation I go through a very awkward series of multi-point turns to get pointed the opposite direction. I found a place to park two blocks away and with just minutes until the class was supposed to start, I'm running down the street barefoot (I'm one to eschew shoes in the summer) with my gym bag, the cop yelling at me as I dart through the line of bikes, on my way to the club's parking lot.
Distance's – you can ride as short as 15 miles… all the way up to 100 miles, a full (not metric) century.
As a (somewhat proud) cyclist, there's only one response you want to give when asked; “did you ride the Tour de Tonka?” “Yep (standing a little taller) – the century. Reporting any other distance tends to feel like a disappointment, and your body language will normally reflect this. I added this as a bit of foreshadowing, which you'll understand in a few minutes.
Matt and the rollers – That's Matt as in Matt Finnesgard, one of the riders in our group. He's in his mid 30's and a very strong. Oh, and he rides with no technology… not even a speedometer.
Our normal position in the pace-line is front and center. Tandems are best up front. Besides making a nice hole in the air, for the riders behind, all of our mass makes it difficult to react to changes in speed easily. 100 miles can make for a long pull. After the 30 mile rest stop, Matt offered to pull us. A nice gesture on the face of it, as long as the roads are relatively flat. They're not. The next section we rode was pretty much continuous rollers. I know he wasn't doing it on purpose, but Matt didn't slow from his steady 23 mph when the grade became positive. He just keeps a steady cadence and it was killing us to keep up. Here's where I had everyone doing 30 second intervals; just below PTP and then above. Some were load based with steady cadence… and some where accelerations from 80 rpm to 100 rpm and back again.
Old Market – a long, two section climb at the 98.5 mile point in the century.
The Tour de Tonka begins at the Minnetonka High School, which is only one mile from our home. The route goes right past our neighborhood – Old Market is only a few blocks from our house. It turned out to be a pretty hot day, 93° and Amy and I were pretty much toast as we approached the turn, that if we took it, would have us home and quickly in the shower and a nap. It would also have us about a mile and a half short of the full distance. It's hard to describe how tempted we were and we quickly discussed ending our ride then and there. “Who would know if we bailed early?” I asked. We were alone at this point. “We would.” was Amy's response. “You're right.” “We can't honestly tell someone; we did the century – if we really didn't 🙁
So up Old Market we went. Amy and I can did the whole thing + they had some fantastic pizza at the finish. My class got to replicate the two sections as 45 secs climbing above threshold, and the final 45 secs of the class with an all out effort, out of the saddle struggling to make it to the top.
There was of course more to the story that filled the hour.
Do you have a similar story you could present to your class?
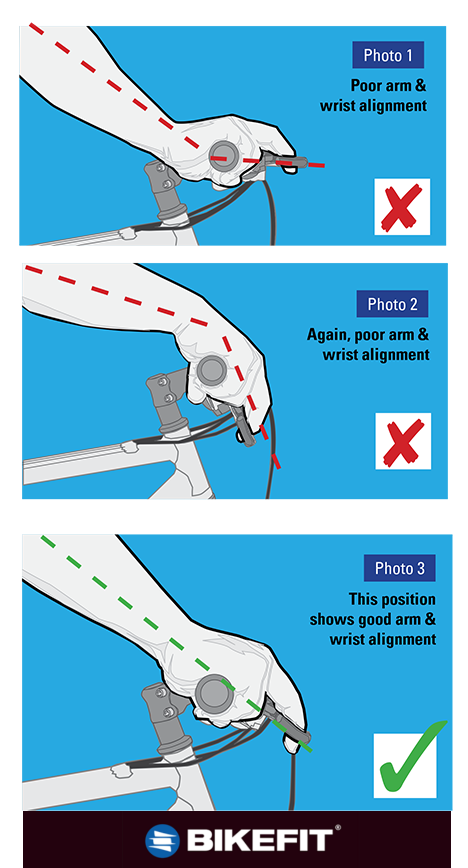
Paul Swift from BikeFit sent out another infographic showing proper wrist alignment, this time for road bikes. We published his previous email that highlighted proper wrist alignment on a mountain bike. Notice in the image above how the curve of the handlebar drops matches the natural, straight wrist position?
I see this problem a lot on our group rides… Set up incorrectly (bars rotated down too far) causes the hinged wrist shown above, left. Where this becomes obvious is the additional arm movement needed to grasp the brake levers – there shouldn't be any 🙁
With your hands on the brake hoods, your wrists should be straight for best comfort and control. In this position you should be able to rest your fingers on the brake levers. Rotating the handlebars and/or brake hoods upwards helps improve alignment for more comfort and better control.
Cuing wrist position in class, or on the road, will be appreciated by your participants.
Remember bike fit is not about the bike, but where you touch the bike.
Paul Swift from BikeFit sent out an infographic showing proper wrist alignment – their example is for a mountain bike, but the concept is identical no matter what you're riding. If you've been to WSSC, BikeFit is the company who provides the very popular bicycle shoe cleat alignment / adjustment service.
Complaints about hand numbness are typically the result of riding with hyper-extended wrists. We've explored the need for proper hand position in detail here at ICI/PRO in these posts:
When you fit new riders to Indoor Cycles you tell them their numbers, right? You say; your seat is hole 6, seat slider is X, handle bar height is Y, etc… You may write these settings down on a note card and your riders depend on these setting marks/numbers being accurate, regardless of which bike they ride.
Their expectation is that they'll be able to pull out the 3×5 index card, with the position numbers listed and set themselves up properly – regardless of which bike they choose. Doesn't always work that way…
This past Thursday morning I set up my Instructor bike, jumped on and knew immediately that something was wrong. I felt like I was sitting way forward of my normal position. Jumped off and checked the slider position – It was exactly where I always have it. Jumped back on and still felt like I sitting too far forward… and I just lived with it while I taught my class.
I checked afterward to see what was causing my concern and it was as I suspected – someone must have switched out this bike and this saddle was installed in a different position, all the way to the front of the seat post = although I had adjusted the slider correctly the saddle was still to far forward.
You'll need a wrench to fix this.
Saddle Fore/Aft position of the saddle can be change in two ways:
How you're familiar, using the adjuster knob or pin and sliding position –
Or by loosening the nut that holds the two seat rails to the seat post – slider assembly. Here's where you need a 9/16 or 15mm wrench. Each saddle should have been installed in the same position – operative word here being should, they almost never are. You'll only need to make this adjustment once, preferably when you take each of the box.
Here's a video I made showing Spinner NXT's and how you can check that each saddle is installed correctly. NOTE: every Indoor Cycle and bicycle saddle adjusts on the rails the same way – how you measure the position, in relation to the slider, will be different between the various brands.
While you're at it, I suggest checking that each seat is level. Dead level is typically best for men and women. You're measuring from the high-points (not the center depression) on either side, to the nose of the saddle.
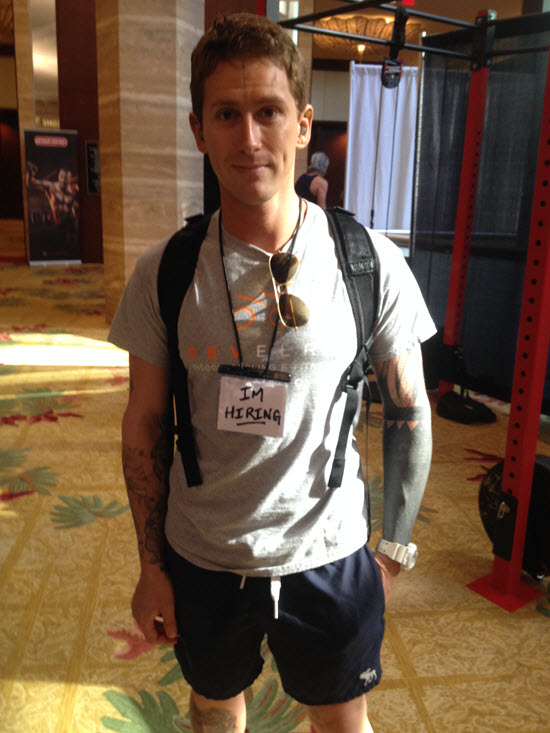
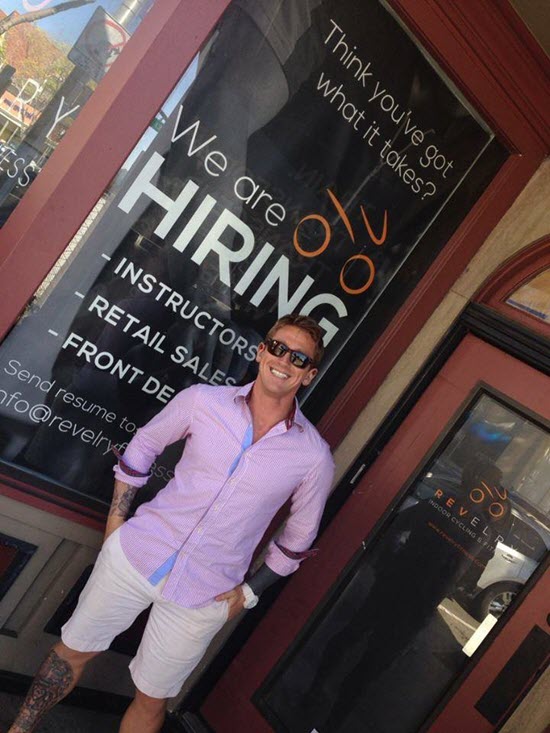
Christian Noni wants to hire you as an Instructor at Revelry Indoor Cycling and Fitness. But there's a catch to his interview process… he's looking for Instructors / coaches who've experienced inspiration from fitness, who have seen the light.. the proof.. (whether it be weight loss, winning a triathlon, or even had a wild twist and that’s how they met their wife or husband) and who lives to share and pass that torch in their classes.
I've been asked multiple times; “John can you help me with a problem I have hiring Instructors?” “I've never hired anyone before, what's the trick to bringing on only great Instructors who will fill the room?”
Great question. One that I really didn't have an answer for, before this interview with Christian Noni. Christian is the Fitness Director at Revelry Indoor Cycling and Fitness. One of his responsibilities to recruit, hire and train the Instructors who will make their studio successful. He has a wonderful way of interviewing potential Instructors… Listen to the interview to learn exactly what he's looking for from and then how they plan to train each new Instructor to bring consistency to all of their classes, regardless of who's teaching.
Christian's mentor is the excellent educator Lawrence Biscontini. If you haven't yet, I would highly suggest that you listen to both episodes of the interview we had with Lawrence:
Good stuff and these two interviews probably rank in the top ten of all the interviews we've ever recorded 🙂
Here's my interview with Christian.[wlm_private ‘PRO-Platinum|PRO-Monthly|PRO-Gratis|PRO-Seasonal|Platinum-trial|Monthly-trial|PRO-Military|30-Days-of-PRO|90 Day PRO|Stages-Instructor|Schwinn-Instructor|Instructor-Bonus|28 Day Challenge']
I'd love to hear if this helps you to select better Instructors. [/wlm_private]


 Paul Swift from