by John | Apr 16, 2020 | Instructor Tips and Tricks

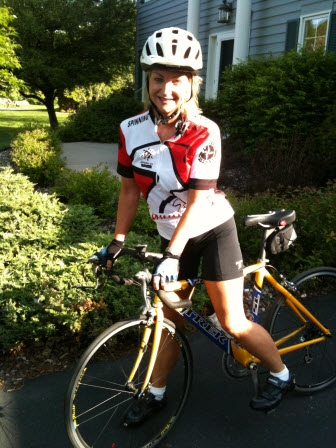
Amy "The Senior Group Fitness Instructor" off to teach her class in a very old Spinning Jersey. Note the Schwinn Logo on her sleave.
When the weather is nice, do you ride your bike to the club and then teach your Indoor Cycling class?
Just curious…


Originally posted 2010-06-20 11:59:21.
by John | Apr 16, 2020 | Instructor Training, Master Instructor Blog

Remember these?
This question from a prospective ICI/PRO member got me thinking today, while out on my early AM training ride…
I'm interested in signing up for your programs, but I have a few questions about the information that is received. When you receive the classes, are there instructions included with how to teach each song; meaning what to do when?
Good question.
I answered her saying that the majority of our Audio Class Profiles are Intensity based – segments of time at a specific level of effort defined by RPE, HR Zone or Power/Watts.
After I hit send I started to reconsider my response – are our profiles mainly intensity based? So I took a one of our most popular profiles (Welcome to the Jungle from Krista Leopold) with a specific focus on how much movement/position/cadence change she had included.
It turns out not much… here's what I found in the PDF download.
Krista's introduction is all about intensity:
Welcome to the Jungle is a high-intensity class. For the student, the prescribed intensity gradually increases from below threshold to maximum effort, which is advisable only for students with previous experience and solid fitness levels. Just as in any class, new and deconditioned students will be coached to ride only where they feel comfortable. This ride is best taught to a group that you already know, and is not a ride to use on a day when you are subbing or just starting out in a new setting. Ideally, you would have announced it in advance so that they are prepared and rested for it. Instead of using heart rate numbers for this ride, we will rely on good ‘ole RPE. You and your students will benefit from having 1-10 scale RPE chart displayed. We will work through four rounds of intervals separated by a complete recovery. Each round will increase in intensity and the recovery time will decrease.
Page two includes this:
For all of the work efforts I recommend the Spinning® movement called “Running with Resistance,” but any movement can be substituted. Running with Resistance is particularly effective because it is a move that is specifically done for short periods. It allows you push a higher resistance at a higher intensity in a way that is different from a sprint. Done correctly, you can easily push your heart into the high end anaerobic zones.
In the description for song #2
Toward the end of the warm-up, we will accelerate as we leave the saddle, almost like jumping,
to finish raising our exertion to right around 6 on the RPE scale.
Then there are a few random suggestions:
It’ll be a fun, high-cadence climb that will be as easy or
as hard as they want it to be.
For this final effort you are mostly cheering them on, reminding them that their cheering squad is
cheering them on, and giving them their starts and stops. Be very clear with every start and stop (of the Tabata intervals) because you don’t want them to miss it. I find that a “3-2-1-Stop” countdown at the end of every
segment helps them by giving them a regular pattern to follow.
Krista's Welcome to the Jungle Quick PROfile only includes one reference to movement
Created by: Krista Leopold, aka GroupFitPower
Training Type: High-Intensity Intervals Working HR Zones: Zones 4-5c
Total Class Length: 60 minutes
Warm-up: 12 minutes Start with a long warm-up to help settle them in. After 8-9 minutes, bring them out of the saddle to get them energized.
1:3 Intervals Round: 11 minutes 30 seconds “Hard” (RPE 7) + 90 seconds “Moderate” repeated 4 times, followed by complete recovery of 2 minutes.
1:2 Intervals Round: 9 minutes 30 seconds “Very Hard” (RPE 8) + 60 seconds “Moderate” repeated 4 times, followed by a complete recovery of 3 minutes.
1:1 Intervals Round: 10 minutes 30 seconds “Very, Very Hard” (RPE 9) + 30 seconds “Moderate” repeated 4 times, followed by a complete recovery of 6 minutes.
2:1 Tabata Intervals: 4 minutes 20 seconds “All-Out Maximum” (RPE 10) + 10 seconds “Moderate” repeated 8 times.
Cool Down and Recovery
After reviewing a few more it appears that I was right, our profiles are primarily intensity (not movement) based. But is that a good thing?
Wasn't the original Johnny G programming nearly all movement based? Jim Karanas made some interesting points about movement based classes in his Non-Authentic Indoor Cycling post.
It won’t last. Silly trend. Dance parties on bikes with music videos can’t last. You can’t even call it training. It’s just physical movement, not sure it’s even considered exercise. It’s totally without direction.
And yet SoulCycle is packing them in and as near as I can tell they're using a whole lot of movement in their classes.
Jim ends his post with this:
If non-authentic IC is going to make a mark, why not embrace it for what it is — a way to train on the bike that makes (some) people fit and happy? Assuming it’s validated as safe and effective (ICG has already contacted the American Council on Exercise and proposed a study), then shouldn’t every indoor cycling education body offer a program on how to teach non-authentic indoor cycling? Why shouldn’t any and every indoor cycling program be taught by those who are truly qualified to teach indoor cycling? That would be the likes of us. We know indoor cycling best. We could create a program — inauthentic fluff, if you will — that’s still authentic in its safety, structure and cardiovascular benefit. Why not?
Could the solution, that many of us are looking for, be as simple as just sprinkling some fun movement into a solid profile that's intensity based?
Originally posted 2013-07-17 12:22:34.
by Joey Stabile | Apr 13, 2020 | Bonus Materials, Class Work-Sets, Creativity Indoor Classes, Instructor Resources, Training With Power
This post has been adapted from an article By Selene Yeager published on June 13, 2019 which can be found HERE.
The following is excerpted from Climb! by Selene Yeager–your guide to train for, conquer, and ultimately fall in love with hills. I (Joey) have read Climb! and I recommend the book, again both for indoor and out.
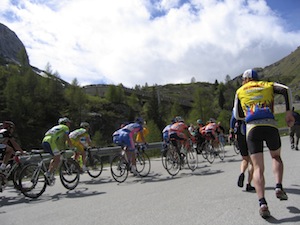
How does one train for a mountain bike stage race, a hard race where you have hour-long climbs, short grinders, and rollers all thrown into the mix, for 4 to 6 hours a day, day after day. The answer is simple, hill repeats and lots of them.
If you are not already doing hill repeats in your indoor classes, you should consider them. They are hard, they allow you to dial in your time at intensity, and they will build a stronger student. Not all repeats have to be the same, some can be level, such as 3 x 8-minute or 6 x 5-minute hill repeats where you have 24 to 30 minutes at threshold. Others can be crafted to mimic real-world conditions, where you’re hanging onto attacking riders or trying to stay away or make a break, like 8 x 3 minutes or 12 x 2 minutes, so the same time at even higher intensity.
These not only train your body to produce more power aerobically, better manage lactate, and produce more power at your threshold, but also bolster your mental reserves, because it’s just as challenging for your mind to blaze up the same lung-busting climb as it is for your muscles.
The following hill repeats are taken from an outdoor preparation plan that is designed to build climbing power. Generally, a workout like this is only done once or twice a week and on fresh legs. Also, though hill repeats are designed to be somewhat torturous, they’re not intended to bury you. These should be done at an 7-8 on a scale of 1-10, not a 9 or 10. Your speed, intensity, and/or power should be within the goal range on every repeat.
Uphill Sprint 20s:
Being able to surge and recover helps you hang with the group up climbs and gives you the reserves to power through undulating climbs that kick up into double-digit grades.
Do It: Design a ride that has a steady climb in the 10 to 15 minute range for duration. Begin the climb in HeartZone 4, climbing at your lactate threshold (LT) RPE of 7 to 8. After 2 minutes, stand up and attack at just below all-out sprint intensity, HeartZone 5, (RPE 9) for 20 pedal strokes. Sit and go right back to climbing at your LT. Repeat every 1 to 2 minutes (depending on your fitness) all the way up the hill. Perform the drill one or two more times.
Rock The Rollers:
To keep going strong through rolling terrain, practice 2-minute attacks.
Do It: Design a ride with short climbs that take about 2 minutes to crest. Wind up before you hit the climb, so you’re at LT (RPE 7 to 8) as soon as the hill starts. Climb at LT for 90 seconds, then go as fast as you can (RPE 9 to 10) for the final 30 seconds all the way to the top. Repeat four to six times.
Short Rest Repeats:
These classic climbing intervals simulate real-world climbing conditions where you often don’t have the luxury of fully recovering before you’re hit with the next incline.
Do It: Design a climb that takes about 10 minutes to climb. Roll into the climb and crank your intensity to your LT heart rate and/or power (RPE 8). Hold it there for 6 minutes. Recover for 3 minutes. Repeat for a total of four climb intervals.
Rocket Drills
As the name implies, these short intervals go from 0 to 60, like a rocket, to develop the explosive strength and power you need to punch up steep climbs without losing speed and momentum.
Do It: Design a short incline that takes about 2 minutes to crest. Begin from a standing or slow-rolling start (much as you would a race), on a count of three, explode up the hill as hard as you can (RPE 8 to 9) for 2 minutes. Recover for 3 minutes. Repeat 5 to 10 times.
I hope that this helps you in your next class design. I always try to bring a little of the outside in every time I ride......Joey
Originally posted 2019-06-17 18:55:52.
by Joey Stabile | Apr 10, 2020 | Audio PROfiles, Best Practices, Class Work-Sets, Creativity Indoor Classes, Instructor Training, KEEPING IT FUN, Master Instructor Blog, PRO/Playlists, Training With Power
Welcome to the The Weekly Ride by Cycling Fusion
Welcome to our new era of The Weekly Ride, you get:
- Full Ride PDF
- Apple Music Playlist
- Spotify Playlist
- File to Download the Ride directly into My Fitness DJ (Yes, no Programming)
- The Ride will be available for purchase in the iClass Builder Store (No Programming)
- A Podcast of the ride being delivered by a master instructor.
(more…)
Originally posted 2019-01-16 08:20:16.
by John | Apr 7, 2020 | Training With Power

Cameron Chinatti from Stages Indoor Cycling is looking for Instructors and participants who know their FTP (Functional Threshold Power). I'm not sure exactly what she's doing with the results of this survey – but it only will take you two minutes to complete, so please click over and share your awesome wattage number.
It's anonymous if you choose and Cameron is looking for as many responses as possible – so feel free to share this survey with your class if you teach and/or train with power. It doesn't matter who's cycle you ride.
You'll find her short survey here.
I haven't surveyed my regular participants, but I have asked a bunch over the past year or so if they have gotten a sense as to their PTP (Personal Threshold Power). I've stayed away from FTP as it designates the result of a formal assessment. The consensus is that most understand where they should be during the “Best Effort” intervals I do in nearly every class.
Feel free to use the FB share button to place this on your personal page if you have friends you feel would be interested.
Originally posted 2014-12-19 16:09:15.
by Tom Scotto | Apr 4, 2020 | Master Instructor Blog
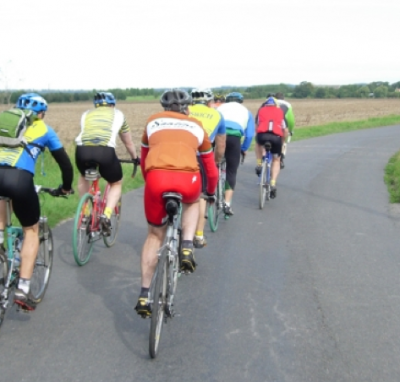 My approach to indoor cycling has always been to bring the qualities of cycling outdoors into the indoor cycling studio. On one hand, there are the general qualities of fitness and condition that everyone enjoys, cyclist or not. However, there are definitely attributes of training and riding that appeal specifically to those that enjoy riding outdoors. I thought I’d have a little fun and give you a glimpse into what goes on in my head when I design an indoor ride. Ok, maybe “fun” was not the right word and the thought of entering my head may have sent your mouse uncontrollably toward the back button. Regardless, here is taste of what goes on during an outdoor group ride and how it translates to almost every indoor ride I create (with the exception of race days).
Meet Up and Warm-Up
I’ve joked around multiple times that every good ride begins and ends at a coffee shop. That may not really be the case. The group I ride and train with on Saturday mornings meets at a local bike shop called Quad Cycles. After the usual banter, bragging and coveting of the latest gear, we roll the ride. Everything starts at an easy pace – very conversational. Often times we are riding 2 by 2 (or 2 abreast) chatting and catching up on whatever. You can often pick out the serious riders or those who understand proper warm-up buy their faster cadence (90-100 RPM). Their legs are spinning fast and smooth, and the pace is easy. After 20-30 minutes, we arrive at our first stop. This signifies the end of the initial warm-up and time to decide what we are going to be doing for the day.
Warm-Up Part 2 and the Ride / Training Focus
Our groups can range from 12 to 60 riders depending on the weather. There are usually 2-3 ride leaders who will create smaller sub-groups and will announce what their focus will be as we continue. “Tom abi”, which is how I’m referred to (which is “brother Tom” in Turkish), “What’s the plan for today?” I’ll let the group know the focus of what I’m planning to do, plus the distance (or time) and target speed. Each ride leader does the same and then people choose which group they want to continue riding with.
We pull out of the parking lot and begin the second part of the warm-up. The second part of the warm-up is both more intense and more focused toward what we are planning to do.
The Route
The second part of the warm-up leads us to our route – the roads where we are going to carry out the “mission”. Maybe it is a set of hills for some climbing or a long flat road for aerobic intervals or sprints. It can also be a rolling meandering course just to get some good endurance miles and time in the saddle. The point is, we select the road or course based on the purpose of what we want to get out of the ride.
Shut it Down
After we hit and complete the main course (pun intended), it is time to shut down and roll home easy. It’s a great time to chat and just chill on the bike. Technically we refer to this as “active recovery”. However, if the workout was designed right, shutting it down is welcome regardless of what you call it. Now I’ve been on many group rides around the country and this “shut down” is sadly rare. People will hammer until the last 100 feet before coming to a screeching halt at the café. I’m fairly strict and let people know when and where we will shut it down. You’ll be surprised how much comfort it brings people when they know everything will calm down at some point. This knowledge also makes the “route” more intense. Since everyone knows the shutoff point, they are now free to really go for it during the “main course”. Are you seeing the connection to indoor cycling? How the effectiveness of an indoor ride can be increased or hindered by how it is created or explained?
Bringing the Experience Indoors
So how does this translate to designing and indoor ride? Well, here is how it translates to me:
(1) Warm-Up 1 (5-6 minutes) — Easy spin to loosen up the legs, raise the heart rate and increase body heat. Explain the purpose of the ride and provide some options for people to choose from.
(2) Warm-Up 2 (5-8 minutes) — Greater focus during the second part of the warm-up to prepare the mind, muscles, energy systems, etc. for what is ahead.
(3) The Course (35-40 minutes) — Get down to business! The drills. The Intervals. The challenges.
(4) Cool-Down & Stretch (8-10 minutes). Depending on how intense the last efforts were, we may take 3-5 minutes to cool-down and then 6 minutes to stretch. We use this time to chat again and reinforce what we experienced and ways to interpret how our body responded to the ride.
————————————————–
So there you have it. That’s what’s on my mind when I’m designing the ride and actually riding a profile in class. If you are interested in attracting outdoor riders to your class, try to put together an experience they connect with. If you’ve never been on a group ride, take a Saturday or Sunday morning and join up with a local club or informal group. Just don’t expect it to go down “exactly” as I’ve described above. Those that know me, also know I like to keep things structured and well planned….a bit.
Originally posted 2017-04-03 14:12:49.