
by Joan Kent | Jul 29, 2013 | Instructor Training, Master Instructor Blog
By Team ICG® Master Trainer Joan Kent
(Jim Karanas has been travelling on ICG business and hasn’t been available to supply posts for ICI-Pro for several weeks now. I’m sure his many followers are disappointed, but I hope this brief post will be of interest and practical use for instructors and students of indoor cycling.)
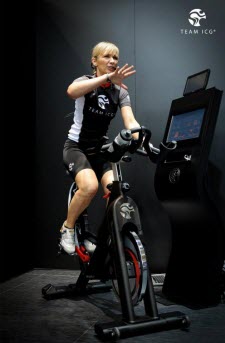
Over 15 years ago, Frank Day created independent crank arms for bicycles. With independent crank arms, one leg can’t assist the other in turning the pedals. The cyclist can’t relax on the upstroke, but must actively raise the pedal, using the hip flexor and hamstring. If the rider does it right, the pedal stroke will be smooth and feel like a “regular” bike. If the pedal stroke is wrong, the entire stoke will be off in timing and simply fall apart. Mastering independent crank arms forces the rider to pedal more efficiently. It’s said to increase power, as well. Another benefit is that the right and left leg muscles become more balanced, whereas fixed crank arms could perpetuate any strength imbalance between the sides. Finally, the rider gets to train ancillary muscles and coordination.
I never gave much thought to independent crank arms until I started Kranking in 2007. As most of you know, Johnny G created Spinning. (Where would any of us be today without that?) He also created Kranking and put independent crank arms on the Krankcycle.
Johnny knew Spinning would never “go” if he used independent crank arms because cyclists and riders of stationary fitness cycles in the gym were too accustomed to fixed crank arms. (One of my friends, a highly accomplished cyclist and a regular in Jim’s classes, did a 95-mile ride with independent crank arms, which impressed me no end. He’s an obvious exception.)
Kranking, however, had no such limitation because there were no expectations about the crank arms. The Krankcycle is a complete departure from the upper body ergometer. Few people like UBEs anyway, so departing in one more way was unlikely to meet with resistance. Enter independent crank arms on the Krankcycle, with all the benefits they provide.
All of that said and out of the way, here’s the point of this post. Kranking can help you and/or your students develop better pedaling technique on an indoor cycle.
In order to Krank without letting the crank arms “clunk” as they go around the axis, you need to smooth out the basic arm stroke. One of the best ways to do that is to imagine and feel that you’re making the biggest circle possible by pushing the crank arm around the largest circumference you can.
In Silicon Valley, where I’ve done a lot of teaching, the engineers think I’m crazy when I say that (“The crank arms are this long and won’t change!”), but use your imagination and make the biggest circle possible. Push outward against the edge.
Keeping the crank arms together on the double Krank stroke takes coordination. Keeping them 180 degrees apart for a split rotation, as the legs are positioned on a bike, takes even more work. It will improve your upper body coordination, muscle balance and core strength. Once you’ve smoothed out the basic stroke and mastered keeping your arms exactly 180 degrees apart for a good 15 minutes or longer, you’re probably ready to transfer what you’ve learned to indoor cycling.
I honestly don’t have any specific training plan for you to follow here and wish I could present one. What happened to me after doing a lot of Kranking is that I noticed my cycling felt different. My pedal stroke on the bike — indoors and out — felt smoother and more even. I found myself pushing to the “outside” of the circumference of the circle as an automatic and natural motion.
It would be great to report that I did pre- and post-Kranking power tests on the bike, but as researchers say, it was a serendipitous finding, and purely anecdotal. Other faithful Krankcycle users did confirm having the same experience on bikes.
Of course, you could — and can — improve your pedaling technique on a bike with PowerCranks. But your students might not have access to one, while many gyms have Krankcycles.
At any rate, if you’re looking for a way to help your students improve and balance their pedal stroke, this might be the unconventional solution. And it’s fun. Please let me know how it works.
by John | Jul 24, 2013 | Class DVDS & Videos, Featured Studios, Instructor Training
 SoulCycle paying Instructors $130 a class may sound like a lot to many of us, but it will be closer to minimum wage once Peloton Cycle studio opens in NYC this fall.
Teach to a full house of 50 riders and expect to receive $500.00 for your efforts. This isn't a typo – this outfit is planning to compensate Indoor Cycling Instructors up to $500.00 a class. Teach a regular schedule of 13 packed classes a week and you'll be interviewing stock brokers for ideas where you should invest your $300,000 annual compensation.
Want to work for Peloton Cycling? Check to see if they're hiring here.
Update 10/1/2013 – I have an interview up with Peloton Cycle's COO Tom Cortese where you can learn a bunch more about their plans.
From a Well and Good in NYC article
To that end, Peloton has borrowed a lot from boutique studios and what riders are addicted to, starting with the charismatic instructor. “Instructors who can command an audience and have great fitness knowledge are arguably like actors, they should be paid as such. We’re tripling what the going rate is to work at a studio,” says Foley, adding that with this platform, Peloton teachers will become “global celebrities, capable of reaching thousands of riders at a time, instead of 50.” (We’re expecting defections any second now.) – I'm assuming they're referring to defections from SoulCycle & Flywheel – John
Peloton's goal here, as I see it, is to recruit the very best 10 Instructors… not just the 10 best Instructors in New York, but the 10 best Instructors from anywhere on the planet. $300k should be enough of an incentive to motivate just about anyone to pack their bags, move to a new gig and start teaching in the Big Apple.
How can they afford to pay Instructors so much?
The financial “Holy Grail” for Peloton is delivering on-demand classes to home users riding their new Peloton Indoor Cycles. This bike looks very cool/well designed and they recently raised over $300,000 using Kick Starter to fund the design and early production.
Created by John Foley, the former president of Barnes & Noble eCommerce, Peloton has built a sexy at-home bike that won’t look out of place in your high-design living room. It comes with a 22-inch tablet-like, touch-screen monitor that allows you to ride along with live classes at Peloton’s 50-bike studio in New York City (opening in Chelsea in the fall), or stream one on-demand.
So your potential class size is limited only by the number of those new cycles they sell.
I'm dying to learn more about all of this; the new Indoor Cycle, the technology, their plans for the Peloton Studio… everything. I'm working on getting a representative on the Podcast ASAP.
P.S. Peloton is accepting applications 🙂
by Jim Karanas | Jun 3, 2013 | Master Instructor Blog
by Team ICG® Master Trainer Jim Karanas
At the beginning of every class we teach is an activity called “warming up”. Since the warm-up seems inadequate in many indoor cycling classes, I felt a review of the process would be beneficial to have on record.
During warm-up, we try to bring the expected working muscles to a state of readiness. To many, this means an easy roll of the legs while gently increasing resistance and/or cadence.
As an aging cyclist, I have made warming up a practice unto itself. Each warm-up is specific to the workout I have planned. It varies depending on what we do, and lengthens in accordance with the difficulty of the training.
Warming up properly on the bike should accomplish the following things:
- Increase blood flow (thus oxygen and fuel) to the working muscles.
- Increase aerobic metabolism in the working muscles.
- Stabilize breathing and heart rate.
- Decrease the viscosity of the working muscles.
- Increase the speed of contraction of the working muscles.
- Improve coordination among muscle groups.
- Prepare the students mentally before initiating difficult training.
Increased Blood Flow
The average person does not have enough blood in the body to support a maximal level of effort in all the muscles at the same time. The body must “shunt” blood to where it's needed to provide the oxygen and fuel necessary for increased activity.
Have you ever noticed when you press intensity early in the training that the muscles feel as if they’re anaerobic, even though your heart rate is not yet high? The body hasn't had enough time to shunt blood to that area to increase the oxygen available for the increasing rate of metabolism.
Increased Aerobic Metabolism
When the muscles are not engaged in exercise, ATP derived from glycolysis and ATP from oxidation are in a specific balance. Although anaerobic production of ATP yields waste products, it's done at a rate that allows the body to clear them from the muscles so there's no feeling of discomfort.
As the level of activity begins to rise, it's our anaerobic metabolism that initially increases to satisfy the greater demand for energy. Once the muscles begin to work with greater efficiency and more blood is providing increased oxygen, the body shifts to producing more ATP via aerobic metabolism. This is when we feel a sudden sensation of greater balance and muscular efficiency, despite a significantly higher heart rate.
Stabilization of Breathing and Heart Rate
Once the body has shifted as described above, a notable regulation of breathing and heart rate occurs. Rhythmic breathing increases the oxygen that can be delivered to the working muscles. To a certain degree, this happens naturally. It also stabilizes the heart rate as long as the intensity remains constant.
Decreased Muscle Viscosity
Viscosity refers to the degree of “stickiness” in the muscles. The body lubricates muscle fibers during warm-up, reducing viscosity and preparing them for the force we’re about to apply. Insufficient warm-up may not allow time for this lubrication of the muscles. When stimulated through exercise, inactive muscles initially perform small, irregular contractions with incomplete relaxation. Once viscosity has been reduced, the contractions become stronger and relaxation more complete.
Increased Speed of Muscular Contraction
Warming up properly increases the speed of neural impulses. That enables the muscles to contract more quickly in response to the work effort and improves efficiency and ease of movement.
Improved Coordination
Coordination basically refers to firing the right muscle fibers at the right time for a given physical task. Correct timing and sequencing from large muscles to smaller ones lead to optimal force. Cycling-specific exercises that engage muscles in the same movement patterns that they will later perform will improve technique and prepare the body for the unique demands of a particular indoor-cycling workout.
Prepare the Student Mentally
I’m often surprised when someone — instructor or student — considers warming up to be only physical. A similar approach should be taken regarding mental preparation. Instructors can guide students through specific thoughts, words, images, and feelings and prepare their minds for the upcoming workout. This mental preparation occurs in conjunction with physical preparation, so the students warm up body and mind together.
So, in five minutes or so, we have to shunt blood, ramp up aerobic metabolism, stabilize our breathing, lubricate the muscles, fire the muscles more quickly, practice technique, and prepare everyone mentally for what we are about to do for the rest of the class. Five minutes is the standard length of warm-up in the average indoor cycling class.
A five-minute warm-up is often considered the minimum necessary before activity. Note that I did not say “performance”. A proper warm-up can take as much as 20 minutes out of a class, depending on your ride profile.
My point is to consider the warm-up as important as the training. Plan it as intricately as you do the training. The right sequence of movement, music, cues and intensity can prepare students and instructors alike to train as they've never trained before.
by John | May 24, 2013 | Music

UPDATED 5/25
I you have a Monday 5/27 class somewhere in the USA – there's a good chance it will be cancelled for the holiday. If that's the case, be sure to get outside and enjoy your day off 🙂
Tuesday will be back to work – and you'll have a bunch of participants who will be eager to burn off a few of the Johnsonville brats they consumed (in quantity) the day before.
Don't know Johnsonville brats? They are a year round staple food for Wisconsinites or temporary college residents and a mandatory item on any Memorial Day menu here in the frozen north.
Even though they are technically bratwurst, these are nothing like those disgusting milky-white things your mother used to bring home and cook under the broiler. These are brats and they're awesome!
John's recipe for Johnsonville brats.
Cooking Johnsonville brats is a day-long, near zen-like experience. Similar to preparing a Thanksgiving dinner, but more fun cause you need to be in the right frame of mind to both prepare and then properly cook them 🙂

Empty shelves Saturday AM – what I was afraid of and it took 3 stops before I found my brats.
2 (or more) Original Johnsonville brat party packs. ONLY THE ORIGINAL VERSION!!! The only acceptable option is the Beer'n Brat which they make for people who don't have all day and need to get them on the grill ASAP. If you get to the store and find they are sold out of the original, don't be tempted to use any of the other flavored varieties. Better to go hungry or settle for hamburgers.
2 (or more) large white onions, cut into quarters.
1 (or more) 24 packs* of your favorite Wisconsin beer. My personal favorite is Leinenkugel's or Lienie's as we call it around here.
Real bakery brat buns – NOT HOTDOG BUNS! There is a difference.
Early in the morning, cube the onions and place in a large stock pot.
Add the brats.
Add enough beer to float the brats, reserving 1/2 of each bottle for the cook. It's going to be a long day, so pace yourself by limiting your alcohol consumption to just 1/2 a Lienie's at a time.
Bring to a roaring boil and then reduce to a simmer. Cover and let cook for 4 (or more) hours. Occasionally lift the lid and breath in the heavenly vapors with anticipation of what's to come.
Grill over direct heat for about 10 (or more) minutes, turning frequently. Have a water bottle handy to control the inevitable grease fire as these babies cook up. I forgot to add; wear an apron, or an old shirt, cause these things have a tendency to explode/spurt at you while you're enjoying watching them cook. I don't think it's possible to overcook a brat, so leave them on until they split and a bit burnt.
Serve on toasted brat buns with your favorite brown mustard. My favorite is Cleveland Stadium Mustard.
But keep the sauerkraut away. That stuff is really disgusting.
*Some areas of Northern Wisconsin call these “a suitcase” and the store clerk may become confused and offer you two 12 packs if you ask for a 24 pack.
Getting back on the Free Music Friday track… I really enjoyed my time recording with Dunte Hector this week. Did I mention that he's only 23 years old? I subscribed to Dunte on Spotify and have been listening to his playlists. This track Alex Clare — Relax My Beloved jumped out a very powerful track that I could see using to get everyone establishing “Big Pedals” at the early stage of a climb. Big Pedals @ 63 RPM that I'll we'll then excelerate to ~ 80 RPM and sustain for however long it takes to reach the top.
by Jennifer Lintz | May 15, 2013 | Instructor Training
By Jennifer Lintz, Registered Dietitian and ICI/PRO Member Soigneur
Recently I received a message from one of our members in need of a little assistance:
“I'm pretty new to this spin instruction thing and I'm looking for new class ideas and routines that aren't based too much on certain songs but on technique and fun challenging routines. Is there a spot on your site to help with this?”
Because I am sure there are others who have had this same question, I am sharing my response, just in case others find it helpful. Getting started as an indoor cycle instructor can be very overwhelming, and a lot of times, new teachers are simply looking for ideas.
Here is my take …
“Yes, we do have a section with some class ideas. Once you get logged in, if you click on the “Instructor Training” tab at the top, and then “Class Profiles,” we have over 50 different examples of classes that Instructors and Master Instructors have led that were well-received. Each instructor explains their class plan in an audio podcast, but there is also a corresponding PDF to go along with it. Here is a good example from Julz Arney.
Many of the instructors do list recommended songs, but by no means would you have to use them. If you glance through the various profiles we have on the site (and we add new ones a couple times each month), you will get a lot of ideas for how to structure your classes and can tweak them to fit your teaching style.
I always like to start my class planning with some kind of objective that answers the question “What are we going to do today?”
When I taught this morning, we did an “Out and Back Ride.” Therefore, all of the terrain we conquered in the first half of class we saw in reverse order in the second half, as if we had turned around. You can apply so many different types of terrain to that format … it could be rolling hills first, followed by flat roads focusing on consistency in pace and gear, then a gradual climb, some speed work, and turn around to do it all over with new tunes and slight variations in the way the drills are executed.
Some days, my classes are entirely drill-based (i.e. “We are doing interval ladders today.” An example of this might be: 30 seconds on and 30 seconds off, followed by 60 seconds on and 30 seconds off, 2 minutes on and 30 seconds off, 4 minutes on and 1 minute off, etc. and then go back down.)
Other times, I will describe the terrain right out of the gate. (i.e. “Today's ride is pretty flat, but we will have 3 hills to deal with, each a little steeper than the previous. The first one will be a 3 minute climb, followed by a 5 minute climb, and finishing with a 7 minute climb.”)
When I go to class as a participant, I like to know a bit about what we are doing (“The Plan”), so I try to give that to my riders as we start the warm up. Today we are doing “____________.” It can help when music correlates with the terrain/drill, (i.e. slow, steady beat for inclines vs quick, driving beat for endurance/flat terrain).
I could go on and on and on! I don't think there is a right or wrong as far as the way you set up your class, just as long as you have a plan, explain it to your students, and stick to it. Hopefully scanning the Audio PROfiles will give you some good inspiration. I also find it helpful to listen to the podcasts when I am driving to work to help improve my cueing/coaching/organization/motivational technique.
I am copying John on this in case he has anything to add. It can be very overwhelming when you get started as an instructor, but each class is an opportunity to improve.”
I would love to hear what the rest of you have to say about this topic!