You didn't notice it getting dressed and it wasn't there early in class, it just kind of snuck up on you. One minute you're JRA (Just Riding Along) and the next you begin to catch little whiffs of an odor, not pleasant, that makes you appreciate your position up front and away from anyone else.
What is that smell? Where is it coming from and how come I'm just noticing this now?
It didn't take me long to discover the cause of the foul odor, my trusty old Sidi Mega Cycling Shoes were rank.
But I wash my shoes (somewhat) regularly and they smelt fine when I put them on… why do they stink now?
The culprit are bacteria and odor causing microbes that love warm, humid places. In fact they thrive on it, eating, growing and multiplying at an astonishing rate once they are in the right environment – my warm, sweaty shoes must have been about as perfect an environment for bacterial growth as possible 🙁 The by-products of all this multiplying are toxins and toxic gases that our noses identify as stink. I don't even want to think about what all those little buggers are eating in my shoes. All these nasty critters are sitting dormant in your cool, dry shoes. Add some moisture and warmth and they come to life, with a potentially embarrassing affect.
What can I do to fix it?
I tried on multiple occasions to wash and dry my shoes using just clothes soap/detergent/vinegar/baking soda without success. If your shoes are old don't waste your time with these methods. The only thing I found that worked was a three day (I forgot them in the tub) soak in Oxi Clean. If you have white shoes you could try a small amount of bleach, but I can't vouch for this method, so I'd stick with Oxi Clean .
Billy Blanks Mays was telling you the truth when he would say; “the power of oxygen!” Oxygen is a powerful disinfectant and has the power to actually kill bacteria and odor causing microbes, rather than simply surround them and wash them away with the surfactants that make soap, err… soap.
It's a chemistry thing. Oxygen exists in nature as a component of the air we breath as a pair O² and in stable compounds like water as in H²O. Whenever an Oxygen atom finds itself alone (free ) it gets ugly, looks for something to attach to and in the process converts whatever it attaches to into another compound. Many of the products you use to clean with contain a free Oxygen atom; Hydrogen Peroxide, Bleach, Vinegar and household Ammonia are a few.
The free Oxygen atoms found in Oxi Clean are as deadly to bacteria as sunlight is to a vampire. So the next time your shoes get warm and sweaty there are fewer (you'll never get rid of them all) little friends to cause a stink – if you'll forgive the pun.
How can I prevent the stink it in the first place or prevent it from coming back?
Wear clean socks in your shoes! I'm guilty of trying to pull off the Triathlete look by riding sans socks – or sometimes it's just that I forgot to pack a pair. OK, I'll say it; they're eating the dead skin off your feet. Socks keep their source of food away from surfaces that are harder to clean, like the inside of your shoes.
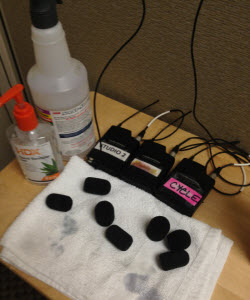
The same goes for your Instructor Mic and windscreen if you use one.
Does your club have a microphone sanitising station like this?
You need to kill all the bacteria, viruses and other icky stuff that you've introduced after each class, with no exceptions. This is doubly important if you share a mic with other Instructors.
The solution here is much easier. All it takes is a quick dollop of hand sanitiser that you can work through the windscreen, wipe over the headset and let dry for the next class.
It’s 5:30 a.m. and you can hear the sound of a low but persistent hum in the Spinning room. Listen carefully, and in between the grinding of flywheels you can hear the whispers, “Is she late…… again?”
The window of time before class begins is where most growth occurs. Arrive 30 minutes early and seize the opportunity to:
Test the sound system and ensure microphone battery is fresh
Crank up some background music to warm the crowd
Adjust the air temperature
Tidy up the room
Offer water to new students if they didn’t come prepared (I always keep a case of water bottles on hand)
Distribute guest passes so students can bring friends (make your own if your gym doesn’t offer a free cycling class pass).
Dim the lights to establish an environment free of judgment (if lighting options are available at your facility).
Start class on time!
Critical phase
During this critical pre-class phase, get to know your audience! A savvy instructor will learn students’ athletic interests, musical preferences and occupations. Congratulate the mother of two for completing her first half marathon, throw in a remix by The Doors for your children of the 70’s and buy a latte’ from the guy on bike #12 who owns a coffee shop. Don’t expect riders to support your efforts if you don’t support theirs.
Don’t believe me? Take the challenge! For one month make a conscious effort to improve your time management skills and extend genuine kindness to your students. Watch with delight as new conviction emerges and classes become energized.
What’s next? I’ll teach you how to spice up your class with a trick from the advertising boys on Madison Avenue…..trust me; you won’t want to miss this one!
Leave a comment for Barbara so she knows your were here.
No more hunting for new music or counting out cues to develop your ride profile. Here is your ready to ride profile for a fully choreographed ride, that can be displayed from your phone, or printed out onto cue cards for your class. This ride is timed out, down to the second, to make your life as easy as possible!
While it may seem redundant to say, most indoor bikes do not move. Please, stop and think about that for a moment. We are not talking about forward motion or distance, of course an indoor bike (or an outdoor bike on a trainer) does not move forward. But what about the other motions that are involved in cycling.
When a rider is out of the saddle, most riders sway the bike from side to side a bit. Why does this happen? Generally, it is the mechanical reality of the situation due to applying extreme power to each pedal. Since the pedals are not on the centerline of the bike, applying a large force to the right pedal will, physically speaking, apply a rotational force that pushes the top of the bike to the right and the bottom of the bike to the left. Without this counterbalancing motion, the wheel would kick out to the side. By swaying the bike in the opposite direction, the amount of force that can be applied to the pedals is increased without crashing.
The second primary aspect of swaying the bike is that it allows the rider to engage their upper body (especially core and arms) into the movement which increases power.
Take a moment and watch some of the pros race, they only have about a 12 degree sway; less than most avid riders. This is due to their efficiency and power.
The second motion that we want to consider is the flexibility of the bike frame. I learned a great deal about this from Kirk Frameworks Co. (http://kirkframeworks.com). There are three basic types of frame flex: Vertical, Torsional and Bottom Bracket/Drivetrain. It is important to understand that these different types of frame flex are more or less related to each other.
Vertical Flex
A frame with the proper amount of vertical flex will have a very smooth ride. More importantly, it also offers better control and handling.
Lateral/Torsional Flex
Torsional flex is when the head tube and seat tube are twisted relative to each other, and thus are no longer in the same plane. All frames, regardless of material or quality have a good deal of torsional flex. Try this sometime — sit on your bike with it pointed straight at a mirror. With your butt on the saddle and your hands on the brake hoods, push your hands to the left and your butt to the right. Watch the frame twist.
Bottom Bracket/Drivetrain
When a rider pushes down on the pedal he also, for better or worse, pushes sideways. This is because the pedal is off to the side of the bike and is not in the bike’s centerline.
When the rider pushes down with the right foot the bottom bracket flexes to the left. When the bottom bracket is pushed to the side, it stays there until the force that was holding it there is released. So at the top of the pedal stroke the bottom bracket starts its sideways move and at the bottom of the stroke it returns to neutral. In returning to neutral it applies that returned energy to the drive train and then to the road. This flex and return smoothes out our power transmission to the ground, making acceleration smoother and optimizing traction.
With the exception of a few new bikes on the market, most indoor bikes do not provide movement side-to-side. Because of this limitation, riders must emphasize relaxation when riding and allow gentle upper-body movement. Attempting to maintain a still upper body can place the spine and surrounding muscles at risk from the forces being generated by the legs.
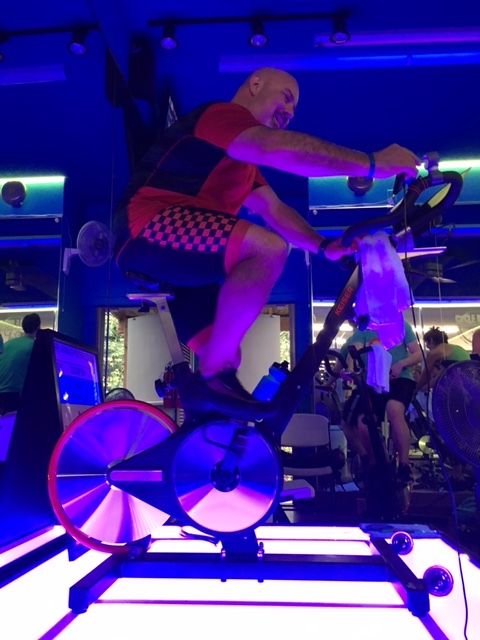
“Why do I make less power (fewer watts) standing, then when I'm seated?”
This a a great question that we get often. I loved John's answer, and so I have done a few edits and present it here….. Joey
A great questions from one of the riders in a Performance Cycle class. An observation that shows he's paying attention plus it gives me the chance to clear this up, so you can properly explain this anomaly to your participants.
The short answer is you don't* If resistance and cadence remains the same, in or out of the saddle doesn't matter. The amount of power/watts you are creating doesn't change… because it can't.
The bike decides the right amount of power
You know that Power = Force x Cadence. So let's assume this participant is riding seated and pedaling @80RPM. Their resistance is set to a level that results in the console display showing 150 watts.
Our legs create the perfect amount of force required to get the job done, which in this instance is overcoming the resistance to pedal @ 80RPM. If your resistance setting on the cycle requires “X” amount of force to push down the pedal, your muscles will create exactly “X” – no extra force is created and no less. The combination of that force, multiplied by a cadence of 80 RPM results in the power meter showing 150 watts.
In fact there's an actual law of physics that says that it's impossible to get the same amount of power out of a machine with a reduced amount of power added into it – which is why I'm saying the amount of power/watts you are creating stays exactly the same, if you make no change other than to stand and ride out of the saddle.
“But then why does the power meter show my watts lower, when I'm standing.”
My response was; “you're right it does and there's a simple answer why…
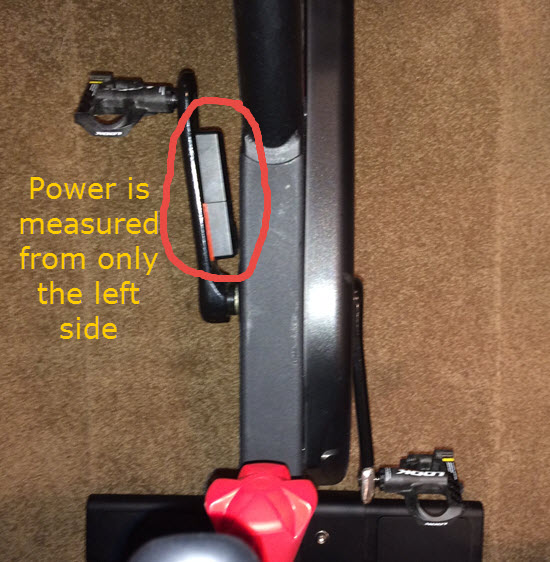
Let me begin with the basics. I teach at a Life Time Fitness Athletic Club and we ride FreeMotion S11.9 with the Carbon Drive belts. FreeMotion's measure power only through the left crankarm as you can see here.
This is my personal S11.0 (the home version) which is why it's black and not the normal silver color. The electronics are identical across all models.
Yes, the meter shows a drop in power…
Many of us who teach or ride on this Indoor Cycle have noticed that the power meter will show a lower wattage number when you transition out of the saddle, without giving any thought as to why. As I explained above, it shouldn't > the wattage number should remain the same. Again; Power is equal to force times cadence. If you didn't change the resistance setting, and you're maintaining the same cadence, the power meter should continue to show the same wattage… but it doesn't because >>>> your legs aren't the same strength.
Your dominate (stronger) leg does more work
The force required to pedal is divided between your two legs – but not equally. Because many (if not all) of us have one leg that's stronger than the other, our brains automatically proportion the amount of force from each. Remember: our legs only create exactly what's needed. Unless you consciously choose otherwise > more force is unconsciously asked from the stronger leg and the opposite leg adds what's left, equaling the total required.
Some quick research showed me that it's very common for one leg to be stronger in most people. Your dominant/stronger leg is typically the same as your writing hand. Since ~90% of people are right handed, the majority of your class will be seeing lower wattages when the come out of the saddle > because they are doing more work with their right leg. The FreeMotion's left hand power meter sensors are seeing a lower amount, of the total amount of work, as coming from your left leg.
Because this IC can only sense force on the left side, when you stand your stronger leg carries a greater percentage of your body weight = the wattages appear lower.
So standing or seated at the same cadence, you continue to create the exact same amount of power. It's just that the power meter doesn't see all of it and displays the reduced amount = the misperception that we create less power standing… which you now understand isn't true 🙂
Make this a feature (not a bug) in your class
Since the Freemotion can show leg strength disparity, why not use it as a training tool?
Novel idea, right?
Start by teaching everyone which leg is their stronger/dominate leg. The simplest way I know is by doing Step-Ups on a box or step raised to the proper level as shown in this short video.
This exercise was eye opening to me, when we did them in Boot Camp. Learning that my right leg is considerably stronger, I'm now really focusing on making my left leg do more work. Hopefully over time, a stronger left leg will result in me having a higher FTP and greater overall muscular endurance.
I suggest having your riders do this as an after class activity > or you could bring a box into your studio and have everyone take a turn.
Using a pair of reasonably sized dumbbells, perform 8-12 reps all on one side and then the other. It should be quickly apparent which (or if) they have a leg strength disparity.
We'll explore drills to exploit this feature and help riders train their weaker leg in future posts! [/wlm_private]
* I'm not referring to pedaling efficiency here, which is a completely different subject.
** Please let me know if this isn't clear, if I've confused you or you have an alternate method of explaining this.

 It’s 5:30 a.m. and you can hear the sound of a low but persistent hum in the Spinning room. Listen carefully, and in between the grinding of flywheels you can hear the whispers, “Is she late…… again?”