Besides sporting those fabulous sideburns, Tour de France leader Bradley Wiggins is demonstrating how to climb effectively using a much faster pedal cadence than the riders that surround him. I've been counting his pedal RPM during the climbs and today as I watched, Wiggins climbed the Col de Tormalet in the high 80's. Wiggins reminds me of another successful high cadence climber – Lance Armstrong. I'm going to venture a guess that this year's presumptive winner has a similarly superhuman aerobic capacity.
Climbing hills outdoor as a group requires everyone to develop the same amount of power, relative to the combined weight of the rider and bicycle. When we discuss cuing a climb in class we shouldn't give a random wattage – I want everyone at 300 watts!!!!, but rather normalize each a rider's power output as it relates to their body weight. For example you may say; for us to stay together as a group we all need to be maintaining one watt per Lb.
How a cyclist creates power can vary by changing the two components that make up power; force (pedal torque) and speed (cadence/RPM).
The force you apply to the pedals while seated is primarily developed through muscle contractions. Yes, BIGGER muscles can create more force.
The speed that you you apply these contractions is very dependent on the availability of oxygen, which makes high RPM pedaling more a function of your aerobic system.
Wiggins vs. Evans
When you see Bradley Wiggins standing next to other riders, it's quite obvious that he doesn't posses the large muscles of many of his competitors. You may actually say that he has “skinny” legs compared to last year's winner Cadel Evans in this picture.
NOTE: If you've got people in your class who are concerned with getting “big legs” from cycling you can show them this picture. Explain that, as a professional cyclist, if Bradley Wiggins could develop the muscular size of Evan's legs, he would… but he probably can't due to his genetic makeup.
So, for Mr. Wiggins to maintain his place at the front of the peloton, while riding alongside Mr. Evans, Mr. Wiggins needs to produce the same watts per Lb (or Kg) as Cadel. No more and no less… the exact same watts per Lb. Not able to develop the same amount of force as others… he makes up for it by applying more frequent (yet smaller) forces on his pedals = higher cadence.
So – how to bring this concept into your class?
If you're teaching with power it's easy. Create a profile that calls for specific watts per Lb at varying pedal RPMs with the intent of exploring which RPM equates to the lowest heart rate, with a fixed watts per Lb. My experience is that each RPM level needs to be maintained for 3+ minutes so your student's effort can stabilize, before making a change.
But what if you don't have power?
As part of my Wine Country Audio PROfile, I added some additional information that I feel will benefit you on days where you're encouraging faster climbing cadences… but don't want everyone's pedals running away with them.
How you cue the addition of intensity is very important in an Indoor Cycling class of any format and its different dependent on the type of Indoor Cycle you’re riding.
– With any Indoor Cycle that uses friction to create the resistance I suggest adding resistance to cadence. Class is pedaling ~ 90 RPM and then add load to reach intended intensity. – If you are riding a FreeMotion S11, Keiser M3 or Schwinn AC with magnetic resistance you can add resistance to cadence or you can do the exact opposite, adding cadence to resistance. You’ve never heard that before, have you? It’s why I see magnetic resistance as being superior.
Here's why My biggest struggle (besides getting people to be quiet) is how to best communicate load in class. If you have been paying attention, you have noticed that with a friction based resistance system as you slow your cadence the pedals get heavier. We have all seen the person who was supposed to be accelerating out of a climb start bouncing like they have no resistance at all. This happens because as your student pedals faster, the added centrifugal force overcomes the fixed amount of friction, making it easier and easier to pedal, until it’s like they have no load at all. Not Good 🙁 Cycling is all about endurance. We want them to endure it! The solution is to establish leg speed and then adjust load to regulate the work they are doing.
Indoor cycles with magnetic resistance (S11, M3 and AC) work very differently. As the speed of the flywheel increases, the Eddy Currents that create the load increase as well. So these Indoor Cycles actually get harder to pedal as cadence increases, just like a real bicycle. So with these types of cycles cue your students to set their load at a slower RPM and then simply increase cadence to add intensity.
Give this a try and let me know if it helps [wlm_firstname]
“The trouble with becoming dependent on technology… we're then completely at the mercy of something we have near zero little control over.”
Anonymous
I learned a valuable lesson this past Thursday night > check your device to ensure your make available offline/downloaded Spotify playlists are in fact available offline/downloaded before you leave your house!
I teach two classes on Thursday's; 6:00 am and 5:30 pm and use my iPhone 4s to deliver the music via Spotify. I like to use the same playlist for both classes and teach a similar class, even though the morning class is only 45 minutes. The morning class when off without a hitch but when I tried to cue up the same class that evening – it wasn't showing as available offline. In fact none of my Spotify playlists showed as playable 🙁
Quickly thinking back to another Best Practice post > when something isn't working, your first move should be to reboot (power down) the device. No help at all. Thankfully I still had a few playlists in iTunes and was able to carry on with a class I wasn't ready to teach.
Then this morning Amy had the same problem on her Android phone. This problem isn't limited to just iPhones. Thankfully she had checked this morning and was able to download her class before heading off to teach.
The Spotify forum has a number of posts describing the problem, but no solutions. I spend some time trying to replicate the problem without success. So beyond what I've listed below, my advice for Spotify user's is to check and confirm that the playlist you will be using is in fact ready for offline use.
Always have an alternate form of music ready and waiting!
For years I had a “Rescue CD” tucked into my personal folder in the Dept Head's office. It's long gone. Today I'm burning a new one as I type this.
Have an old, unused iPod laying around? Add a few of your old iTunes playlists and throw it into your gym bag, along with a charger cord and wall transformer. I just bought a few spare cord/chargers from Amazon.com for about $5 each.
Subscribe to IndoorCyclingMusic.com‘s music podcast. These hour long mixed tracks on my iPhone have been lifesavers in the past. Because they're the actual mp3's they will be there as long as your device will turn on.
Don't forget that Indoor Cycling DVD's include a soundtrack. They might not be to your taste, but could do in a pinch when everything else fails.
As a last resort (say the studio's sound system fails completely) be mentally prepared to coach a class without music. Coach Troy Jacobson has made a fortune walking around with a clipboard and stopwatch. Sure they add a soundtrack to the finished Spinervals Cycling DVD, but there was no music playing during the taping of the episode I participated in.
You may even go so far as to prepare for a future disaster by choosing to teach a quiet class where it's just you, doing your best impression of Coach Troy > except you would be prepared in advance.
Dave Santiago's Racing with Pro's class profile may have the structure you'll need to look prepared and sounding professional.
Have you ever had someone say something so revolutionary, that it smacks you hard in the face and knocks you completely off balance?
It happened to me today and I'm still reeling with the potential of this exciting new method of creating great class playlists. Let me explain…
While preparing to record our latest Audio Class PROfile, Instructor Dennis Mellon introduced me to the fascinating concept of Harmonic Mixing, which is used by the top DJs to build a magical playlist.
This isn't mixing songs by BPM with MixMeister, but rather by combining tracks in the same or a complimentary musical key.
The net effect I'm discovering, is a flow/transition between songs that just sounds right. You may not be able to identify why exactly, it just works. If you're a bit tone-deaf like me, it may explain why some of your playlists don't elicit the same positive response, as say your wife's 🙁
This has been a continuous source of frustration for me; Amy, Chris Hawthorne and a bunch of other Instructors I follow on Spotify all have very good ears for music. And yet the playlists I create (using their songs) never sound as good as the original playlist I swipe them from.
Harmonic Mixing is an advanced technique used by top DJs all over the world. By mixing tracks that are in the same or related keys, harmonic mixing enables long blends and mash-ups. The goal is to eliminate key clashes.
The Basics
Harmonic mixing consists of two elements: knowing the key of every song that you play and knowing which keys are compatible.
To get started, find the keys of your songs. You can detect keys with a piano, a good ear, and a background in music theory. To save time, you can use professional DJ software such as Mixed In Key. Mixed In Key scans your MP3 and WAV files, and shows you the key of every song.
The First Mix
To help DJs learn harmonic mixing, Mark Davis created the Camelot wheel, a visual representation of which keys are compatible with each other:
Help for all of us Tone-Deaf Instructors!
The Professional DJ Approach
Many professional DJs move around the Camelot wheel with every mix.
To select a compatible song, choose a keycode within one “hour” of your current keycode. If you are in 8A, you can play 7A, 8A or 9A next. If you are in 12A, you can play 11A, 12A or 1A. This mix will be smooth every time.
You can also mix between inner and outer wheels if you stay in the same “hour.” For example, try mixing from 8A to 8B, and notice the change in melody as you go from Minor to Major.
Harmonic mixing is a simple technique, but it opens up a world of creativity. You will play creative DJ sets and discover interesting song combinations. It's easy to get started with any music genre.
This Camelot wheel is brilliant – just like there are color wheels to help people like me select complimentary paint colors for say the house and trim, the Camelot wheel shows you which musical keys work together and which will clash.
You can listen to Dennis explain how he uses Harmonic Mixing to create playlists that his classes really enjoy and how it could be the answer (dare I say; The Holy Grail) that many of us have been searching for?
Subscribe to the podcast and then join ICI/PRO so you don't miss hearing Dennis Mellon's Harmonically Mixed playlist when we publish it tomorrow.
I suppose I should start this by answering your question; “what exactly is their Golden Hour, John?”
It's my description of the 60 minutes, that follows the first 30 minutes, of aerobic activity.
For you, me and many (if not most) of the students in your class, we all have a period of time where we are the strongest on the bike. Depending on your level of fitness, that period could be anywhere between 30 minutes to 3+ hours. It “begins” for most of us after about the first 20-30 minutes of activity.
Now you may be sitting there nodding your head thinking; “yea, that makes sense… I do feel much stronger and capable of higher/longer levels of work, during the second half of class.
Competitive cyclists understand the Golden Hour. If you've watched the Time Trial stages of the Tour De France you've no doubt seen the rows of cyclists on trainers, pedaling through a very specific intensity profile. The picture at the top is of the British Women's Track Cycling Team going through their warm up protocol at last year's Olympics.
I found this at wattbike.com that shows Team Sky's preparation for last year's opening stage Time Trial for the Paris-Nice stage race. The completion of each rider's warm up is timed to coincide with their individual start time of the race.
Paris-Nice
Stage 1 Time Trial
Standard Time Trial Warm-Up
5 min light
8 min progressive to Zone 5
2 min easy
2 min to include – 3 x 6s accelerations to activate
3 mins easy
Notes:
Progressive means building to the power zone over the 8 minutes. Only in the last 1 min do you get to Z5
6 second accelerations are sprints & for a whole 6 seconds!
“Why is it an hour?” My perception is that most of our regulars could manage a 90 minute class – if we locked the doors and brought out the whips 🙂 So 30 mins + the Golden Hour = 90 minutes of achievable effort before fatigue sets in.
“But my class is only 45/60 minutes… how would this help?”
I use the Golden Hour to cultivate an abundance mentalitymindset in my class. Simply stated; you have a lot… so you can freely spend a lot. A common training technique,for time limited triathletes, is to limit your rides to just double your event distance. So on race day, when you're faced with a 20 mile bike leg, you're thinking; “I'm trained to ride 40 miles – so twenty's no big deal.” “I'll have a bunch left for the run.”
Contrast this with the scarcity mentality that many of our student's come to class with. They walk in thinking; “I need to pace myself, or I'll never be able to finish this class.” Which is the same as saying; I only have a little… so I need to be very careful when and how I spend it. You've no doubt experienced participants who appear to coast through most of class, only to give one big effort at the finish. They were “saving” some of their limited resources, so as not to “run out” before the end.
Here's a few ideas on how you can incorporate the Golden Hour into your classes.
Seek agreement
I talk frequently about the Golden Hour effect at the beginning of my classes, asking for my classes' agreement that they too feel stronger during the second half of class. Then at the 25 minute mark; ” do you feel it?” “Do you sense how you body is beginning to fire on all cylinders?” “Do you feel those early feelings of stiffness or limitations/distress in your breathing leaving you?” “Do you have new feelings of strength and confidence?” “Are you ready to take advantage of your Golden Hour?”
Make it a goal to reach the Golden Hour ASAP
It drives me crazy watching people come early to class, mount up and then spend ten or more minutes sitting there slowly turning the pedals. What are they waiting for? I make a point to commend all those making the most productive use of their time in class – and encourage the others who aren't to “get your money's worth” by independently beginning their warm up as soon as possible.
Your participants/students/riders come to your class with different objectives; burn fat, maintain/increase fitness, endorphin rush, etc… Success in any of these requires a commitment to do the work you intended for them. Coaching everyone to work at their potential is part of your role as an Instructor. Helping everyone understand that their capacity for work exceeds the length of available class time, can go a long way toward helping everyone reach their unique fitness goals.
Star Trac had the new Spinner® Blade Ion on display at IHRSA. I rode one during Josh Taylor's 6:30 am demonstration ride this past Thursday. After the class I discussed the Ion's new features with Josh. I then got an overview of Spinning's new Spinpower™ education from Program Director Angie Sturtevant, which I'll share as a separate article.
Basics
The “Ion” differentiates this bike with Power from the conventional Spinner Blade. It uses the same chain drive and friction resistance system, found on all Spinner® Indoor Cycles.
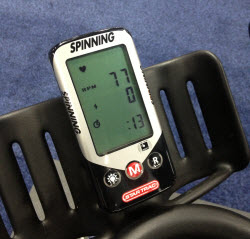
Console / Monitor
Very simple… and I'm a huge fan of simple, so right away I appreciated how easy it was to use the Ion's console. I was told they are making a few minor changes so the final version may look different. Working down from the top, the display shows:
Heart Rate
Cadence
Power
Elapsed Time
Just three buttons
Left button turns the back-light on/off. It doesn't time out because it doesn't need to preserve battery life. It will stay on until you want it dark or you stop pedaling. I might not have this completely right – but you get the point – the light will shine all class 🙂
Center button scrolls through screens displaying; real time and averages + calories
Hold down the Right button for 2 seconds resets the Elapsed Time – Josh explained that this button will also add a “digital marker” to any Ant+ enabled devise, identifying the beginning or end of an interval, similar to the “Stage” button found on other consoles.
Josh made the point during his demo ride that their console will show ZERO watts when there's no resistance, regardless of the cadence = this will show all of our “spinners” that they aren't doing any real work until they've added some load.
Free Registration Required to read the rest — Click Here. Opens in a new tab.
[wlm_ismember]
Measured Power
Strain gauge measures the amount of pull on the brake pad.
The Blade Ion measures power with a strain gauge connected to the brake pad – again more simplicity. This technique is actually over 100 years old and how the horsepower of early engines was measured; by measuring the force acting on the brake, as the flywheel tries to drag the brake around it's circumference.
If you have an NXT available you can see exactly what they are doing. Remove any resistance and start the pedals turning slowly. Now carefully touch the slowly turning flywheel with one finger. Feel how it wants to drag your finger along? Can you see how the harder you press against the flywheel, the more effort it takes to hold your finger in place? By measuring that force, the speed of the rotating flywheel and then doing a bit of math, we could calculate Power.
That Black Box contains the strain gauge and replaces the normal brake pad holder on the standard Blade or NXT – which begs the question; will they ever offer a retrofit power meter for older NXT's?
What about Calibration?
I was told that the Ion will be factory calibrated and that no other calibration will be necessary – which I find very hard to believe.
This isn't the right time to get into a lengthy discussion over what I see as fundamental differences between; how the Ion measures the amount of Power coming out vs. how FreeMotion (and also any bicycle crank arm/spider or pedal based power meter) is measuring the amount of Power the rider is putting into the cycle. Or if it's really of any value…
So I don't leave you hanging here, the factory calibration may indeed accurately display the amount of coming out of the Ion forever… but does that precisely reflect the amount of power the rider is putting into the cycle?
What I'm questioning is there's a lot of drive train (multiple bearings and the chain) between the pedals (work in) and the brake mechanism (work out). This engineering article describes the efficiency of bicycle chain drive system and how losses can vary between 2% and 20%. I'm sure Star Trac's engineers have a very sophisticated algorithm to work all this out on a new Ion – but what happens over time? Worn chains and bearings, sprocket alignment and chain tension will all have an effect. Potentially some of the Ion's in your studio could become favorites because they display a higher wattage, relativity to the amount of work introduced by the rider, simply because its chain is in better alignment. Does that make sense?
No Batteries Required
Angie said she likes this because it's “green” (no batteries to throw out) – this blue light is a very cool touch.
Hands down my favorite feature of the Ion is how it charges itself. Josh told me that it incorporates a smart charging system that will allow the batteries to discharge before recharging. That wire runs from the hub charging unit & cadence counter up to the handle bars.
Phone cord allows adjustment.
How it felt to ride & my overall reaction.
Adding a cool blue Instructor platform will be de rigueur for any studio with Blade Ions
Let me start by saying Star Trac makes a phenomenal Indoor Cycle. Solid and smooth – I'm sure Jeff Wimmer had his hands on these. They fit me perfectly – or after riding & teaching on them for all these years do I fit them perfectly? Either way they're very nice to ride… and you hear the yeah-but coming… but I've really become a fan of magnetic resistance over the past 4 years. I understand how Spinning's® brand goes to the “feel” of a Spinner® and that “feel” comes in part from a friction based resistance system. I prefer riding magnetic and was disappointed that the Ion still uses a friction brake.
I also felt weak/less powerful on the Spinner Blade Ion. Or said differently, for a given amount of effort, I was seeing a lower wattage number than I'm used to seeing from a recently calibrated FreeMotion or a Schwinn AC. You could add embarrassed to my list of feelings. I actually felt compelled to cover my readings while Josh was off the bike checking in with his class 🙁
Thinking it may just be me, I went directly to FreeMotion's area and jumped into a class with Cameron Chinatti. Nope, it wasn't me. There on a familiar cycle, I was seeing/feeling my normal ~250 FTP. So back to the Ion (different bike this time) but the same results. A similar effort/HR and only saw ~180 watts.
I talked to Angie about this and she suggested that you just can't compare the two, they're different. I've asked Angie to join me on the Podcast to discuss this in detail and will let you know if/when she'll come on as a guest.
Later that morning I also tried a little experiment that I've wanted to do for years…
What happens to your Power / Wattage when you accelerate from a set point, say; 100 watts @ 60 rpm to 90 rpm on friction based system, as compared to a magnetic system? Do they react the same way?