by Christine Hawthorne | Jul 21, 2017 | Instructor Training, Music
Movie soundtracks are great places to find fresh new tunes for your cycling classes. If you want to incorporate this type of music into your classes but you're not sure where to start, Hans Zimmer is your guy. He has composed music for over 150 films and he's one of my favorites when I'm searching for a serious climb or a chase sequence with a fast flat road. No lyrics paired with the orchestral sound allows your riders to focus on the ride and really work on form and function. His newest work is from the motion picture everyone is talking about, Dunkirk. Clocking in at around 8 minutes, Supermarine is one of my favorite tracks. (Also check out Impulse and Home.)
Starting on a flat road, bring it up to a climb (alternating seated/standing) at around the 2:00 mark, adding gear every minute. Things get serious in the final two minutes. Push with heavy gear all the way to the finish!
Supermarine by Hans Zimmer from Dunkirk (The Original Motion Picture Soundtrack) iTunes link

by John | Jul 21, 2017 | Instructor Training
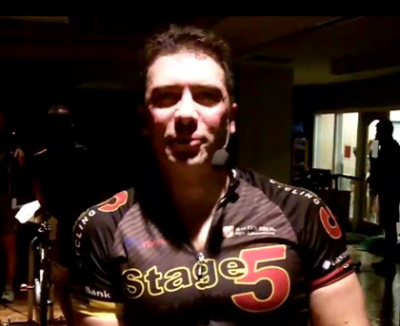 We've had a lot of requests for videos of complete Indoor Cycling classes and I can understand why. It's simply not practical to travel to Boston to experience one of Tom Scotto's classes, so a video you can watch on your computer or iPad/smart phone becomes an option. I could see training by myself with this while I learn the class and Tom's cues. The lighting at the Harvard Square Wellbridge club left a lot to be desired and at the same time it conveyed a sort of MTV music video feel to it. Enjoy!
Here's the class profile to print.
Download the video here. (Right Click – Save as)
You will also find it in your ICI/PRO iTunes feed.
// < 
If you’ve done stomps in your cycling workouts, you may think I’m crazy when I say this, but I’ve always liked them. They’re extremely tough but appeal to that twisted part of me that enjoys hard training. (I know: you’ve got that part, too.)
If you haven’t done stomps, they’re designed to increase power in the saddle. I believe Chris Carmichael is generally given credit for the training, but his guidelines differ from the ones I know. The Carmichael method involves 15- to 20-second stomp intervals. Here's Chris' description at www.active.com
In Performance Max, the program created by Jim Karanas, we used 60-second intervals with a 60-second rest, and followed the format below.
A solid warm-up is essential, since stomps are difficult and can stress the knees and the lower back. Roll the legs for several minutes. Begin an alternating pattern of 2:00 of seated high cadence (110-120 rpm); 1:00 of 80-rpm standing runs; 1:00 seated with resistance at 80 rpm; 1:00 of recovery at 90 rpm. Go through the pattern several times, as your group requires. Change the order, if desired.
A stomp interval is 60 seconds; the recovery interval is 60 seconds. Allow 22 minutes for 10 stomps: a set of 5, a short break, another set. The break I used was 3 minutes total: one minute of the usual recovery after stomp #5, then 2 more minutes (sit out one stomp cycle). It’s enough, but you could go longer. Resistance during stomps is high to very high and drops during recovery. Recovery cadence is individual, but I suggest 90 to 100 rpm.
– Stomp at 80 rpm. Fatigue will tend to slow the legs, so it helps A LOT to have an 80-rpm song to beat-match. We almost always came back to Hallogallo by Neu! because it’s a pretty precise 80 rpm. The fact that it’s 10 minutes long helps sustain the energy of the training. Play it twice or change music for the second set.
– Keep the body centerline on the bike. During the stomp, don’t move side to side, as you would in climbing. Keep hands in position 1.
– Rules for a beautiful, circular pedal stroke don’t apply during stomps. Exaggerate the down-stroke and smash against the resistance, without moving the body side to side. I cue it as “punching the pedals.”
– Heart rate isn’t the point. However, there are no HR limits on this exercise, and HR can spike quite high if the rider is seriously stomping without modifying the resistance. (Intervals under 60 seconds may yield lower heart rates.)
Avoid longer stomps. One instructor used 90-second stomps, but that means easier stomping, so what’s the point? A full-out, 60-second stomp will start to bring on failure at the 50-second mark, so 90 seconds requires reduced intensity. That makes it … something, just not a stomp.
Avoid “mushy” cueing. The instructor of the 90-second stomps would cue the stomp with, “Okay, you guys, do another stomp now.” There’s NO WAY that will elicit a stomp from your riders. It will get you something, but absolutely not a stomp.
One time, the above instructor’s cue was so mushy, I actually missed the start of the interval. That simply never happened when Jim Karanas cued stomps.
So I recommend Jim’s cueing. It starts about 5-6 seconds before the stomp interval. In a firm voice, say, “And load the bike … AND … STOMP!” The slight pauses and the delivery are intended to let the word “stomp” hit the first second of the interval. Cue time during the interval — say, at 30 seconds and again with 10 to go.
If there’s a way to use some feature on the resistance knob to mark the resistance used on the last stomp, it makes things much easier than trying to re-determine resistance for each interval. Cue that reminder for your riders.
Resistance can be ferocious during stomps. Every time I do them — about 8 trainings per year in the PMax calendar — I notice that, despite growing leg fatigue as the intervals proceed, I can still raise the resistance for each stomp. Don’t ask me to explain that, but it’s too consistent to be a fluke. It even happens when I do stomp training on my own. As a result, I started cueing the riders to keep increasing the resistance so they’d get the added strength benefit.
If you use high-intensity intervals in your classes, this training could fit right in with your approach. Because the emphasis is on strength and resistance, stomps may offer variety, say, a change from speed intervals. If you try stomps, please let me know how they work for your classes.
Originally posted 2014-09-23 08:17:39.
by John | Jul 18, 2017 | Instructor Training, Member Spotlight

ICI/PRO member Ryan Bardes is returning from his tour of duty in Afghanistan.
Thanks for your service!
Ryan is moving to Indianapolis, Indiana this Summer and is looking for an Indoor Cycling studio who needs an experienced Instructor beginning in August.
He has posted his Instructor resume at his Google+ account where you can contact him.
Ryan J. Bardes
Knowledge, Skills, and Abilities
-
Monitor and maintain safe performance of modalities
-
Maintain and operate sound system for choreographed class
-
Knowledge and ability to work well as part of a fitness team
-
Inspire participants to achieve next level of personal achievement
-
Demonstrate proper biomechanics with emphasis on open breathing
-
Verbally relate riding scenario to increase visualization and virtualization
-
In-depth heart rate zone and rate of perceived exertion understanding
-
Library of ride profiles with tempo matched music
Education:
2011-2012: STAGES Instructor Certification Rochester, NY
Free-Motion S.11 with Power Module
2000-2004: SRSC Collegiate GroupEx Certification Bloomington, IN
Taught by Master Trainer Tatiana Kolivich
2005- 2008: YMCA Senior Instructor Indianapolis, IN
First Aid, CPR, AED
Ryan has extensive experience as a cyclist:
March 1987 — First bicycle ride without training wheels 😉
Delivered Newspapers via bicycle for 3 years
Semi-pro European Mountain Bike Circuit
Trans-Alp Germany – Austria – Switzerland – Italy
Self-Supported Trans-America ‘Champs 4 the Cure’
Vancouver, Canada – San Francisco, California
Little 500 Team Captain Team Wilkie
Double Century Charity Fundraiser
DeCycles: Denver, CO – Yellowstone, WY – Black Hills, SD
Little 500 Cutters member
Indiana University Men and Women Swim Team Cross-trainer Coach
Max VO2 Training: Boulder, Colorado
Collegiate Road Racing
Collegiate Triathlons
Ride to Ice Cream store with Grandma on a tandem bicycle…
Please help Ryan if you can or, if you know other active military who would benefit from a complimentary ICI/PRO subscription, please have them contact us.
Originally posted 2013-06-06 10:28:59.
by Gino | Jul 17, 2017 | Master Instructor Blog
[plulz_social_like width=”350″ send=”false” font=”arial” action=”like” layout=”standard” faces=”false” ]
 Not sure how you’d construct an experiment on this one
If you’ll recall from Blog post #5, we are doing our best to stick to “The Scientific Method” as we conduct our research. To that end, we have just accomplished three of the initial steps:
The Process So Far
- Select a topic of study
- Simplify the topic
- Conduct a review of the literature
Now it’s time to form a simple and direct hypothesis to act upon. The word “hypothesis” is the fancy science term for basically “my best guess”. That’s really OK since without an idea being a mere guess, we have no reason to do the research. We want to find out if our guess is true or not, and if it is true, the next phase of development would be to use that knowledge to make us (or our students) better riders.

Testability — Can It Be Measured
While it goes without saying, if one can prove something, one should be able to disprove it as well. Either outcome is acceptable if one can measure what is being studied. To do that, we must identify the Variables that are going to be specifically studied an used to prove or disprove our Hypothesis.
A Variable is a factor or element that can be changed and manipulated in ways that are observable and measurable. However, the researcher must also define exactly what each variable is using what are known as operational definitions. These definitions explain how the variable will be manipulated and measured in the study.
“These precise descriptions of each variable are important because many things can be measured in a number of different ways. One of the basic principles of any type of scientific research is that the results must be replicable. By clearly detailing the specifics of how the variables were measured and manipulated, other researchers can better understand the results and repeat the study if needed. (1).”
Our Variables for Muscular Endurance
Fortunately for us, the two variables that are being manipulated are also easily measured in our exploration of Muscular Endurance. These are Cadence and Heart Rate. Since we have used these to define the range at which one should expect the training effect to be activated or produced is defined by those very parameters. These would also be referred to as the “Independent Variables” since an independent variable is a variable that is manipulated in an experiment. We are going to have our subjects change their cadence and heart rate (through resistance or gearing).
The dependent variable is measured to determine if the manipulation of the independent variable(s) had any effect. In some ways, this is the more important variable to identify in that it represents the actual training result we are looking for. In this case, it is the Muscular Endurance of the legs. The problem is how to measure that. Unlike a proper research lab at a university, we do not have a near-infrared spectroscopy (NIRS) which estimates the relative changes in muscle oxygenation and blood volume during exercise.
That being said, it is true that researchers only began using this equipment in recent history, and so the practice of measuring one’s physical ability (or that of one’s legs) has been commonplace in this type of research and can be done with specific controlled riding drills.
The Hypothesis Formula
To “formalize” our hypothesis, we only need to construct it as an “If-then statement”. Specifically, it would be in the format:
IF Independent Variable = X and/or Independent variable = Y, THEN Dependent Variable should change (improve, increase, etc).
Specifically, our hypothesis would be formalized to look something like this:
IF a cyclist maintains a cadence within the range of 65 and 85 RPM while keeping their heart rate within a designated range of BPM (the middle of their Heart Zone 3 and 4) THEN improvements in Muscular Endurance will ensue after some period of repeated training sessions.
The next post will discuss the specific drills we will use to measure the level of Muscular Endurance in each of our study participants.
(1).Form a Hypothesis
By Kendra Cherry, About.com Guide
Originally posted 2012-05-31 12:23:44.
by Christine Hawthorne | Jul 16, 2017 | Instructor Training, Music
Use this classic song when you're keeping the work in the saddle to take your riders from a hill, to a flat road to an all-out sprint! Just like the lyrics suggest, “….we never ever do nothing nice and easy. We always do it nice and rough. ” That's right, we're taking it way back to 1970 when Ike and Tina Turner made Proud Mary a hit. Here's how we rode to this one:
:00-2:36 seated climb
2:36-seated flat road
final :30-Sprint!
Proud Mary by Tina Turner iTunes link