
by John | Oct 1, 2020 | Big Box Instructor, Class Work-Sets, Instructor Training, KEEPING IT FUN, Master Instructor Blog, Training With Power

Better late than never they say. It certainly applies to this season's Performance Cycle classes – now we're in full swing after some initial confusion that came from a sudden change on GFDH's.
We kicked off this past Sunday with an assessment to find the wattage numbers we will be using going forward. I like to use very simple terminology that minimises any mathematical computations.
The week before I described how we experimented with pinning down two numbers;
… Instead I base my Life Time Performance Cycle classes on two numbers; PTP (Personal Threshold Power) and JRAP (Just Riding Along Power — AKA > Base Watts > VT1 / First Ventilatory Threshold Power). From these two rider identified threshold wattages, we can construct three meaningful power Zones;
- Recover zone — watts below JRAP
- Perform zone — watts between JRAP and PTP
- Improve zone — watts above PTP
Today we added one more wattage number – their 20 minute FTP watts. As you can guess, riders should have a lower 20 min average than a 3-4 minute PTP / Best Effort and be above JRAP / Base Watts.
Wait John, you just said you only use the two thresholds in class.
What's the point of adding a third number?
Adding the third point of reference helps you draw a straighter line. At least that's what my high school drafting teacher taught me. It's much easier to draw between two distant points, if you add one in the middle = it helps you understand if you're on the right path between the two known points!
[wlm_private ‘PRO-Platinum|PRO-Monthly|PRO-Gratis|PRO-Seasonal|Platinum-trial|Monthly-trial|PRO-Military|30-Days-of-PRO|90 Day PRO|Stages-Instructor|Schwinn-Instructor|Instructor-Bonus']
The process of sustaining a 20 minute effort is helpful to many riders – it validates and reinforces the two threshold numbers and confirms that people are understanding my cuing.
Before/during and after these twenty minute efforts I tell everyone; this effort should fall between the two thresholds. Which you would think I shouldn't even have to mention… until you hear the confusion I heard after the effort was completed:
- I really surprised myself – my 20 min watts was the same as my 3 minute level!
- There must be something wrong with me – I couldn't sustain my base watts for the whole ride 🙁
Teachable moments here
In the first example; my 20 min watts was the same as my 3 minute level! I was able to ask him; “what does that say about your 3 minute effort?” He understood before I completed my sentence; “I'm not working hard enough!”
The women who told me I couldn't sustain my base watts for the whole ride also had a revelation and asked me; “Do you think I'm working too hard at my base level?” I didn't even need to answer her.
Do you now see the value of adding that third number?
A continuous state of observation
I asked my class on Sunday; how many of you are on a specific training plan? None. Not a single hand went up. This is very typical for my very diverse group of middle age men and women. Yes most ride outside – but their objectives aren't structured beyond not rolling over and hitting the snooze button. They come to my Performance Cycle class to get a nice combination of intensity and endurance work, in a fun group.
My object in this class is that everyone learn from observing their performance, make adjustments and observe again. Over time they learn exactly where they need be. When it's time to work hard – they WORK HARD and when they should work easy – it really is easy.
Make sense?
Here's my playlist –
I'll get the rest of the profile up later in the week if you want to try this in your class.
[/wlm_private]
Originally posted 2018-01-13 09:00:43.
by Joan Kent | Oct 1, 2020 | Master Instructor Blog, Zone based Heart Rate Training
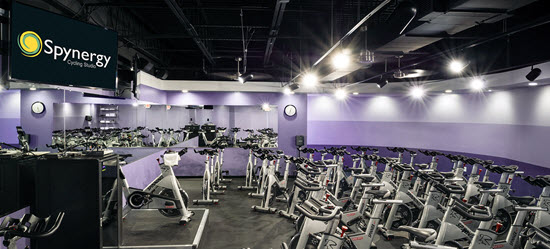
Bill Pryor's Spynergy Studio
By Joan Kent
Indoor cycling classes have become inextricably linked with dim lighting, and I’ve never understood why. Personally, I’m not crazy about training in the dark and will tell you why in a moment.
Studio lighting is one of the factors involved in creating the best class environment, along with music, video, voice, tone, cueing and more. Here are two scenarios from my teaching experience, in which the lighting differences span the spectrum.
In Studio A, the lights are always on and always bright. There’s no on/off switch in the studio because the lights go on when the club is opened. The master switch controls all.
In Studio B, the lights can be brought all the way up to a bright level, but the previous instructor, who had a huge following (okay, it was Jim Karanas), liked to keep the lights dim by flipping only the middle switch on the 3-switch panel. Needless to say, whenever I subbed for him, I made sure the lighting matched what everyone was accustomed to in his class.
The dimmer lighting was okay, but periodically one bank of lights, often on the far side of the room, would burn out, leaving everything on that side of the room just plain dark. It wouldn’t affect the participants close to the door because light outside the studio shines in on the near side of the studio.
We’d notify the front desk staff about the burned-out bulbs, and a short time later, we’d have lights — until they burned out once more.
By my last observation, though, that infamous bank of lights was out again and had/has been for a long time. It made me think about this topic. Apparently, no instructors have reported it to the desk. Apparently, no one has complained.
That last fact amazes me. Because of Jim’s teachings, everyone in the class uses a heart rate monitor (see How to Get Your Students to Wear Heart Rate Monitors). I always train with a HR monitor, mainly because of what I learned from both Johnny G and Jim.
So here’s the thing. In this studio, the bikes don’t have computers that light up and display HR. It’s virtually impossible to see a HR monitor on the far side of the partially lit studio. I’ve seen riders hold up their HR monitors, twist them around to catch available light, and keep track of their heart rates that way. What’s wrong with this picture?
Now I happen to find it difficult to train extremely hard in the dark. For a club anniversary one year, the theme involved decorating the studio like a spooky forest and turning out almost all the lights. Several people did complain that they felt nauseated. Guess I tend to feel that whenever I’m training really hard in the dark.
I had hoped the current instructors might take notice (read ‘take the hint’) when I started bringing a small flashlight to class with me to light my HR monitor on days that I ride on the far side. No such luck.
I have a feeling I’m in the vast minority on this — indoor cycling is almost always taught in dark rooms. Of course, in studios with bike computers that light up, much of this is solved. Still, if I had to choose between the glaring lights of Studio A and the darkness of Studio B, I’d go for the glare. I can monitor my HR easily and definitely feel better physically.
How do the rest of you feel about lighting? Which is most important to you — the atmosphere that goes with dimmer lighting, tracking heart rates, other factors? Please let us know, and thanks.
Originally posted 2014-02-13 10:09:37.
by Joey Stabile | Sep 25, 2020 | Best Practices, Class Work-Sets, Creativity Indoor Classes, Instructor Training, KEEPING IT FUN, Master Instructor Blog, Training With Power
Welcome to the The Weekly Ride by Cycling Fusion
No more hunting for new music or counting out cues to develop your ride profile. Here is your ready to ride profile for a fully choreographed ride, that can be displayed from your phone, or printed out onto cue cards for your class. This ride is timed out, down to the second, to make your life as easy as possible!
(more…)
Originally posted 2018-05-09 08:10:21.
by Jim Karanas | Sep 22, 2020 | Instructor Training, Master Instructor Blog

By Team ICG® Master Trainer Jim Karanas
Indoor Cycling has always been about engaging students face to face, in a setting where member safety is enhanced and the specifics of riding an indoor cycle can be communicated effectively. This requires educated faculty to deliver the classes. It also creates additional expense for either the club operator or the instructor to pay for the education and additional time for the instructor to travel to and attend it.
Although online education can impact any instructor’s teaching knowledge, it hasn’t been widely accepted in Indoor Cycling. Currently, only two education companies offer online training: the Indoorcycling Group (ICG®), partnered with LIVESTRONG® Fitness, and Mad Dogg Athletics®, which provides Spinning®.
In 2010, the U.S. Department of Education published “Evaluation of Evidence-Based Practices in Online Learning.” The study found that students who took all or part of their instruction online performed better, on average, than those taking the same course through face-to-face instruction. Further, those who took “blended” courses, combining elements of online learning and face-to-face instruction, appeared to do best of all.
At ICG®, we saw that the greatest advantages of online learning, as suggested by this study, were time spent and expanded curriculum. Students spent additional learning time because an online module is self-paced. Expanding knowledge is simplified for the student through an extensive online curriculum because it’s easy to offer. Online learning is far more conducive both to increasing learning time and to learning a diverse program of study than is face-to-face instruction because it removes the two greatest barriers to instructor development — inconvenience and finance.
We’re not suggesting that it’s simply better to switch to online learning only. Others studies have shown greatest effectiveness through the use of online learning for advanced study, while keeping the basic practices face-to-face. This makes a good deal of sense with Indoor Cycling. Initial certifications should be in the form of live practicums to give new instructors the most saddle time.
Based on a growing number of studies, however, review, re-certification and the learning of advanced theory might best be done online. Self-paced online education provides as much time for study as the student needs, which can be particularly helpful when covering new material.
So, considering how important and expensive certifications for indoor cycling professionals can be, what might it be worth to you to be able to earn CECs online at your convenience and at your own pace, free of charge?
ICG® offers the most complete, internationally accredited program of continuing education — and we offer it for free. This support is available for ALL instructors through our online education platform. You can take the tutorials all at once or individually, as your time permits. What could be easier?
Just go to http://www.ic-pro.org/en/account/signin and create your own personal account. Your account will be immediately activated with all of our FREE CEC courses that are approved by ACE/AFAA and other certification organizations.
Our free curriculum includes:
Cyclewell: Circuit Format
Dri-Tri®: An express triathlon workout and teaching plan for the busy schedule
Continuing Education: 9 topics
- Aging and Adaptation
- Stretching
- Nutrition
- Competitive Cycling
- Training the Cancer Survivor
- Music and Motion
- Overtraining
- Periodized Training
- Heart Rate Training and Zones
I.C.G. Archive: 2 topics
1. Nutrition Periodization
2. Sportif Seasonal Training
The indoor cycling instructor is a prime candidate for advancement through online learning. The number of ICI-PRO website members and visitors demonstrates that a good percentage of indoor cycling instructors are online frequently. ICI-PRO website information is, as we know, genuinely useful for the indoor cycling professional. However, we still need to maintain certifications, which are costly and somewhat inconvenient, depending on instructor schedules. It’s for this reason that we invite you to take advantage of the ICG® online courses — some of which are of equally high quality as postings on this website — when you next need CECs.
We welcome the opportunity to serve you in this way.
Originally posted 2012-02-20 16:37:44.
by Tom Scotto | Sep 13, 2020 | Master Instructor Blog
 We know it is safe to keep both feet attached to the pedals and simply focus on one leg at a time, but is it safe, and should we unclip one foot to perform pedal stroke drills in our indoor cycling classes?
To stay on point I’m not going to discuss if and why 1-legged drills are effective, but rather limitations or concerns that should be considered when attempting them in our indoor cycling classes.
First, do outdoor cyclists perform 1-legged drills? Yes we do. They have been part of our training program, usually during the base training months (Dec-Mar) for as long as I can remember. Over the last 20 years I have spent countless hours in my basement riding my road bike on an indoor trainer. A considerable amount of time each week was devoted to 1-legged pedal drills with a goal of creating a smooth pedal stroke. So why wouldn’t we want to use this same training technique during an indoor cycling class?
1-legged drills can present a safety risk during an indoor cycling class for 2 reasons: (1) most indoor bikes use a fixed weighted flywheel and (2) it is difficult to maintain cycling form and proper biomechaincs.
As we know, the weighted flywheel on the indoor bike simulates the effects of inertia and momentum experienced when riding a real bike outdoors. Since the flywheel is “fixed” (the pedals can turn the wheel in both directions), it can apply forward pressure on the legs and joints once it picks up speed. When a rider pedals with both legs, often the weaker muscles of one leg (hamstrings and hip flexors) are counter-balanced by the stronger muscles of the other leg (glutes and quads) creating a smoother rotation. I’ve seen riders struggle in classes to maintain a smooth pedal stroke with both legs — remove 1 leg from the equation and their pedal stroke becomes very choppy. This happens because the weaker muscles cannot generate the same about of force as the stronger ones (flexors vs. extensors). However, due to the momentum created by the weighed flywheel, the pedals keep turning even though there is little to no force contribution for practically half the pedal stroke. In reality, half of the pedal stroke is not under the rider’s control. This can place a tremendous amount of force on not only the joints of the legs (hips, knees and ankles), but stress other stabilizing joints and muscles such as the back, shoulders and neck. 1-Legged drills are best performed on bikes that coast because the rider is forced to activate the muscles throughout the entire pedal stroke. As a result, it is usually VERY obvious which muscles are not contributing properly because the rider will experience “dead-air” and awkwardness often at the bottom and top of the stroke.
The other problem is “where do you put the leg that is not clipped in?” Back in the day….it was common for cyclists to have 2 milk crates. Maybe you’ve seen those plastic bins at the grocery store which hold four 1-gallon jugs of milk. As a kid growing up in Brooklyn NY, I remember the “milkman” placing one of these crates full of milk on the front steps of our house. Anyway, cyclists will place 1 crate on each side of their bike (locked into the indoor trainer) as close to the moving pedal as possible. To focus on one leg, we’d simply unclip and rest our foot on the crate. It was a perfect height to enable us to maintain our form and balance (BTW, 2 chairs will also work nicely). Unless everyone in your indoor class comes prepared with their own milk crates, riders are usually forced to do a number of things with their foot in order to pedal with one leg. They can try to dangle it in the air, prop it up on the center of the bike frame, reach way back and rest it on the back legs of the bike or even lift it up on top of the handlebars. I’ve tried them all but was not able to get my foot on the handlebars (stink'in hamstrings). Regardless of which leg position you can achieve, your pedal mechanics will be affected and you will place your joints and muscles at risk with little to no benefit. A number of years ago, an unstable rider was attempting to perform 1-legged drills with his leg suspended next to the bike. His foot wandered too close to the whirling pedal and he chipped his ankle bone (medial malleolus). The instructor of the class was overwhelmed with seemingly endless paperwork and scrutiny.
So from a health and fitness risk stratification standpoint, 1-legged drills (with one leg unclipped) should not be performed in an indoor class unless both the bikes have the ability to coast and riders are either wearing diamond-plate steel anklets or until clubs start equipping cycling studios with milk crates.
Originally posted 2011-08-05 11:30:24.
by John | Sep 1, 2020 | Instructor Training, Master Instructor Blog
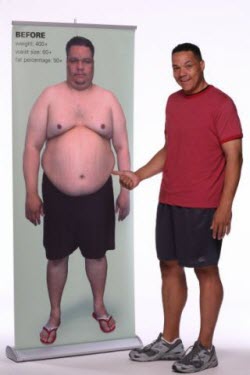
I'll bet Pete Thomas here made a few position changes.
Myth #7 – Once you find a good position, you shouldn't need to change it.
Back in Myth #3 I discussed how your students do want you to make suggestions to their setup, but they may offer some initial resistance because…
People are creatures of habit and routine. We all derive comfort from the familiar. Like robots, we try to do exactly the same thing every time we find ourselves in these familiar situations/places.
For the regulars in your class this means they get to the club at the same time, park in the same general location, attempt to get the same locker, find the same bike and set it up in exactly the same way, every time.
I was referring to making suggestions to students who's position on the bike was less than optimal.
So then once we get them set up correctly we shouldn't touch them, right?
Not always. People can (and do) change – and those changes may require a change in position.
Changes in weight can change more then your belly circumference.
I haven't experienced this personally, but my understanding is that adding some additional body fat can make your pants shorter. True story! Which makes perfect sense. If your butt gets bigger (due to the thickening of the fat layer beneath our skin, more material is needed to circumnavigate cover it, leaving less material in the length of each pant leg. Next people are making jokes about your flood preparations.
The inverse of this is true as well. As we loose body fat, we change dimensionally – hopefully everywhere – as the fat layers become thinner.
Now think about this. Let's say you have a successful student, one who loses a bunch of weight by regularly taking your class this winter. Can you imagine how a lessening of body fat can have an impact on saddle height? [you'd want to raise it]
Or vice versa? [lower it]
The trouble is that weight gain/loss is gradual, so a regular participant will just adopt with the changes.
So keep your eyes open for anyone who's beaten the battle of the bulge and help them celebrate their success by maybe raising their saddle a notch!
Originally posted 2013-01-09 16:32:30.