By Jennifer Lintz, Registered Dietitian Nutritionist and ICI/PRO Contributor
Have you ever not done something because you weren’t sure you could?
As instructors, I have a feeling many of us talk quite a bit about comfort zones (specifically, getting out of them) in our classes, but I often wonder … do we take our own advice?
I have seen Eleanor Roosevelt’s quotes on this topic numerous times, but I will admit, I never fully appreciated her words until I actually took them out for a test drive.
Two years ago, a dietetic intern of mine, Amanda, who is now a very close friend, asked me to do something with her called RAGNAR®. Ever heard of it? She told me a little bit about it, but all I processed was:
“You have to run a lot over two days. You will be in a van with 11 other people when you aren’t running. You probably will not sleep.”
I immediately thought “Why would anyone choose to do this?”
I told her I would pass, and thought “Whew. I’m off the hook.”
That was, of course, until she asked me to join her team again the next year.
She assured me it would be “life changing” and “the most fun I’ll ever have.” While I was not convinced it would be either of those things, I begrudgingly agreed to do it.
Our team of 12 – all women – was formed by the early part of 2014, and because many of us live in southeast Minnesota, we chose to do RAGNAR® Great River which starts in Winona, MN, and ends in Minneapolis, MN. Over August 13th and 14th, we would run just over 200 miles as a team. Each runner was assigned 3 legs of the route that ranged anywhere from 3 to 10 miles. Some of us ran during the day, others overnight. I was runner #2, which meant my first leg was 6.2 miles, the second 5.1, and the third 5.6.
Knowing we would be running in the dog days of August, I made sure to get plenty of training under my belt in the months leading up to RAGNAR®, sometimes running a few miles in the morning and later a few more at night. I did everything from steady state runs, to hill-repeats, speed work, tempo runs, cross training, and weight lifting to prepare.
As the event neared, I was feeling fairly confident about my ability to do the running part. My apprehension, I realized, stemmed mainly from knowing I would get virtually no sleep and have very little time to myself. I have long considered myself an introvert who requires plenty of rest, so both of these aspects of RAGNAR® made me nervous. I fully expected to be tired and grumpy when it was over.
Without sharing all of the details, I will tell you that I couldn't have been more wrong. Doing RAGNAR® was an incredible experience and just plain fun … and it wasn't because of the running. Sure, it was exciting to get a couple PRs, but the real value of RAGNAR®, for me, came down to the people and the camaraderie. Needless to say, we are already preparing for next year.
So, how does this tie into teaching indoor cycling? For starters, my self-talk during the training process and the weekend itself gave me fresh ideas for coaching in cycling classes. But, perhaps most importantly, it helped me truly understand what it means to get uncomfortable and why stretching our personal limits can be a beautiful thing. As someone who regularly encourages students to challenge themselves, I found it very valuable to practice what I preach off the bike.
For me, RAGNAR® was just the tip of the iceberg. I now have the beginnings of what I'm calling a “To Try” list; first up is Zumba (let's just say dancing is not one of my strengths). In all seriousness, it reminded me how important it is to be the student and get a taste of what it feels like to be a little nervous.
What would you do if you weren't apprehensive about it? Please feel free to share your experience.
A big THANK YOU to John and ICI/PRO who sponsored our team. Below are a few pictures from the weekend.
The start line at 6:00 a.m. Friday morning.
Community nap time at one of the big exchanges on Saturday afternoon.
I was just finishing my last leg of the race. Felt good!
Guest post by Instructor & Studio Owner Pauline Geraci
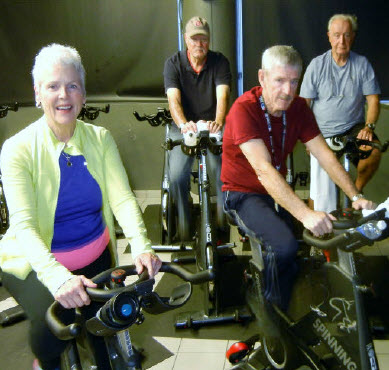
According the Administration for Community Living (ACL), people 65-plus represented 12.4 percent of the population in the year 2000 but are expected to grow to be 19 percent of the population by 2030.
Let’s face it, we are not getting any younger. As we age, the more important it is for us to stay active. But the older we get, the harder it is activity becomes.
We start developing muscle and joint pains and other issues which we sometimes use as an excuse to become less physically active which in turn makes us more prone to injury and the aging process. What to do?
Indoor cycling meets many of our aging population’s needs. For starters, it is a great cardiovascular workout. The American College of Sports Medicine (ACSM) recommends that healthy adults ages 18-65 years old should participate in aerobic physical activity for a minimum of 30 minutes, five days per week or vigorous intensity, aerobic activity for a minimum of 20 minutes, three days per week.
An indoor cycling class will keep your heart rate up long enough to provide health benefits. A physical activity that includes continuous cardiovascular activity can help lower your risk of coronary artery disease, can help lower blood pressure and LDL cholesterol, and can help lower your overall resting heart rate.
As we age, we start to develop balance issues because of inactivity or inner ear problems. Maybe we have fallen once and now are afraid to do activities without relying on a walker or cane. You certainly don’t feel comfortable riding a bike outdoors. Indoor cycling eliminates your concerns with balance issues. Indoor cycling removes the element of risk and the fear of falling so you can experience its health benefits. A good cycling class allows you to go at your own pace and push yourself, yet feel safe and comfortable.
Another worry for seniors is finding a cardiovascular workout that is low to no impact. Indoor cycling offers a high intensity low impact workout. Many people who recently have recovered from orthopedic injuries turn to indoor cycling to help them get back on track.
Remember, as with all physical activity you are about to embark on, make sure you get clearance from your doctor. Indoor cycling, when done correctly, provides minimal impact on the hip, knee and ankle joints.
Because of the circular motion of riding a bike, your knees properly flex and extend, while avoiding the high impact pounding of other activities such as running or certain aerobic type classes.
Another issue of aging is age-related sarcopenia. People who are physically inactive can lose as much as 3-5 percent of their muscle mass per decade after age 30. Even if you are active, you still will experience some muscle loss.
A benefit of indoor cycling is increased muscular endurance. This refers to the ability of a muscle to continually and repeatedly exert force over an extended period of time. In an indoor cycling class, you pedal against resistance which increase the endurance of the leg muscles: legs, quadriceps, hamstrings, gluteus and even the calf muscles.
Working out these muscles also will help to strengthen the surrounding bones, tendons and ligaments which also help you with balance issues.
In turn, this increased strength means you’ll be able to perform your daily activities with greater ease.
Riding outdoors is great but there are safety and weather issues to contend with. You can’t make excuses about not working out because of the weather when you ride indoors. Indoor cycling also allows you to be free from concerns such as negligent motorists, narrow road shoulders, going downhill too fast and bike malfunctions (flat tires, loose chains, etc.).
It’s good to get outdoors and exercise whenever possible, but it’s also important to keep from putting yourself at unnecessary risk, especially at an age when each fall is a little harder to get up from than the last.
The ability to choose your own resistance also makes indoor cycling an ideal fitness class for seniors. On an outdoor ride, your resistance level is dependent on your surrounding terrain. On any given route in Sequim you will find inclines that you are not prepared to handle. You also may not feel challenged during an outdoor ride.
Indoor cycling will definitely challenge you! Indoor bikes come with resistance knobs. This allows you to raise or lower the intensity of the workout to meet your physical restraints and/or fitness goals.
Many people, not just seniors, would like to lose some weight. If your fitness goals include weight and/or fat loss, you’ve come to the right place.
According to spinning.com, you can burn anywhere between 400-600 calories per average 45-minute class.
Since it takes 3,500 calories to burn one pound of fat, just 5-8 indoor cycling classes, combined with a healthy diet can help you meet your New Year goals!
Unfortunately, it’s impossible to stop the aging process. But don’t let that excuse you from engaging in your favorite activities. Come and enjoy a safe and exhilarating workout experience at indoor cycling classes nearest to you!
Pauline Geraci is owner of Fit4Life Studio, 1245 W. Washington St., Sequim. See www.fit4lifesequim.com.
Whenever I work with a new client who needs to get off the sugar roller coaster, I see some familiar patterns as the client struggles with her or his sugar addiction.
The pattern may include lapses, relapses, frustration, embarrassment, giving up, moving between compliant and noncompliant behaviors, getting past all of these, and finally moving forward decisively.
As the process goes on, mistakes may occur that could be labeled “predictable” because they’re things many clients have done before and conquered. Best of all, they can be modified so the end result is getting off sugar for good.
In this post is a list of mistakes that are common in trying to quit sugar. I made all of them and probably a bunch more. I discovered what I had been doing wrong mentally and emotionally that had kept me from becoming a successful quitter.
My Addiction Created This Sugar Quitting Mindset
I’m a good person to talk to about sugar addiction. I have a PhD in psychoactive nutrition (how foods affect brain chemistry), with a specialty in sugar addiction. Before that, I got a master’s degree in exercise physiology. I’m also certified by ACE (American Council on Exercise) as a Health Consultant.
I wrote a dissertation on using psychoactive nutrition in the treatment of women with binge-eating disorder. In it, to the very best of my knowledge, I was the first person to outline the neurochemical pathways of sugar addiction, and a neurochemical and hormonal explanation for the sugar/fat seesaw.
But there may be a more compelling reason to listen to me about sugar addiction. I’m arguably the world’s foremost recovered sugar addict.
I quit sugar more times than I can count. I tell this to all my clients because it’s helpful for sugar addicts when they know I’m not just preaching from an academic perspective.
In the process of making every mistake in the book — and inventing a few of my own — I discovered a formula that works.
Mindset Mistakes That Mess Up Quitting Sugar
Let’s look at the mistakes that kept me stuck for quite some time — and might be keeping some of your students stuck, as well.
Mistake 1: Expecting quitting to be easy
You’ll probably have good days and bad, easy moments and difficult ones. If you expect quitting to be easy, you might be unprepared for the bad times.
If you expect instead that it will take effort to quit, you’ll be ready to deal with whatever happens.
It’s not that quitting sugar won’t bother you at all, but you’ll be less reactive. Not only to external factors — like tempting foods around you — but also to internal factors, like sugar cravings.
Eventually, you’ll be non-reactive to sugary foods in general, whether you see them, smell them, or even taste a little. It’s definitely worth getting to that point!
As for cravings, liquid B-complex is the most effective short-term solution, as explained in a previous post.
Mistake 2: Not having a solid system
It’s easy to find questionable “wisdom” on websites, in magazines, in books, on podcasts. But it’s not a good idea to cobble your plan from a mishmash of unrelated bits of advice.
Instead, find one plan and stick with it.
Because I quit sugar before it was recognized as harmful, I had to piece my plan together from my research. Not every step was a clear one forward, and there was backsliding. My continued research eventually led to a solid system.
Part of that system is to focus on your sugar addiction first until you succeed in quitting and feel ready to move on to the next issue. This isn’t the time to focus on weight loss, become a vegan, go raw, or schedule your life makeover. Conquering sugar addiction gets top billing now.
Mistake 3: Looking for support … in all the wrong places
It’s only natural to want support. But telling the wrong people about your decision to quit sugar could lead to sabotage that undoes your efforts!
As detailed in a previous post, telling everyone at the dinner table that you’re turning down dessert because you’re addicted to sugar might trigger this:
“Have it; you can eat less tomorrow.”
“Just work out a little harder tomorrow.”
“A little bit can’t hurt.”
“But I made it myself.”
Not one of those comments shows an awareness of the issues a sugar addict faces. If they succeed in getting you to go against your plan, you’re the one who suffers and has to start over again.
Part 2 will cover the changes that are key in making quitting sugar possible — the Mindset Shifts I needed to stop resisting — and finally implement — so I could quit sugar successfully. Some of your students may need to know them, too.
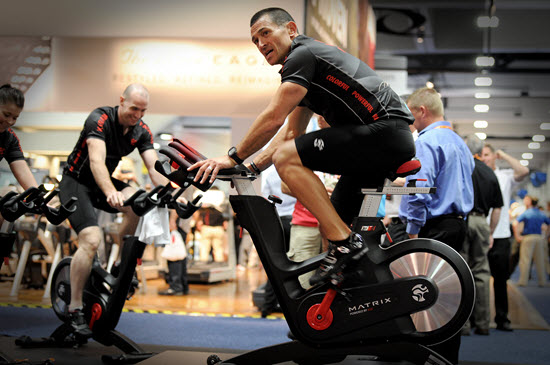
Matrix and the Indoor Cycling Group (ICG®) debuted their new IC7 Indoor Cycle with power at IHRSA last month. In many respects it's different from any group cycle on the market today. You could go so far as describing a number of their technical innovations as revolutionary – not to mention how everything is wrapped in a very good looking package.
Where do I even start?
There are so many innovations engineered into the IC7, it's difficult to know where to begin… So I'll list off a bunch of the cool features that I feel are important and IMO not just marketing hype. You can download an informative brochure for the IC7 here.
First the basics
The IC7 features a unique two-stage, belt driven drivetrain – a toothed belt so it retains the feel of a chain. Turning away from the friction pads and weighted flywheel on their previous models, the IC7 now spins an aluminum flywheel and utilizes magnetic resistance, controlled by a micro adjusting knob with 100 (yes you read the correctly) individual levels to choose from.
If Q-Factor is important to you, it now appears that the IC7 is now the narrowest on the market @ 155mm – three millimeters narrower than the claimed 158mm of the Blade Ion. Just for fun, I measured my VeloVie road bike, with its top of the line SRAM Red Groupo @ 149mm. FYI – Spring is here and our member's discount on a new VeloVie bicycle is waiting for you here.
Fitting the IC7 to various size riders is done with seat/handlebar gas strut assisted raise/lower and both have fore/aft adjustment. Settings are then fixed using over-center cam locks vs. threaded adjustment bolts. If you've been frustrated by the time it takes to screw/tighten down settings when setting up a rider, you'll love how quick and simple these are to use. The handlebars have a very refined/substantial/solid feel to them and include two water bottle holders. The assist from the gas struts (similar to what helps lift the hood or tailgate on your car) had me changing their height easily, even while in the riding position 🙂
In the quest to accommodate a wide variety of people, the handlebars extent outward as you raise them up (think Keiser M3) and they begin very low. I typically ride any IC with the bars all the way down and I needed to raise them to get comfortably setup on the IC7.
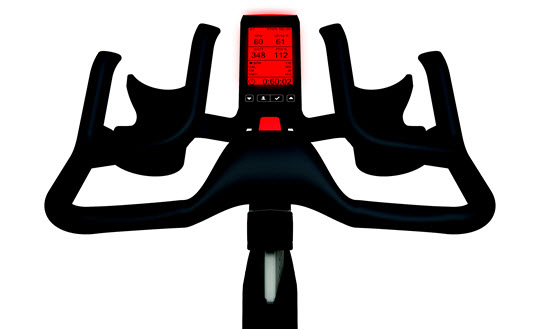
The power console (self-powered = no batteries) provides the expected rider metrics for watts, RPM, distance and HR if you're wearing a chest strap. And the unexpected – a resistance level indication and very cool LED lights that change colors based a participants‘ WattRate® (power) or heart rate and the training parameters set by the Coach By Color® training system. More on the console, the Coach By Color® system and how they get those lights to change correctly for each rider coming in a separate post.
One feature not included was a stage or lap button to measure intervals – but it will shortly. In a followup email from Bernd Pürschel – ICG's CEO and lead engineer, Bernd offered that they will be including this function in the near future.
Measured Power Using Optical Sensors
With multiple manufacturers offering power/watts, any comparative discussion between brands nearly always comes down to two simple questions;
How accurate is the wattage displayed?
Is that wattage consistent (feels the same) from bike to bike?
The claimed accuracy of the IC7 is +/- 1% which to me is saying the wattage displayed is nearly perfect.
Is that possible?
I had a long conversation with Bernd to understand where his confidence about accuracy and consistency of power come from. I wanted to learn specifically how torque is measured and displayed on the IC7's console. You no doubt understand that power/watts is equal to the twisting force (torque) a rider applies to the pedals… multiplied by the speed (RPM) in which the power is applied. Measuring the RPM side is easy, you just count the number of revolutions. Measuring the torque is the hard (and expensive) part of any power meter; indoors or out.
The accuracy, Bernd explained, comes from the use of an Optical Torque Sensor that forms the intermediate shaft in the drive train shown here in this photo of an IC7 going through long-term reliability testing.
Pedals turn the large sprocket and the toothed belt turns the intermediate shaft that doubles as the optical torque sensor.
To measure torque, something needs to twist or deflect and then have a sensor in place to measure tiny amounts of twist or deflection. In the bicycle world, strain gauges installed in the; pedals, rear hub, bottom bracket or crankarms are used the measure deflection caused by the rider pushing the pedals, that is resisted by the tire's contact with the ground. The FreeMotion S11.9 uses a strain gauge attached to the left side crankarm and the Blade Ion uses a strain gauge in the arm the holds the brake pad in place.
Instead of using strain gauges to measure torque, the IC7 measures the amount of twist that occurs in the intermediate shaft, using light that passes through a series of little windows on either end of the intermediate shaft. I found this drawing that may help to show what's happening down there.
Measuring your awesome amount of torque using light 🙂
Here's a very simplistic explanation of how this works:
In its rested state, the little slots in the disks on either end of the shaft line up perfectly. Light shown (fig 150) from one end will pass easily between the slots and out the other side to a sensor (fig 160). Now imagine what would happen if you twisted the shaft – the slots are no longer lined up, right? Using fancy electronics it is possible to measure this twist with incredible precision by sensing changes in the amount of light passing from one site to the other.
Now if you know with certainty what amount of force twists the shaft “X” amount, you have the makings of a very accurate method of measuring torque. Bernd assured me that the intermediate shaft is build using very special (and expensive) German steel, which results the complete system having a margin of claimed error of just +/- 1%. It's important to note that ICG didn't invent using Optical Sensors to measure torque. They've been used for years in precision machines that require a very high degree of accuracy.
Here's a computer simulation showing details of the inner workings.
So how about bike to bike?
The fundamental problem I see on our classes where we've introduced power, is a lack of trust from both Instructors and riders in the wattage being displayed. Consistency between cycles is (to me) more important than if they're super accurate. I don't care what I see as my FTP wattage, as long as that level of effort feels the same regardless of which of the Indoor Cycles in our studio I choose to ride. Bernd feels they have that solved through a simple method of calibrating the 100 position resistance control with the magnet holder. It's beyond me to explain how it works in words – hopefully they'll create a video that shows the procedure.
Next up – Coach by Color® and how it will help communicate to you (the Instructor), that everyone has heard and understood your intensity cues.
I grew up in a small town about 50 miles north of New York city on the banks of the Hudson River named Highland Falls. One of the unique aspects of my hometown, besides the unparalleled beauty of the Hudson Valley, is the fact that it borders the United States Military Academy at West Point.
For as long as I can remember I have admired and respected those who have committed their lives to the service of our amazing country. My father is a Vietnam veteran and due to the proximity of my hometown to West Point, many of my teachers and coaches were active or retired military. The children of the families stationed at the academy went to my high school, James I. O'Neill. I believe that O'Neill has more graduates go to West Point than any other, non-military, high school in the country. I have also had classmates make the ultimate sacrifice in the defense of our nation during recent wars in the middle east.
I have been lucky enough to be taught, coached, mentored by and friends with some of the finest leaders in our country. I respect their commitment and appreciate their sacrifices to keep my family safe and free.
Every Memorial and Veteran's Day I do my best to honor them with themed indoor cycling class. Below is a recording of the class I taught in honor of the military this past Friday as well as many of the videos I used.
So we’ve talked about why Indoor only riders will benefit from Power Training, and in the last post we reminded the avid outdoor cyclist just why Power is a must for their continued growth and improvement riding outside… but how to get started. That’s the question I’ve heard from a number of folks that have just gotten new Keiser M3 Power bikes (even though our Power Training system from Cycling Fusion works for all indoor bikes – it is what we use at Global Ride Training Center). The inevitable first question is like one from a new blogger sitting in front of a blank computer screen. Where do I start!?!
Introduce Power With Games
While most indoor cyclists still don’t wear heart monitors when they ride, most know what it is and why it is used. However, when it comes to training with Power, that’s a different matter altogether. Unfortunately, this is also why many clubs do not consider bikes with Power. Their ignorance leads them to feel it is too complicated or worse – intimidating. In this case ignorance isn’t bliss, it’s just plain ignorance. The goal here is to show that riding with Power is fun, interesting, and easy to do. This will help to beat back a consensus of complexity, which right now, threatens to slow the growth of Power bikes in our industry. Consequently, it’s best to just let students begin to play with Power before they really begin to train with it.
We do this by offering structured and methodical Power Games that make training with Power more fun. These are just a sample of Power Training games one can play. With feedback like Watts, Heart Rate and Cadence, (typical tools that come with any bike already equipped with Power) one is only limited by their own imagination. Here are some games that might help “break the ice” when it comes to training with Power.
Ten Songs To 10 Gears
Let your students warm up, encouraging them to increase their gears slightly as they “warm up with purpose”, but to keep it light and easy during the warmup. Once they have warmed up for at least 5 or 6 minutes, ask them to check their gear number, and the Watts they are genearting. This will represent their “baseline” or the bottom gear or Wattage for them today. This concept of establishing a Power “baseline” will apply to all of the games we discuss here, except for our last game; the 5 X 5.
Each of the next 9 songs then you should direct them to increase it 1 gear. The first 3 or 4 should be easily handled in the saddle. The final 3 or 4 may need to be out of the saddle, and some students might not be able to negotiate a gear much more than 7 or 8 above their warmup, depending on how high they start, and the type of Power indicator your bike uses.
Outside of the first couple and last couple, you should have plenty of leeway for what position to be in for all the other Power levels. Continue to work on form, and draw their attention to how each gear affects the Power, and how it probably also affects their cadence and certainly heart rate. This is a good exploratory exercise to help students see just how far they can go. Some may never go beyond a few gears without this slow and methodical increasing of Power. Others might find that they haven’t really stressed themselves, or at least not to the max. This is good too, as it helps to show your students a wide range of Power levels and helps them to understand what kind of Power range they have.


 So we’ve talked about why Indoor only riders will benefit from Power Training, and in the last post we reminded the avid outdoor cyclist just why Power is a must for their continued growth and improvement riding outside… but how to get started. That’s the question I’ve heard from a number of folks that have just gotten new