I'm not embarrassed to say that I like country music. Country is a genre that many indoor cycling instructor avoid, but I embrace it. I get more complements about playing country music than any other genre. Country music IS popular and has a HUGE following. I live in Denver and a few weeks ago U2 was playing the Pepsi Center, a 20,000 seat venue and Luke Bryan was playing Mile High Stadium, a 75,000 seat venue, on the same night. Luke Bryan sold out U2 did not!
This week I mixed together 3 new country songs:
Homegrown by Zac Brown Band
Play It Again by Luke Bryan
John Cougar, John Deere, John 3:16 by Keith Urban
All 3 songs are about 3 minutes and 30 seconds long. I like to use this music mix for three 3 minute intervals with 30-40 seconds recovery after each. Since the energy and tempo “feel” lower and slower I like to ride at a cadence of 60-80 rpm for this set. Listen below to how I used this set in class.
[wlm_private ‘PRO-Platinum|PRO-Monthly|PRO-Gratis|PRO-Seasonal|Platinum-trial|Monthly-trial|PRO-Military|30-Days-of-PRO|90 Day PRO|Stages-Instructor|Schwinn-Instructor|Instructor-Bonus|28 Day Challenge']If you use video I also mixed together the videos of these three songs.
3 song harmonically mixed track, to download Right Click > Save As / Save Target As to download. Open in iTunes and then you'll see this in your Spotify Local File folder.
This AM at around 6:23, I dripped sweat onto my iPhone's screen and accidentally switched on Shuffle. Of course I didn't realize my error until this great new track I'm using for openers comes on, for the second time.
Wait… didn't we already do this song?
Oh, Crap! Now what do I do?
There are few things that scream ROOKIE INSTRUCTOR louder than manually switching between songs during a class.
Unsettling to be sure. Keep your cool John… smile… pretend you planed the class like this 🙂
So instead of freaking out, grabbing my phone and trying to get back to my intended track, I just rolled with it 🙂
I normally use three, 30 second hard efforts as my openers. To mix things up this morning I decided to use just two. The track I used is below which features two 45 sec segments; @ 1:00 and then again at 3:17.
The second time I had everyone repeat their efforts, while paying attention to their perceived effort. The song has an awesome build before you hear the I Don't Got Time For Pain that keys the 45 second big effort! It's about 62 RPM. I cue everyone to add load until they feel the need to stand, wait for I Don't Got Time For Pain and it's accelerating off to the races.
Great post and well detailed. I appreciate all the great articles you post.
The challenges you described are all too familiar to me. I’ve found a simple solution that works for my indoor cycling classes, and is based on my experience running a small business that provides software training classes. In that capacity, we teach software productivity courses (1, 2 and up to 5 day workshops) where there could be 20, 50 or even 100 participants. The distractions are numerous: participants checking their emails, texting, talking to their colleagues, etc. It is unfortunate because they have to bring their laptops and mobile devices to class. So, in order to deliver a more effective training session, we first had to understand the causes of distraction:
1. People use training classes, and for that matter, indoor cycling classes as a social venue, a “catch-up” of sorts. They meet friends, colleagues and chit chat about their families, work or other issues.
2. We are all wired, 24/7. The availability of mobile devices and the need to have them tends to add another layer of distraction. There is nothing more frustrating than being asked to repeat a key topic during a training class only because the person who asked was checking their email.
We found the solution to be tricky. The effectiveness of the solution, however, was in its simplicity.
1. Establish a basic ground rule and make them promise to respect it.
At the beginning of each software training class and also at the beginning of each indoor cycling class I teach, I ask all participants to silence their phones, avoid chatting, and in the case of software training classes, I ask them to not check their email, instant messaging or texts until break time. Then, and this is key, I request that they promise to respect this rule. I know we are all adults here, but sometimes, you have to go back to basics.
2. Make them commit to the belief that the class is their time, their investment and thus, their reward.
Again, at the start of each class, I define the objectives of why we are here and what we are trying to accomplish. For indoor cycling classes, I simply state that for next 60minutes, this will be “your time” where you focus on your health and mental well-being. I ask all participants to take a moment to empty their minds of all distractions, worries and anxiety and leave those outside the studio (to be collected later of course). Then I ask that we all respect our collective time by not creating distractions. [I love this line!]
With these two basic rules, I have found greater success in creating an experience for riders that extends beyond the social gathering aspects. In fact, I hear frequent feedback from riders that in that one hour, they have found a way to re-focus and re-recommit; to re-balance and de-escalate; and, to have fun and enjoy the workout at the same time.
In closing, the important of establishing these ground rules will define you as an instructor who places a high priority on the participants’ time and commitment. They will respond in kind.
No more hunting for new music or counting out cues. Here is your ready to ride document, that can be displayed from your phone, or printed out onto cue cards. This ride is timed out, down to the second, to make your life as easy as possible!
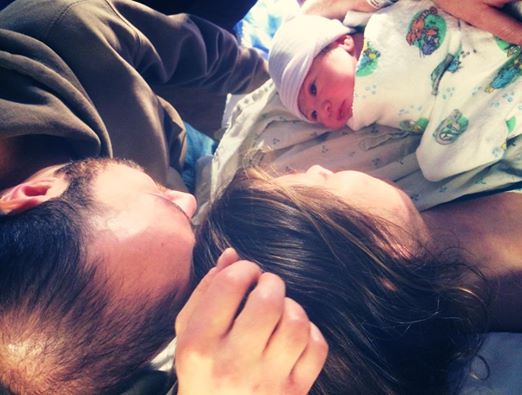
Corbin Chinatti Ruff with Mom and Dad – Sorry Dunte, this picture was so cute I couldn't pass up using it for this post 🙂
Stages Indoor Cycling's Dunte Hector joins me to discuss his ideas about integrating power, while using your existing music playlists. Brilliant in its simplicity and so easy to implement… I wish I had thought of it myself. Learn Dunte's trick below.
We actually recorded this PRO Podcast back several years ago and we mention that Cameron Chinatti was due to give birth at any moment. Well on Feb 13 (after we recorded) Corbin Chinatti Ruff became the newest member of the Stages family.
I coach a four month long winter training camp that offers 14 indoor cycles and 6 bicycle trainers. This allows participants to bring their own bikes, mount them on the trainers and ride alongside the stationary bikes. Everyone gets a fantastic experience with this mix. But there are a few things to know about mixing trainers and spinners.
Why offer Road Bike Trainers? Having bike trainers as part of your program will expand your market, increase your class capacity with a small budget, and give new interest and challenge for instructors and riders alike.
There are three important things to consider if you are mixing spinners and trainers in the same room: Why BYOBike, Location/Set-Up/Noise, and Cueing for Instruction. 1.) Why BYOBike?
Why would someone want to bring their own bike in the first place? For a number of reasons, using your bike on a trainer is a more realistic experience.
It’s About Fit.
The fit is just better on a “real” bike. Owners of bikes have the seat/handle bar location adjusted, a saddle that they are accustomed to, and crank positions that fit their body. If not, this is a great opportunity to help your riders with a proper bike fit.
Vital to fit is that the spread of the pedals on your own bike is the right width. I find that on some brands of spinners, the pedals are set much wider apart than you’d find on a road bike. This can cause knee pain. We tested the Kaiser M3 bikes at my Club and several riders (me included) experienced knee pain. While I like many features on the Keiser M3, I discovered that the pedals are set 1” wider than the Lemond Revmaster. This can be a make or break in comfort and dissuaded us from purchasing the bikes.
Practice with Changing Gears
While it is not quite like riding outside, riding your own bike on a trainer does give you practice in shifting gears and learning your own gear ratios related to work effort. We’ve had many riders who bring in a new bike and want to try it out to “learn the bike” before taking it outside.
It’s a Harder Ride
On your own bike, there is no help from a weighted flywheel. If you are not pedaling on a bike, the wheel stops going around. That means every pedal stroke counts a little bit more. It is 100% your own effort.
Spinning bikes are a “fixed gear” with a weighted fly wheel that retains energy which means you are getting assistance with every pedal stroke from the momentum of the flywheel, especially at high RPM.
Trainers are 20% the Price
Bicycle trainers are about $350 compared to a spinning bike at $1800 (of course, prices vary wildly for both of these options). If you want to add more bikes to a room, you could add 5 trainers for the price of one Spinning® bike.
I use Kurt Kinetic Fluid trainers because they are fairly indestructible and give a very smooth, quiet ride. All you need is the trainer, a mat, and the front wheel cup. When you mount a bike to a trainer, the rear wheel has now been lifted off the floor by several inches. To avoid feeling like you are riding “downhill” (since the front wheel is lower than the back), you need to raise the front wheel. Most brands of trainers come with a front wheel support. I like the supports that offer a variety of tire sizes and heights — sometimes you may want to even raise the front tire higher than the rear if you are going to focus on a hill climbing workout. This will help to put the rider’s body in a more realistic climbing position.
In a pinch, if I don’t have a front wheel support, I’ll use a riser from a step aerobics bench. They are about the right height to level the bike.
Who you Attract
You want your program to meet the needs of a variety of participants. With trainers, you will attract riders who may otherwise never consider a “spinning” class. The cyclists who want to go through the trouble of bringing their own bikes to a class are usually the ones who are avid outdoor riders. This will expand your market — with a low cost – to a whole new group of cycling enthusiasts. Of course it will be up to you, as an instructor, to make it worth their while. And your spinning participants may see the bikes on trainers and develop the interest to take up biking outdoors. This makes your members much more likely to continue with bike related fitness programs.
2.) Location, Set-up, and Noise
OK, let’s say you are going for the mix of indoor cycles and trainers in you class. What can you expect?
Location
Where, oh where, do you put the BYOBers? Near the entry door.
With years of experimentation on where to physically put them in the room, I have found that it is simplest to group them nearest to the entry door. This makes it easier for navigating the bikes in and out of the room. Plus you want all the trainers in one area. Close proximity makes it easier to give specific cues to the trainers vs. the others. I can look at the group on trainers, give the cue, and know they are staying on track with the rest of the group.
Dirt
Bikes can be dirty. We require that the riders bring clean bikes and clean shoes to class. Plus we always have them wipe down their mats after class. This helps everything stay clean. If you can set up a bike cleaning station outside of your facility, you will win the hearts and admiration of cyclists.
Set-Up
We provide the trainer, on a mat, with a front wheel cup. A bike on a trainer takes up about 30% more length than the foot print of a spinning bike. I usually set the trainer off the back of a typical bike mat with the front wheel cup at the front of the mat. This way the sweat from the rider still falls on the mat.
As an instructor, you need to know how to attach the bike to the trainer. There are several steps to be aware of. I usually let the rider set up their own bike, but if they haven’t done it before, you’ll need to give them help. We always have a floor tire pump on hand because tires should be filled to the correct pressure to have the best ride on a trainer.
1. Rear Skewer
Most trainers have some sort of screw on cup that attaches to the rear wheel skewer on the bike. Some bikes have skewers that will not fit in these attachment points. It is a good idea to have loaner skewers on hand (Kurt Kinetic Trainers come with a skewer that will fit the trainer) and you can swap it out for the rider. It is simple to do, but you should be confident in what you are doing. If you have any questions about how to swap out a skewer, go to your local bike shop and have them show you how before you do it on someone else’s bike. Chances are that your rider will know how to do this.
2. Jiggle Test
Once the bike is mounted to the trainer and before you add the tension to the rear wheel, make sure the bike is stable. I simply grab the frame and give it a jiggle. If the bike seems a little wiggly, increase the tension on the axel mount. If the bike is stable, you are good to go.
3. Skid Test
After adding tension with the resistance roller to the rear wheel, grab the wheel and give it a tug to spin the wheel. Does it skid on the resistance roller? If it does, then apply more resistance to the rear tire. Tug it again. When there is no skidding or squealing, you are ready.
Before class starts, it is a good idea as an instructor to give each bike the jiggle and skid test.
Noise
Yes, bikes on trainers are louder than the stationary bikes. That sound, the revving of the bike tires on the trainers, gives added “feel and fuel” for everyone as you increase/decrease speeds through your workout. If you aren’t used to wearing a microphone when you teach, you may want to start.
The noise level of the trainer will depend on two things: the trainer model and the tread on the bike wheel. Some models of trainers are simply noisier. That is why I like the fluid trainers — they tend to be quieter.
More tread (and wider tire) = more friction = more noise. A smooth tire will be much quieter than a knobby one. If you notice a rider with a noisy tire, suggest for the purposes of the class that they switch out their tire to a narrow smooth one. This will also reduce the wear and tear on their regular tire.
I'll follow up next week with how I actually teach one of my BYOB (Bring your Own Bike) Indoor Cycling Classes.
John's note: We're excited to have Coach Robin (AKA CycleMole) on the ICI/PRO Team and I can't wait for her to share her story about where the name CycleMole came from and I'm super interested in learning exactly what it takes to ride around the world on a bicycle!
Robin Robertson
Creator of Cycle Moles: Indoor Cycling for Outdoor Adventure
USAC Level 2 Coach, ACE Personal Trainer www.cyclemoles.com www.powertopedal.com