There's an old saying that goes; “I've been at this so long… I've forgotten much of what I didn't know, when I first started.” I've taught Indoor Cycling classes since 1998ish. A long time ago for sure. Even back then I had an advantage over most new Instructors. I'm married to the “Senior Group Fitness Instructor” in my family. Amy began her fitness career in 1994 and Spinning® in 1995. She was there for many of my early classes to help guide and critique me and my classes. I had her positioned front-center in the class during my first audition at Life Time – yes, I passed 🙂
So a lot of time has passed between those first classes and today. It's hard for me to think back on the nervousness and insecurity that's common in most new instructors. What's needed is a newer Instructor who's willing to share their ideas and solutions. That sounds like my friend Lena Hershey 🙂
This page at leanlena.com has links to multiple articles writen by Lena > New Instructor Tips specifically for those of you just getting started in your teaching carreer 🙂
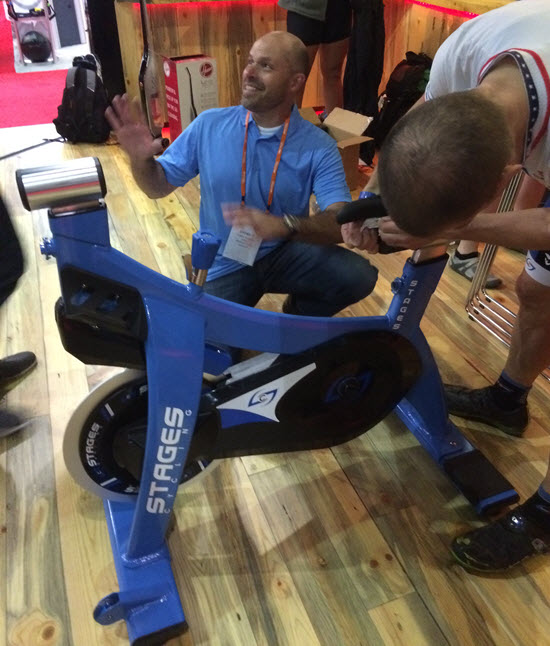
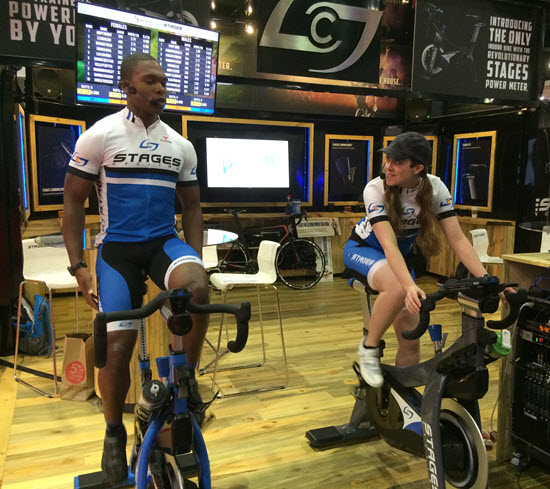
Master Educator Cameron Chinatti with Stages Indoor Cycling joins me for a fun followup to their very successful IHRSA convention where they launched the new Stages SC3 Indoor Cycle. We've got a bunch of videos that relate to my interview, which you'll find below.
One of the highlights from the show was the amazing efforts of two cyclists, during their 60 sec challenge.
First there was
Junior Nationals competitor Dominic Suozzi decided to try his hand at the #60secchallege today. The kid's wearing Converse and he destroyed everyone. 1100 Watts!! That's crazy-ville!
Then how about the huge effort from Kat Haskins … aka TheBarnKat > she's an Instructor at CB Cycle Barn and wasn't an outdoor cyclist, up until now. She won a new Giant bicycle with Stages Power Meter for her efforts 🙂
Here's my interview with Cameron. Enjoy!
Cameron and I discuss their new “Sprint Shift” innovation. Here's a quick video showing how it works. You can read more about how I used this new feature at my review of the Stages SC3 Indoor Cycle.
Before I get a bunch of hate mail from Schwinn Instructors. I make the comment that Stages is the first Indoor Cycling company that is focused on both Indoor and outdoor cycling. Yes I realise that the brand “Schwinn” was first a bicycle company – my first road bike was a green Schwinn Varsity, second was a white and purple Schwinn Paramount. But the Schwinn Indoor Cycling brand has/had no connection with the bicycle company known as Schwinn bicycles. Stages is currently selling products to outdoor cyclists (the Stages Power Meter+ Endurance Training Education) as well as Indoor Cycling studios (the Stages SC3 Indoor Cycle + Instructor Education) Does my comment make sense now?
John, I feel we need an official organization of Cycling Studio Owners + an annual conference where we can all meet and learn from each other.
I've heard this dozens of times from Studio Owners, including this past IHRSA and last month at our Full Psycle/PRO PIQ training in Chicago.
That's a great idea, I would say repeatedly, followed by; So who's going to organize it?
Well… you are John – always said with a big smile 🙂
—————————————————————–
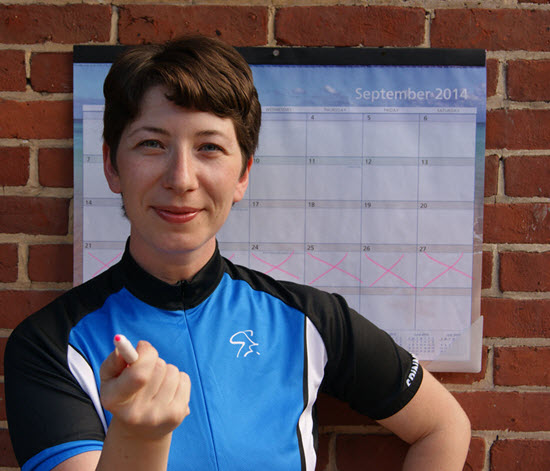
There's a simple sales technique that's called; If I could… would you? The purpose of this exchange is to confirm if a person's question (do you have this in blue?) is conveying actual interest. Your open ended response is designed to understand more, keep the conversation going and possibly gain an early commitment (if I could get you one in blue, would you purchase one today?).
An example of using this at your studio:
Customer question; do you offer a “beginners” class for new riders?
Your response; If we could offer a “beginners” class… would you come?
Notice how responding directly; yes, we have a beginners class, doesn't have the same effect? That response ends the conversation and now you're left waiting for your customer to offer more.
An alternate response to this (if you have an existing beginners class) might be; yes we do – Wednesdays at 9:00. If we have an open bike, can I count on you being here to ride it?
—————————————————————–
So back to the original question:
If we organized a meeting for Cycling Studio Owners…
…would you join us?
Now I understand that isn't nearly enough information to say Yes, or No. You'd need more detail. This would be open to Owners, Managers and prospective fitness entrepreneurs. We have some early interest from a number of potential sponsors and have scouted a possible location. Here's what we've found:
At an upscale hotel in Stamford, Connecticut > very close to NYC and LaGuardia airport – the east coast has the highest concentration of boutique studios.
Rooms are only ~$110.00 a night.
We're thinking about meeting over two days, during the third week in August > that dead time, after youth sports and long before Labor Day.
Having hosted two ICI/PRO conferences, I know that events like this are a huge undertaking and will be very, very expensive. Beyond your tentative Yes/No, I probably will/won't participate, I have a bunch of additional questions for you:
What are the best days of the week for this?
What should the format be?
What would you like to learn, see, experience?
Does it make sense to establish a formal Studio Owners organization?
I've created this survey to collect your responses.
If, or how, we proceed will depend on what you tell us!
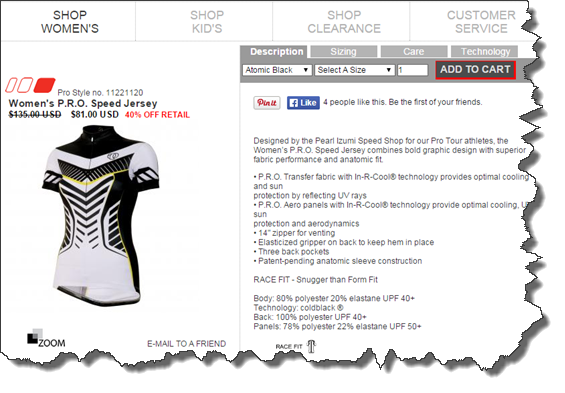
Welcome to the Pearl Izumi/ICI PRO Program!You are qualified for a 40% off retail purchase rate for up to $1,000 of gear per season at shop.pearlizumi.com .
Please remember some of the basic rules of the program. This program is for your personal use only – please don't discuss your special privileges with anyone who's not part of the program; it's designed to make you more familiar with our products so you can show them off to your clients.
Of course, the whole process isn't complete unless your clients can purchase our products for themselves at a retail location – please take a few minutes to familiarize yourself with the stocking Pearl Izumi dealers in your area so you can send some customers their way – you might even land a few clients through these new relationships (you can use the dealer locator function on the site if you're not sure which dealers are nearby).
Dealer orders take precedence over any of our discount programs; your order will generally ship within 4 business days (even orders for PI employees have to wait), and you'll receive an automated email with your UPS tracking number once your order is en route.
ICI/PRO Annual/Platinum members can log in and review Pearl's entire 2015 line here. Please contact me if you have any issues accessing the programs website.
*I've lost track… I think this is year six of our exclusive access to the Pearl iZumi PRO Purchase program. Thanks Pearl for your continued support of our Instructors 🙂
I got about 75 minutes of saddle time on the Stages SC3 during the conference. Two morning classes, a 60 sec challenge (445 watts – 2.78 watts/lb which I felt was OK for a 53 year old) and some undirected free time when I experimented with the SprintShift.
Quick aside:Why does everyone look like they're setup too low in the videos? I had a Facebook comment asking this question and she's right, they do look low. But I can assure you that neither Dunte Hector or Cameron Chinatti riding in this video are set up incorrectly. Over the years, I have developed an eagle-eye for improperly adjusted riders = they looked right to me, riding there in front of them. So why do they look low? I have no idea. Might be an optical illusion, or the shutter speed of the camera is too slow. Do you have any idea why?
Fit – I'm 5′-10″ and I like a long & low reach to the bars. On a bicycle, this is determined by top-tube length. On most Indoor Cycles without handlebar fore/aft adjustment I feel a little cramped. With adjustability an option, I will normally push the bars all the way out – to increase the reach. On the SC3 I felt very comfortable with the reach with the fore/aft centered = this IC appears to have a longer top-tube length. (I didn't measure anything, this is just my general feeling)
I also have long femurs, (thigh bones) which require my saddle position to be biased quite a bit rearward, to keep my knee over pedal. My road bike needed a special setback seatpost to get me in the correct position. Here too I found that there was plenty of room and found the perfect position with the saddle set about 1/4″ back from the center point on the adjuster.
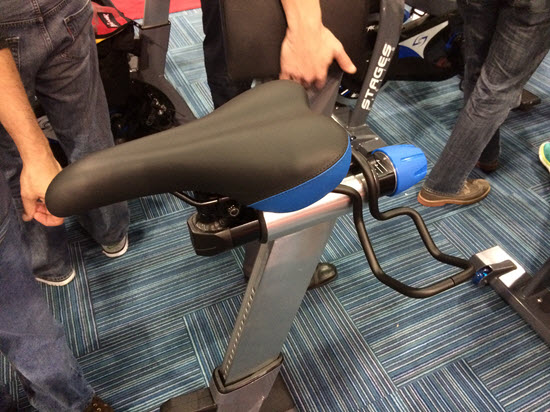
I really like the road bars they are using. They offer some new options for hand positions, while at the same time creates limits – no more seated riders looking goofy with their hands extended way out to the bar ends. The imitation brake hoods (the bump at the end) form a very natural/secure place to rest your hands while standing, hopefully removing the temptation to tightly grip the bars.
All the adjustments include easy to read measurement scales = your participants will be able to quickly make their pre-class adjustments, after their initial fitting. The saddle/handlebar fore/aft are micro adjustable and use a nicely shaped knob that you tighten down to fix your settings. Height at both ends use the new FitLoc over-center lever to place setting pins into very closely spaced adjustment holes.
There are two water bottle holders attached to the frame, which are very easy to reach seated or standing. Why not include them as part of the handlebars? I asked that question to Cameron and she told me that they wanted to keep the bars as light as possible, so they're easy for small people to adjust with only one hand 🙂
The Ride– Smooth / Solid and very Quiet. As I discussed in Part 1, the aluminum frame is very strong and I couldn't detect any flex. All the adjusters stayed securely fastened = I never felt I needed to re-tighten anything during my rides.
The SC3's belt isn't under any tension, which is unique. It's hard to describe this in words… there isn't the feeling like you need to overcome some internal force in the drivetrain. The result is a very light feel, almost frictionless, with just a touch of chain like vibration coming through the peddals.
I'm a big fan of magnetic resistance on Indoor Cycles – you can read why here. The SC3 didn't disappoint as their drive uses this resistance system. The large, screw type, adjuster knob made for predictable and progressive adjustments in the amount of load added. Pushing down on the knob is the safety brake.
Using the SprintShift lever
If you do a lot of timed below/@/Above PTP intervals, where everyone is recording their average watts using a stage button, you'll love using the SprintShift lever. With apologies to Ron (pocket fisherman) Popeil – when you're running a series of intervals all you need to do is; “Set it… and forget it!”
Here's one way I found to use SprintShift: The Stages Instructors had us doing a fun relay race, as part of each class I attended. Each row competed to see how fast each rider in turn could complete 0.2 of a mile. They had some fun inflated batons that we passed, after completing our two tenths.
To prepare for the race, I practiced to get a feel for the proper resistance I could sustain, for what turned out to be about 25 seconds of work. With the SprintShift lever fully to the right, I set the level so I would see ~500 watts @ 100 RPM (where I work best during a short sprint) and then flipped the lever full left (making it lighter/easier) to wait for my turn. I maintained my 100 RPM cadence until I was passed the baton. Snapping the lever full right brought me to the perfect gear. I punched the stage button and was off. Did I mention I was the anchor person on our team? And that there were two very fit people behind me? So yes, I felt a ton of pressure to get my 0.2 done as quickly as possible.
We talk a lot about including “Best Efforts” (and below/@/Above PTP intervals) as part of your classes here at ICI/PRO. I feel they are an important components of every class I teach – they give my riders a quick understanding of PTP Personal Threshold Power. This answers the question for them; “how much power/watts should I be making, when I want to work hard?” without waiting for a scheduled 20 minute FTP class in the future.
Think forward to the (hopeful) day when I can teach on the SC3, I would have everyone dial in their PTP resistance with the SprintShift lever in the middle position. Then moving it to the left would give me a “Below PTP” working resistance. Bringing it fully to the right would add the “Above PTP” resistance. Cuing a return to whatever cadence we've been using should make for an easily understandable and challenging class 🙂
Power Observations
The power/watts readings seemed steadier/ didn't bounce around as much as what I'm used to on a competing bike. The absolute watts readings I was seeing was very similar to what I'm accustomed to.
I really like how your averages remain displayed for 5 seconds after you hit the stage button. It always takes me a moment to refocus after an all out effort = I enjoyed see my averages before they disappeared.
Bottom Line
I see the Stages SC3 as an excellent Indoor Cycle and it should be on your short list of cycles to choose from if/when you're planning a purchase.
If you have additional questions, or would like to be connected with them for more information, use this contact form.
Accessories
Custom painted Indoor Cycles can make a huge difference to the look of your room. Your Instructors will feel special with a uniquely painted Instructor bike, possibly one that matches your studio's colors. Contact us for pricing and lead times.
The Stages SC3 can be custom painted without affecting the warranty.
Stages Master Educators Dunte Hector and Cameron Chinatti leading the morning ride at IHRSA
IHRSA 2015 was the first public appearance of the Stages Cycling SC3 Indoor Cycle. This was a total surprise to me and I have no idea how Stages Master Educator Dennis Mellon was able to keep his mouth shut for so long. We talk weekly and it must have been killing him not to be able to tell me about their latest project 🙂
Going forward, I feel it's important to disclosure that Stages Cycling sponsored (paid) my and Amy's travel to, and lodging in, Los Angeles to take part in the launch of their new Stages SC3 at IHRSA 2015.
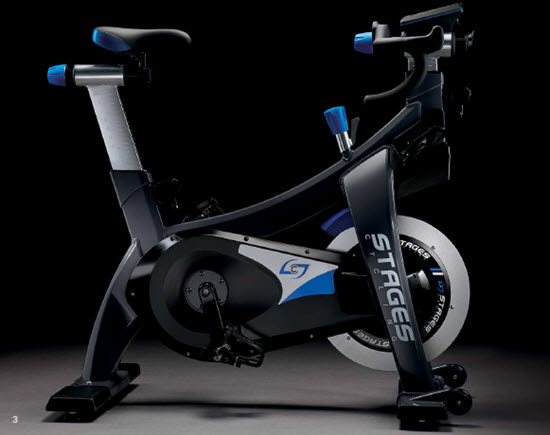
If parts of the Stage SC3 look familiar, there's a good reason. The engineers who designed this Indoor Cycle have a long and storied history of product development with indoor cycles and power consoles. It was explained to me that the design criteria for the SC3 was; take all of the engineering team's collective experience and build the ultimate, commercial Indoor Cycle. Did they succeed? Let's find out…
The Basics
Frame – Aluminum… and lots of it. This is a very solid/substantial IC > perfect for studios with big, powerful riders – or – those offering unconventional classes with a lot of movement.
Drive – CarbonGlydeâ„¢ drive system. Yes, this is the same Gates belt as other manufacturers are using, but there are fundamental differences with the other components of the drive train, that give the SC3 a very different feel. Because they don't run the belt under tension (there's a tiny bit of slack you can feel as you move the pedals back and forth) the SC3 is noticeably quieter than the Schwinn AC and it's tensioned Gates belt. It also retains a slight, chain-like vibration, but doesn't buzz like the AC. Stages is so confident in their drive system that they offer a 10 year warranty on the CarbonGlydeâ„¢ belt. Correction: Stairmaster's engineer Travis Vaughan alerted me to my error describing the Schwinn AC's Gates belt as “tensioned” – which it's not. I didn't intend to infer that they used a tensioner like what's used with Poly “V” belts. Instead I should have described the differences as; the AC runs it's belt taut (zero slack) vs. the SC3 which, when properly tensioned, has a very small amount of slack.
Resistance – Magnetic > surrounding an aluminum flywheel. Screw style adjustment and includes the new Stages SprintShiftâ„¢ three position lever . More on that below.
Handlebars – Road Bike Style Drop Bars – there's a reason that handlebars on road bikes haven't changed over the last 100 years > these fit us (humans) the best. Please don't ask me; “butwhere is position #3 John?” It's standing, with your hands surrounding the brake hoods, exactly where your hands belong when you're out of the saddle 🙂 It's here where you have the most leverage to power through a steep climb and it eliminates the temptation to “over reach” while seated.
Saddle – nice. Not too narrow… and not to wide/fat. Forgive me for saying it this way, it's very close to (might be exactly the same as) the saddle on the Schwinn AC > we have one on the back of our Trek Tandem. Amy loves this saddle and it's been comfortable for her for thousands of miles. Trust me on this one… I'd have heard all about an uncomfortable saddle.
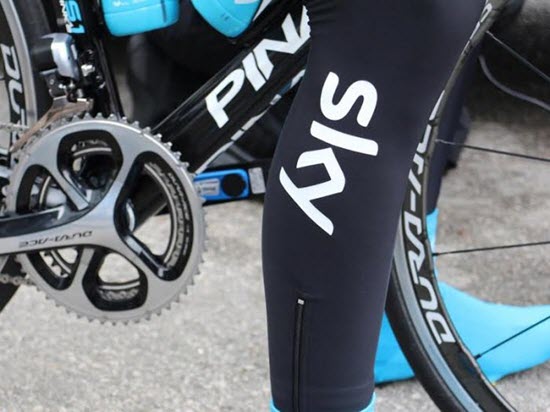
The Power Meter
Good enough for TDF winning Team Sky Professional Racing Team
The heart of an Indoor Cycle that features power measurement is, of course, the power meter. The new SC3 is using the same technology used by Team Sky – winners of two Tour de France bicycle races and they're going to continue to use these power meters in 2015.
I could devote an entire article on just this topic and will have more as part of the ride portion of this review. In the interest of time I'll give you the important bits:
2,000 hours of battery life using two AA's – yes the display console is self-charging.
Same hardware, design, and accuracy found in the Stage Power® meter, which is used by professional cyclists’ and used in the world’s most famous cycling races, including the Tour de France.
ANT+â„¢ and Bluetooth – so it will connect with your iPhone or Android without any adapters.
Supposedly accurate to +/- 2.5%. I say “supposedly” because I have no way to verify their claims – but I bet Team Sky does 🙂
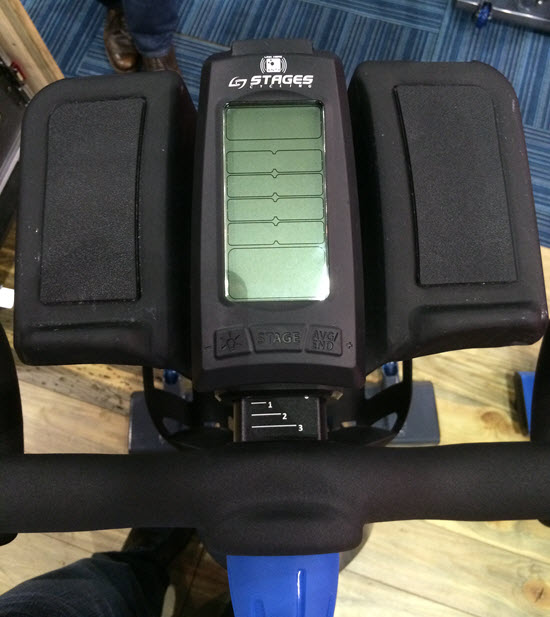
Display Console
It's important to separate the power meter, from the display console. Although most studios will choose to purchase their new SC3's with the new Stages EcoSCRNâ„¢ console, you don't have to. The Stages power meter will work with any Bluetooth or Ant+ device, like an iPhone or Garmin. You could also choose to wirelessly connect the Stages power meter directly to Display Training systems from Performance IQ or Spivi.
Here's a short video showing it in action during one of the 60 sec challenges.
The EcoSCRNâ„¢ console is self-powered = no batteries to replace ever… that's the Eco part 🙂
No exposed wires > I was told they've very neatly packaged the cable that connects the flywheel generator to the console = a long life of raising the handlebars up and down.
Constant backlight if you choose 🙂
Stage button to record intervals > there's also a nice feature that your averages remain displayed for 5 seconds after you end a stage.
Stages SprintShiftâ„¢ is a three position “shifter”, that provides course adjustments quickly. I want to describe it as a sort of cruise control, where you flick your finger and instantly resume your previous speed/resistance level.
Think of doing a repeating series of intervals. We cue everyone to add load, ride the segment and then recover. Now repeat it again. With SprintShift you can set your initial load with the lever full right. Move it left for recovery and then return back to the exact resistance instantly, by moving the lever all the way to the right.
There's some interesting physics at work here. If you use the SprintShift at lower resistance levels, the amount of change between each level remains relative & realistic. But start with a big gear and the changes are incrementally larger.
There are multiple ways you could incorporate this in your class and we'll find more over time. I'll describe a relay race we did in the ride part of the review where it was very helpful > we won! I'm sure Cameron and Co. will have some fun suggestions for using SprintShift when I interview her in the next few weeks.
If you've ever fought over a stubborn screw type seatpost of handlebar adjuster, you'll enjoy these new FitLoc cam style adjusters. Watch the video and you will see how quick and easy they are to operate. Also, they've kept the weight of the bars low, so it takes very little strength to raise them, using only one hand.