
by Tom Scotto | Aug 5, 2017 | Master Instructor Blog
 With the increase of those interested in getting a healthy start to 2012, more and more people are joining health clubs and attending indoor cycling classes. This is great! It provides a perfect opportunity to foster good technique and skills as these new members acclimate to our classes. One topic I have found myself addressing more than usual lately is proper footwear.
Multi-Purpose?
It is definitely a delicate balance at times as we try to encourage new or beginner riders to regularly return to class while guiding them toward good clothing and equipment choices. The more prominent issue lately is people riding with running shoes. I totally understand their mindset and appreciate their determination. They are starting this new exercise routine, which may incorporate running, weight training and cycling. Without understanding the nature of cycling, it would seem logical to just purchase a pair of running shoes and kill 3 birds with one stone (a terrible expression). As we know, this approach is not ideal when cycling is concerned.
Protect the Feet
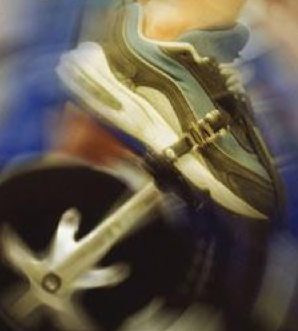
As many of us know, the forces applied to the feet during an indoor cycling class can be great. These forces can be created by both resistance and speed alike. Simply put, if someone is wearing a running shoe, which is probably one of the worst options (besides those barefoot running shoes and Vibrams), the sole will flex placing stress on the feet. Under heavy resistance, a shoe with a soft sole will bend over the pedal, straining the intrinsic muscles of the foot plus ligaments, tendons and joints. In a similar fashion, high speeds can encourage riders to dorsiflex (angle their foot and toes upward) in order to stabilize the pedal. This exaggerated (and unnecessary) dorsiflexion can stress the extensors on the top of the foot and lower leg. To protect the feet from injury (and fatigue) from these strenuous forces, cycling shoes were created with stiff soles.
You Don’t Even Need Cleats
It can be very intimidating to learn all there is to know about the different types of cycling shoes, cleats, pedals, etc. Even though to us it appears very simple, to a person new to exercising in general, this can be overwhelming. We toss out terms like “SPD pedals” and “clipless”. Just think how confusing that can be…you “clip” into your “clipless” pedals. I try to put new riders at ease and tell them the most important reason to purchase a cycling shoe is to protect the feet. So I will often encourage the seemingly overwhelmed person to just by the shoes WITHOUT the cleats. I’ll of course educate them on the benefits of having a cycling shoe designed for walking when off the bike and write down “SPD” for them as they venture to the wilds of the local bike shop (where a techy geek with too much knowledge and not enough education may lurk in the darkness). Once they wrap their minds around the shoes and experience the vast difference, we take the next step toward cleats.
Bring on the Power and Performance
The rigidity of the soles on cycling shoes provides a more stable platform for delivering force to the pedals. Remember the foot is a “lever” and both the ankle and attachment to the crank arm (pedal axle) are the fulcrums. If the sole of the shoe is not firm, the power being delivered to the pedals will be affected.
In addition, without proper support or a firm platform, the muscles of the feet can fatigue. This muscle fatigue can lead to burning, pain and/or injury.
SPECIAL NOTE: If your cycling shoes are more than 3 years old, consider getting a new pair. Over time (considering the amount of use), the upper part of the shoe can stretch and the sole of the shoe can develop small, often unseen, cracks in the plastic, or breaks in the fibers (carbon soles). As the shoe loses its rigidity, its ability to support the foot and transfer power to the pedals diminishes.
————————————————
Whether it is spurring on the newcomer or persuading the veteran rider, help them understand the safety and performance benefits of using proper cycling shoes. If all else fails, convince them to at least switch to a tennis or basketball sneaker, which provide far more support than running shoes.
Originally posted 2012-01-26 17:14:35.
by Tom Scotto | Jul 31, 2017 | Master Instructor Blog
 As we approach the colder months (for many of us anyway), instructors and riders alike are searching for new ways to train indoors to maintain their fitness and keep from going insane. Over the last 10 years I’ve delivered various flavors of winter training programs as an independent indoor cycling instructor, as Stage5 Cycling and now through Cycling Fusion. Just as there are more than one type of rider and numerous demographics in fitness, there is more than one way to present a winter training program. I’m going to share some tips that I believe make these programs attractive and valuable.
First, What is a Indoor Cycling Winter Training Program?
A winter training program usually consists of weekly indoor training sessions over the course of a number of weeks or months. I’ve seen programs as short as 6 weeks and as long as 16 weeks. In addition to a fun group environment, they provide both accountability and training structure for riders trying to build and maintain their fitness over the winter (off-season) months of the year. The number of participants can range from 6 to 30+, with some offering multiple sessions per week, each from 1 to 4 hours in length. Some winter training programs can start as early as December and others may continue into April. What drives all these decisions and options? Well…..it depends.
Why Should You Consider a Winter Training Program at Your Club?
Before I go on a rampage about bringing the outdoor cycling community into your club, they are not the only group of people that may like or benefit from this type of training. Remember, the overall goal is accountability and training structure. Winter training programs can also appeal to the non-cyclist / fitness-only crowd who are looking for something different or another way to workout in a group with a purpose. Furthermore, other sports such as soccer, lacrosse, football and tennis (to name a few) have used indoor cycling as a great cross-training activity to provide their pre-season aerobic conditioning. But the bottom-line is…. Show Me the $$Money$$!
- Health Clubs Want More Members ($)
- Instructors Want to Make More Money ($$)
- Cycling Coaches want more Clients ($$$)
These programs are not free, but are offered at an additional cost to members (and non-members). The instructor gets a cut of the money which is usually a percentage of the revenue or a fixed amount per participant. The club will often use this as a way to attract non-members (who usually pay a higher price than members). It is a great opportunity for the club to offer temporary memberships or special promotional deals. If you are a coach, what better way is there to introduce yourself to a group of potential clients? Each weekly session provides a captive audience of riders, and if you do your job of leading the winter training well, it is not uncommon to convert a few of the participants to personal coaching clients.
SUGGESTION: Break down the price of the winter training program by week or session. For example, if you are charging $200.00 per rider for an 8-week session, show that this is only $25 per week. This will allow them to immediately see the value as they compare the weekly cost (apples to apples) to other services in the club like personal training, which are often priced much higher per session.
Choose Your Audience
Before you bring your master plan to the club’s fitness director, do your homework. First decide who your target audience is. Eh..cyclists, right? Maybe not. Consider who takes your indoor classes. Announce that you are thinking about holding a winter training program at the club and want to know who would be interested. Don’t just take note of how many people raise their hands but WHO raised their hand. A more formal way to present the idea is to make up a quick survey which asks a few questions:
- Would you be interested in an “X”-Week Winter Training Program (circle Yes or No)?
- Which Days are Best (circle Monday, Tuesday, Wednesday, Thursday, Friday, Saturday and/or Sunday)?
- What Times are Best (circle Morning, Lunch and/or Evening)?
- What is Your Goal (circle Weight Loss, General Fitness, Charity Ride, Century Ride, Cycling Vacation and/or Competition)?
Keep it short and sweet and just have them circle or check things. The less they have to write, the greater your chance of getting a real response. The results of the survey will provide a good pulse on what structure may be best and indicate potential interest levels and goals.
SIDENOTE: Be true to yourself. Don’t try to be someone you are not. I’ve seen some disastrous programs where participants we disgruntled because the instructor targeted those interested in “Performance” but knew little about coaching or competitive cycling. Many of the participants demanded their money back and the program (and future programs) got a bad rap. Use your strengths and target those you are most able to help, and you are on the road to success.
Create a REAL Training Plan
Regardless of whether you are working with people interested in weight-loss or competitive athletes, design a weekly training plan that is progressive and adheres to a periodized model. Remember, many riders will begin the program deconditioned with a goal of building fitness over time. The plan needs to consider the goal of the program and provide progressive steps to deliver the necessary skills, training intensity and training volume. This is not about putting together 6 to 12 random classes, but rather creating a smart approach to training. This plan is also part of your marketing materials. When you advertise the program, list the focus of each week on your promotional materials and people will immediately see the value and benefit they will receive. Sign Me Up!
Get Measurable Results and Track Progress
The best way to show that a program works is to prove it. Both as Stage5 Cycling and Cycling Fusion, we provided metabolic testing and/or power testing before AND after the program. Not only is this an additional revenue opportunity, but it will show where a rider started and how much progress they have made as a result of your great instruction and coaching. If you don’t have access to metabolic testing equipment, try to find someone who does and see if they will give you a deal. They should, because (1) you are giving them a group of people, (2) they can setup a day (or event) when everyone can be tested together, (3) includes built-in repeat business and (4) provides good exposure to a health club with LOTS of potential clients.
I also recommend providing a way for each rider to record and track their progress. This could be a simple paper training log where one can write down their daily training time (volume), the specific training intensities they worked at, how many calories they burned, and improvements in leg speed and power. There are also a number of online training logs and journals that can make keeping track of this information easier. Some online systems can even pull your rider’s training information directly from their heart rate monitors, greatly reducing the amount of time needed to manually enter and calculate numbers.
Don’t shrug this off as a “would be nice to have”. There is tremendous value in being able to see a rider’s progress or lack there of. The purpose is not to harass your people each week like a drill instructor, but to help them be successful. If you are not aware of a struggle one of your riders is having, you can’t help them. In the end, they will have failed to receive the benefit from the program — which is not good for the rider and not good for business. Plus, many people don’t see a trend unless it is written down or displayed in front of them. Keep them honest and keep them accountable to the goals THEY said they wanted to achieve.
Don’t Forget the Basics
When you begin your program, don’t just jump right into training on day one. Depending on the background and experience of your participants, it may be very important to ensure everyone is setup correctly on their bike. I would make it “mandatory”. During the first session, I usually give them a very easy drill to accomplish (which doesn’t require a lot of cueing) while I move from rider to rider to check and record their setup and notes on their form. This is a good time to make specific recommendations on proper cycling clothing and shoes. The more you set your riders up for success in the beginning the more successful the program will be.
More Sales $$
In almost all winter training scenarios, I recommend participants have or purchase a heart rate monitor. Yet another training tool to ensure they are getting the most (and the right amount) from each session. This is a great opportunity to collaborate with your health club’s shop or store (if you have one). Many of the clubs I teach at have a pro shop or store where members can purchase (branded) merchandise such as water bottles, workout clothing and accessories. Many club shops may already carry heart rate monitors that you can recommend to your riders. If not, talk to the shop manager and let them know what you are doing. They may see the business opportunity and work with you. The more of the club’s services you can get involved in your program, the greater the perceived value and visibility.
Bring In A Guest Instructor, Coach or Athlete
Everyone loves a special guest. Is there a local coach or athlete that is interested in giving a talk or leading a training ride for your class? Don’t be shy, because these coaches and athletes often are not and “love” the spotlight. It is worth paying a celebrity for a day to boost the exposure and “coolness” of your program. Keep in mind that your guest coach or athlete will also pass the word around their circles of influence, validating your program and attracting more people.
Provide Training Resources
You should expect your riders to train between your weekly sessions as part of their commitment to the program. In addition to stating the expectation, provide training resources and options. These could include suggested training videos they can use at home, other recommended classes they could take at the club, and cross-training options such as yoga, pilates and strength training. This can be yet another way to get more of your club, or additional clubs, to participate in the program. For example, I spoke to a yoga instructor at a local studio that loved the idea of working together and created a “Yoga for Cyclists” partner program. People paid extra for these yoga sessions (winter training participants received a discount), she attracted cyclists to her studio and it was a great compliment to our program. We even got a couple of members from her studio to register for our program — spreading the love!
There is a lot to consider and a good amount of work involved to pull it off, but the rewards are great if you take the time to build it right.
Also, keep a look out for Gene Nacey's upcoming ICI/Pro podcast Sunday about developing a multi-week training program.
Originally posted 2011-11-03 19:28:14.
by Tom Scotto | Jul 24, 2017 | Master Instructor Blog

The Great Chris Boardman
Should people ride in an aero position during indoor cycling classes? I’ve been asked this numerous times by instructors and have battled with more than a few riders over the years on this very subject. My answer, NO. Here’s my take on it:
(1) Safely / Biomechanics
This may be the most convincing reason aero positions are not recommended for indoor cycling classes, and the most difficult to articulate. First, aggressive aero positions require much more specific fitting and postural alignment due to the angles, flexion and forces being applied (pelvis / spine). Most indoor bikes barely have enough adjustment to get into a proper riding position, so a rider would be hard pressed (or extremely lucky) to find a aero position that was appropriate. I can find myself spending 2-3 hours performing a bike fitting for an athlete on a actual Triathlon or Time Trial bike to obtain proper posture and alignment. Many indoor riders don’t realize that their back (spine) is not in proper alignment when they ride in an indoor class. The back should be relaxed and relatively flat from the pelvis to the shoulders. Unfortunately, it is common for riders to try and ride in an aero position in class and either (1) collapse their shoulders and sink down, (2) improperly flex at the thoracic (upper) spine and (3) improperly flex at the lumbar (lower) spine. To add insult to injury, some riders also attempt to look UP at the instructor while in this aero position causing the cervical spine to over-extend. Although some indoor bikes provide this pseudo-aero handlebar position, to date, I’ve not seen an indoor bike equipped with proper support for the fore-arms in order to use the position. This introduces more alignment and stability issues. Before your riders get the smart ideal to bring in support for their forearms, read on.
The second consideration is the fact that most indoor bikes do not move “side-to-side”. The risk of riding in an aero position (on any bike) is that you are creating another contact point with the bike (elbows/forearm). With the forearms resting on the handlebars (no elbow joint movement), the shoulder complex is isolated. This is not as detrimental on the shoulders as it is on the spine. With the shoulders isolated, the spine is now forced to absorb a greater amount stress due to pedal forces, as well as torsion and flexion caused by the movement of the hips. Since real bikes move under the rider (side-to-side), these forces on the shoulders, spine and pelvis are greatly reduced. Consequently, indoor bikes don’t have lateral movement which places the shoulders, spine and pelvis at risk, particularly under heavier resistance.
(2) Is He/She a Triathlete?
This is a “no-win” argument for the rider. If they are not a triathlete, there is no reason for them to attempt to develop the functional movement of a triathlete. Plus, they would not generally have the acquired muscular conditioning and postural alignment (that triathletes do) to ride safely in that position on an indoor bike. AND, if they were a triathlete, they would know how specific their aero position is and would never attempt to replicate it on an indoor bike.
If you can’t convince them with the above, try this…
I shame them into getting off their forearms. I’ve used a similar tactic to deal with cadence issues in class. I let everyone know (but intended mostly for the rider RESTING ON THEIR FOREARMS!), that riding with their forearms rested on the handlebars in not safe on indoor bikes. Triathletes know this which is why they don’t do it indoors. AND it is often a sign that a rider is tired and not able to hold their “proper” riding form. This way EVERYONE in the class knows that a person riding on their forearms, must be feeling weak and tired. No one wants EVERYONE “thinking” you may be weak, tired or have bad form.
I really appreciate the instructors who are constantly pursuing deeper knowledge into topics like this (besides the fact that it is one of my favorites). As instructors, we should be required to know best practices and safety issues of the disciplines we teach. It is great to see the quality of our industry improving and the integrity of instructors increasing.
Originally posted 2011-03-07 16:07:42.
by Tom Scotto | Jul 12, 2017 | Master Instructor Blog
 It can be intimidating and awkward to instruct an indoor cycling class when not on the bike. Our bike seat can become a security blanket — a comfortable, happy place. However, getting off the bike and mingling with our riders can enhance their experience and allow them to draw closer to us as their instructor or coach. I find it to be an excellent way to engage riders and keep them focused on the objective of the class while adding a more “personal touch” to an otherwise group format. Here are 3 ways you can start to mingling with the crowds during class.
Introduction and Warm-Up
I love starting class OFF the bike. It gives me a chance to pace the room and stir up some energy as I introduce myself, learn who is new, and explain the objective of our time together. It is not uncommon for me to spend the the first 3-5 minutes of the class nowhere near my bike. As I’m rambling on about all of what we will experience, I randomly say “hey” to people as I pass their bikes. I also find this an effective way to bring an overly energetic class to order. Instead of trying to get their attention from the instructor bike (usually farther away), I’m in the crowd and in their face (strategically close to those with the greater tendency to continue chatting once class has started).
Recovery Time
Some instructors may find it easier to be off the bike during times of recovery. One usually doesn’t have to keep track of detailed timing and cues for 2-5 minutes and can feel free to move around the room. Similar to the introduction and warm-up, I use recovery times to explain what’s ahead. As I’m talking and moving around the room, I will often pause next to a rider and give them some encouragement “Abby, you looked like you were really focused during that last drill, how are you feeling?”. Abby may say “yeah, that was tough, but I was able to hang on until the end”. I would then say something to include the entire class like “Abby, you certainly got the most out of it. So how about everyone else? How are we doing?”. Remember, as the instructor, you are standing in the middle of the class. This puts you in the action and better connects you to your riders.
During Drills
In many of the surveys I’ve conducted, a greater percentage of riders prefer to see the instructor on the bike during hard efforts. It is motivating and an example of good form and technique. I don’t often get off my bike during climbs or when visualizing a road or certain terrain (feels like I’m being left behind), but I do find getting in amongst your riders during intervals can be very motivating. Instead of being in an educational mode, I go full-bore into coach mode. For example, during a 3-minute strength interval, I’ll walk from rider to rider “Joe you are crushing it! Keep your foot on the gas!”…. “Anita, you are a machine…unstoppable…unwilling to back down! You’ve got this!”….”Alright everyone, we’ve only go 45 seconds left, dig down deep and finish what you’ve started!”. Again, you can use a combination of personal encouragement and group motivation.
EXTRA: Get Physical
I will often make direct contact with my riders as I walk around the room. Sometimes it is as simple as solid eye contact as I stand in front of their bike. However, other times I may put my hand on a rider’s shoulder as I’m giving them some words of encouragement. Obviously, you as an instructor need to be comfortable with this and be aware of those who may want their personal space. In general, I usually reserve physical contact for my “regulars”. Those who attend often and who I’ve spoken to on an individual basis. 99.9% of the time, if you act with the proper intentions, it will be received as positive personal attention and yet another way to draw yourself into your class. However, if you are uncertain — DON’T DO IT! If you want to give it a try, choose one of your best friends in class to be your first victim.
Get off your bike, get in your class and get connected!
Originally posted 2011-12-01 20:26:59.
by Tom Scotto | Jun 27, 2017 | Master Instructor Blog

Before I risk provoking your wild side, I’m referring to your stomach. The riders in my classes can be the best informants as to what is circulating around the indoor cycling industry. They are hungry for knowledge and some are even taking workshops to become instructors. It is common for one of them to approach me each week and ask about something they’ve read or seen about indoor cycling (or cycling in general) that confuses them. This week the question was “should I suck my stomach in when I ride?”
The answer….NO. That’s right, I didn’t say “it depends” or “only when…” Simply, No. Usually it is someone who participates in or teaches another fitness discipline that believes the abdomen needs to remain contracted “always”. But this time it was another indoor cycling instructor — no, don’t say that!
Breathing is Good
The most important reason to keep one’s stomach “relaxed” while cycling is to be able to breathe optimally. When your abdomen is contracted it restricts the movement (contraction) of the diaphragm and the expansion of your lungs. The diaphragm is a muscle between the abdominal cavity and thoracic cage. When you take a deep breath in, the diaphragm contracts creating more space in the thoracic cage allowing the lungs to expand. If your stomach is sucked it, the diaphragm is pinned by the contents of your abdomen. Thus, your breathing is severely restricted.
Breathing properly also includes the ability to exhale. Exhalation (particularly when your training and riding hard) will contract the rectus abdominis. If your stomach is already sucked in, it will very hard to contract the rectus abdominis and exhale fully.
But I Thought Cyclists Need a Strong Core?
Yes we do. However, there is a difference between a strong (or tight) core and sucking in your stomach while riding. It is often thought that the stomach is responsible for supporting the upper body while riding. There is more to the “core” than just the stomach. The core (to cycling coaches) also includes the other upper body muscles such as the back, obliques, chest, shoulders, etc. Although we do not want to voluntarily contract any of these core muscles either, we do need them to be conditioned to support our posture, movement and transfer of power.
What a Waist
Yeah, I know you’re not going to look nearly as sexy in the mirror while you ride, but you’ll be able to work harder and perform better and longer. Not sucking in your stomach will also help you in 2 other ways. First, tightening your stomach while riding requires that your abdomen be contracted. Contracted muscles require fuel and oxygen. In this case, both are being “waisted” in order to restrict your breathing. Second, if you are an outdoor rider, tightening your stomach while you ride will hinder your ability to respond quickly when bike-handling skills are required.
So, breathe! Let it hang out and enjoy a full deep breath in and long exhale. Experience the additional endurance, power and performance from utilizing your full aerobic capacity. And keep working on that core. Just don’t work on it while you’re riding.
Originally posted 2012-01-05 13:18:26.