
The guys at BikeFit.com do a great job using infographics to communicate the process of proper bicycle fit. Today they sent out these images and I wanted to share them with you. Each details the multiple points of adjustment that can be used to ensure a comfortable setup.
If you really want to become a bike fit expert, check out everything you can do with this iPad app.
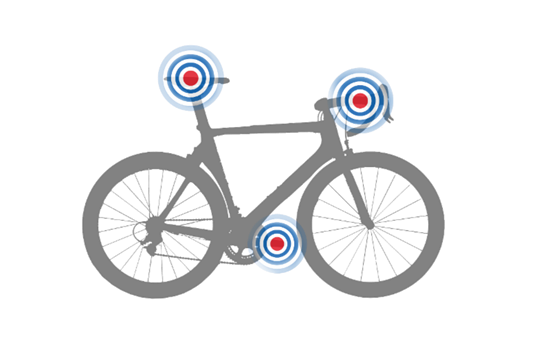
Adjustable points of contact on a bicycle.
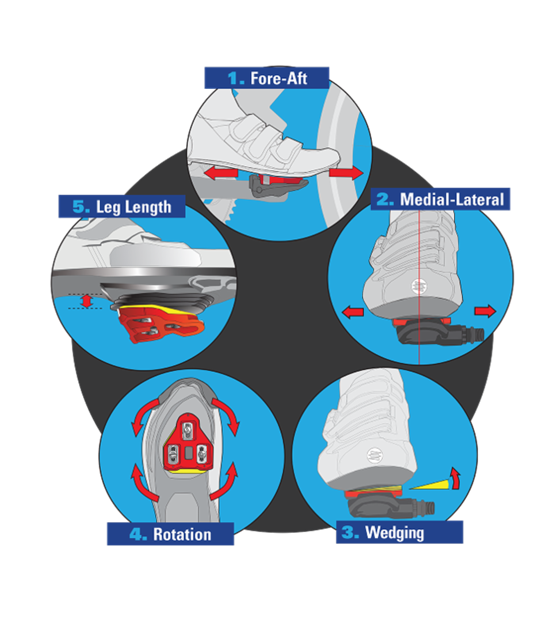
5 points of cleat adjustments
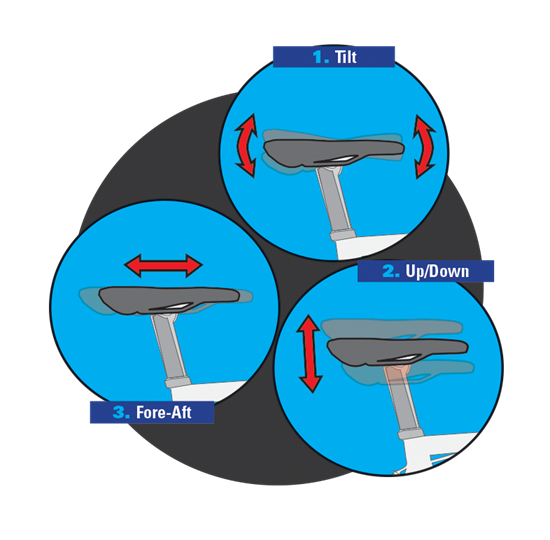
3 points of saddle adjustments
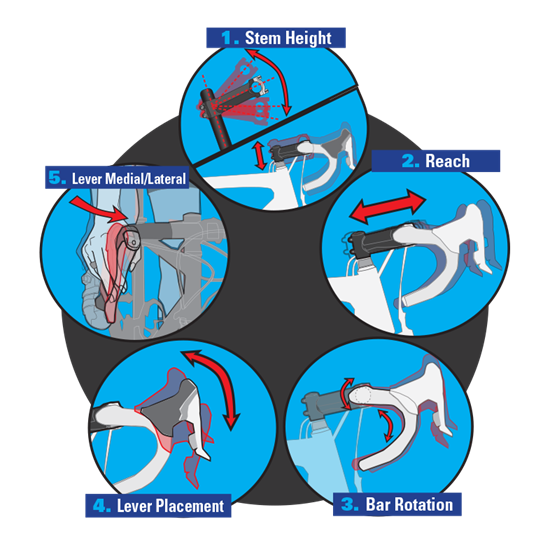
Handlebar adjustments
Having been through a three hour, professional fitting like what BikeFit.com offers – I have experienced how many of these adjustments are effected by others… i.e. saddle fore/aft affects height and reach to the bars, cleat position can require a change in saddle position, etc…
A comprehensive fitting is really important for someone who is riding thousands of miles a year and/or is super concerned about efficiency = getting the maximum amount of power to the road.
So how detailed should you be with a new participant? After setting up people for over 15 years, it's my view that you just need to get them close and feeling comfortable. You obviously don't have 3 hours and with the exception of the Keiser M3, the adjustments on Indoor Cycles are too coarse to really fine tune a person anyway.
Originally posted 2015-09-10 09:57:04.
John is a member on the AFS (Association of Fitness Studios) Advisory Council.
Holding certifications from; Schwinn, Heart Zones, Team ICG and Life Time Fitness, John's held regularly scheduled cycling classes between 1998 and 2015 when he moved to Florida.
When the weather permits, you'll find him riding and leading outdoor groups by himself or with his Tandem partner (wife) Amy.
- ICI/PRO Podcast #191 – Selling endurance to your class - June 15, 2026
- Use the “Mom Test” to help choose studio registration software & technology - May 20, 2026
- Bike Fit Graphics Show Points of Adjustments - May 17, 2026